Remote display module - rdm, Rtu - misc menu, 369 rtu miscellaneous (misc) menu range item – tekmar 369 Zone Control User Manuals User Manual
Page 8
Control Systems
tekmar Control Systems Ltd., Canada
tekmar Control Systems, Inc., U.S.A.
Head Office: 5100 Silver Star Road
Vernon, B.C. Canada V1B 3K4
Tel. (250) 545-7749 Fax. (250) 545-0650
Web Site: www.tekmarcontrols.com
Product design, software and literature are Copyright © 2000 by:
tekmar Control Systems Ltd. and tekmar Control Systems, Inc.
All specifications are subject to change without notice.
Printed in Canada. U 369 -10/00.
8 of 8
*Note: Depending on the settings the installer makes in the control, control menu items may not appear.
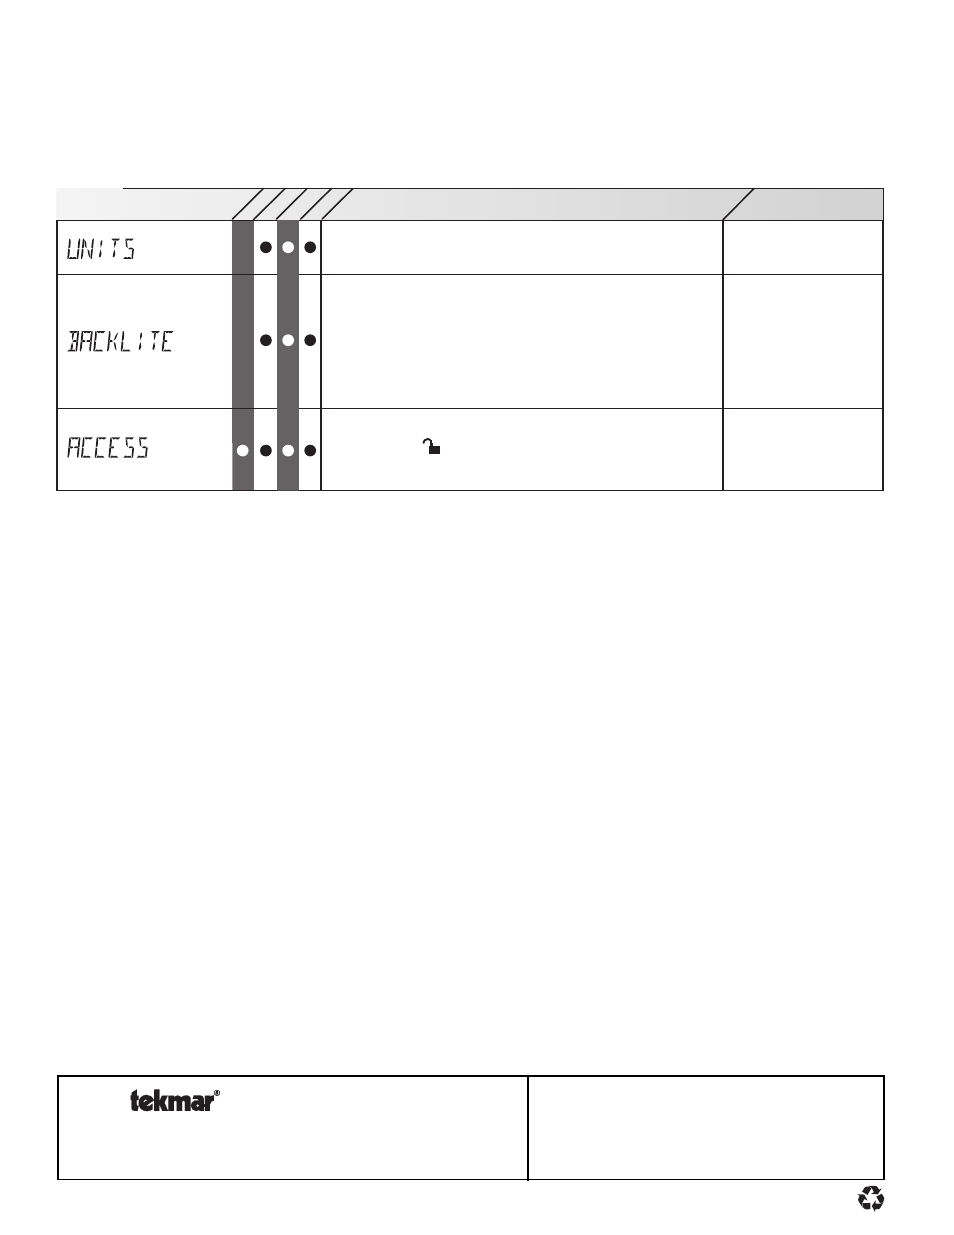
369 RTU Miscellaneous (Misc) Menu
Range
Item
062 063
LT
D
USER
°F, °C
ADV, INST, USER, LTD
OFF, 30 sec, ON
The units of measure that all of the temperatures are to be
displayed.
The access level that is to be used by the RTU.
DIP switch =
Only qualified service people should adjust items in the ADV
(Advance) and (Installer) access levels.
The operating mode for the back lighting of the LCD and the
time until the control returns to the view menu after any button
was pressed.
If Backlight is set to OFF, the control returns
after 10 seconds and the backlight stays off.
If Backlight is
set to 30 SEC, the control returns after 30 seconds and the
backlight stays on for 30 seconds after any button press.
If
Backlight is set to ON, the control returns after 90 seconds
and the backlight stays on.
REMOTE DISPLAY MODULE (RDM)
An optional Remote Display Module can be connected up to the 369. All items displayed on the 369 and display RTU(s) can be displayed
on the RDM. To access the control’s user interface, select CTRL through the DEVICE item in the Misc menu. To access a display RTU’s
user interface, select RTU
i (where i corresponds to the appropriate zone) through the DEVICE item in the Misc menu.
PROGRAMMING A “NULL” EVENT
Once in the Schedule (Schd) menu, press and release the Item button until the desired event is displayed. Use the
▲ and ▼ buttons
to select the “time” between 11:50 pm and 12:00 am. “– –:– –” is displayed indicating that the event will not occur during the
schedule.