Preparation for printing (usb connection), Preparation for printing (usb connection) -5, Changing the installation settings – Sindoh D202 User Manual
Page 69: Basic usage
5
-5
Basic Usage
5
9
If necessary, change the printer name or print a test page, then click [Finish].
Installation of the printer driver is then completed.
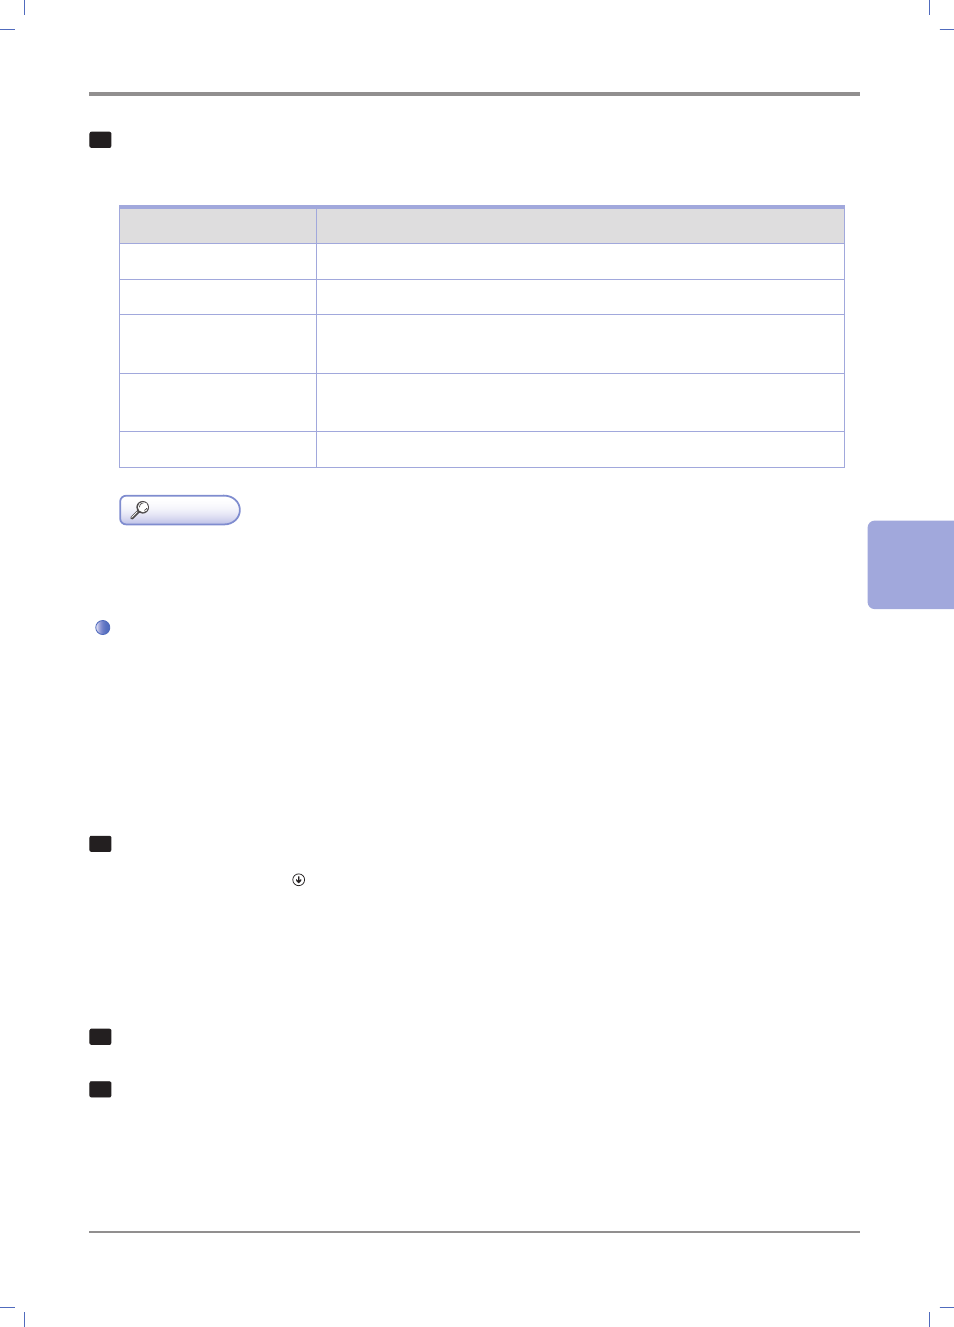
Settings
Description
[Review]
Displays the installed components for checking.
[Rename Printer]
Changes this machine name, if necessary.
[Property]
Sets the optional operating environment of this machine.
For details, refer to page
[Print Setting]
Changes the default print settings of this machine, if necessary.
For details, refer to page
[Print Test page]
If necessary, print a test page to check that printing process works correctly.
Reference
-
When you finish installing the printer driver, configure the default settings of the printer driver. For
details, refer to page
Preparation for printing (USB connection)
Changing the installation settings
(Windows 7/8/8.1/Server 2008 R2/Server 2012/Server 2012 R2)
If you are using Windows 7/8/8.1/Server 2008 R2/Server 2012/Server 2012 R2, change the computer settings
before installing the printer driver.
◎
The XPS driver does not support USB connection.
1
Open the [Control Panel] window.
-
In Windows 8.1, click [ ] in the Start window, then click [Control Panel].
-
In Windows 8, right-click the Start window, then click [All apps] - [Control Panel].
-
In Windows Server 2012/Server 2012 R2, click [Control Panel] in the Start window.
-
In Windows 7/Server 2008 R2, open the Start menu, then click [Control Panel].
2
Click [System and Security] - [System].
3
Click [Advanced system settings] on the menu in the left-hand pane.
The
[System Properties] window appears.