Servo installation – E-flite Fokker DVII 250 ARF User Manual
Page 7
7
E-flite Fokker DVII 250 Slow Flyer Assembly Manual
Servo Installation
Required Parts
Fuselage
Servo with hardware (2)
Receiver
Micro pushrod connector (2)
Micro pushrod connector backplate (2)
Required Tools and Adhesives
Pin drill
Thin CA
Pliers
Pencil
Phillips screwdriver: #0, #1
Drill bit: 1/16-inch (1.5mm)
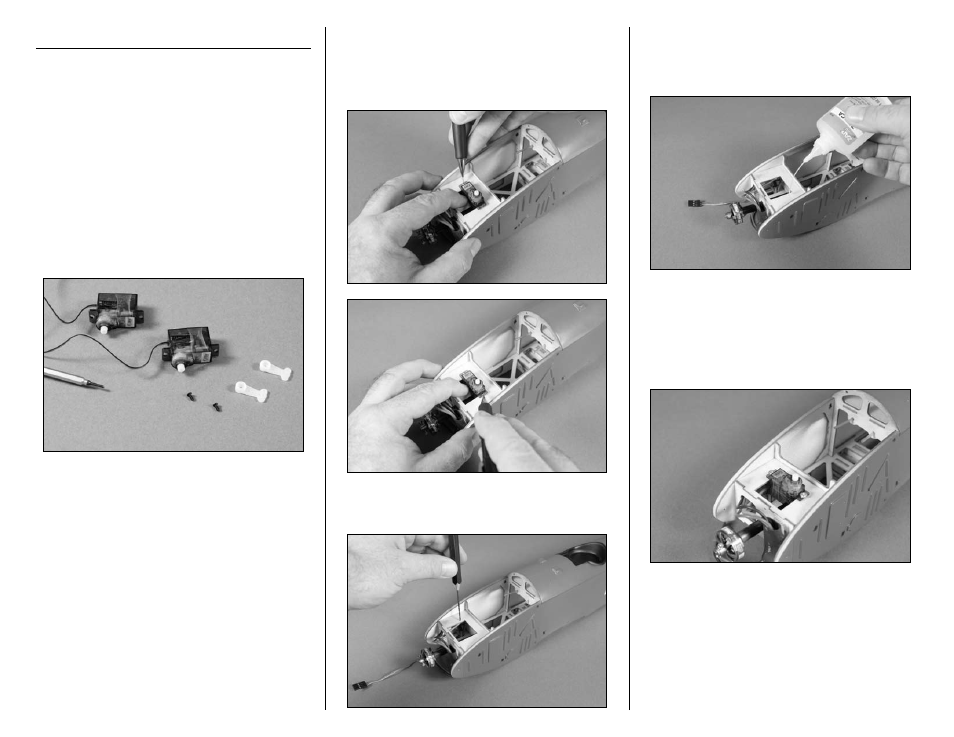
1. Use a #0 Phillips screwdriver to remove the
servo arms from the rudder and elevator servos.
2. Position the rudder servo in the opening at the
front of the fuselage as shown. Slide the servo as
far back in the opening as possible. Use a pencil to
mark the position for the screws that will be used to
secure the rudder servo.
3. Use a pin drill and 1/16-inch (1.5mm) drill bit
to drill the holes for the two servo mounting screws.
4. Apply 2–3 drops of thin CA into each of the
holes to harden the surrounding wood. This is done
to strengthen the wood and provide a stronger
surface for the servo mounting screws.
5. Position the rudder servo back in the opening
in the front of the fuselage. Use a #1 Phillips
screwdriver and the screws provided with the servo
to secure the rudder servo. The lead from the servo
will exit the hole in the bottom of the fuselage as
shown.