Rigging installation – E-flite Fokker DVII 250 ARF User Manual
Page 18
18
E-flite Fokker DVII 250 Slow Flyer Assembly Manual
Rigging Installation
Required Parts
Airframe
Rigging thread
Motor battery
Hook and loop tape
Required Tools and Adhesives
Foam-safe CA
Thin CA
Needle
White glue
Low-tack tape
Hobby scissors
Hobby knife with #11 blade
Installing the rigging will add to the appearance
and strength of your airplane, but you will not be
able to remove the wings without cutting the rigging.
The rigging is required on your model. DO NOT
fly your model before installing the rigging.
You may want to thread the rigging through
a needle to make it easier to pass the rigging
through the holes, especially the tubes in
the fuselage near the bottom wing.
Another option is to soak the last 4 inches
(100mm) of the rigging line with thin CA to stiffen
it up so you can pass it through all the holes.
1. Cut the rigging thread in half. You will need two
pieces of thread to accomplish the rigging on the
Fokker DVII.
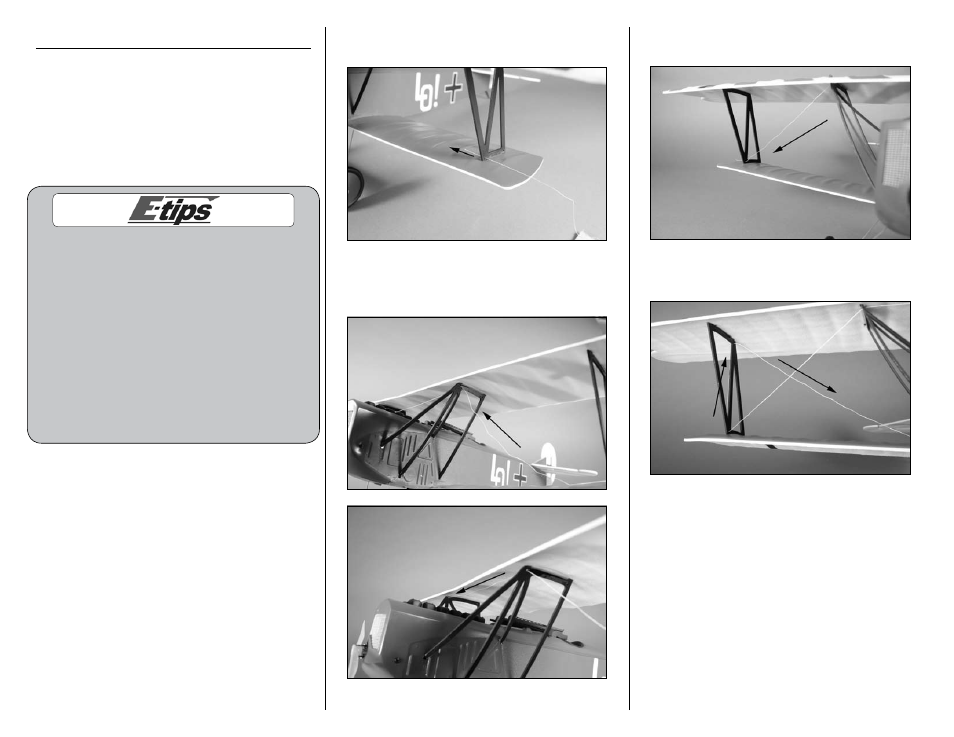
2. Insert the rigging thread into the lower forward
hole in the outer strut.
3. The rigging then is routed to the cabane strut
and goes through the holes in the cabane that are
to the front of the aircraft.
4. Route the rigging down to the forward hole in
the outer strut.
5. Next, the rigging will go up and to the rear hole
in the outer strut as shown.