Wiring table, Installing the ring light, Dimensions – Banner PresencePLUS Lighting User Manual
Page 3: Sensing shiny surfaces
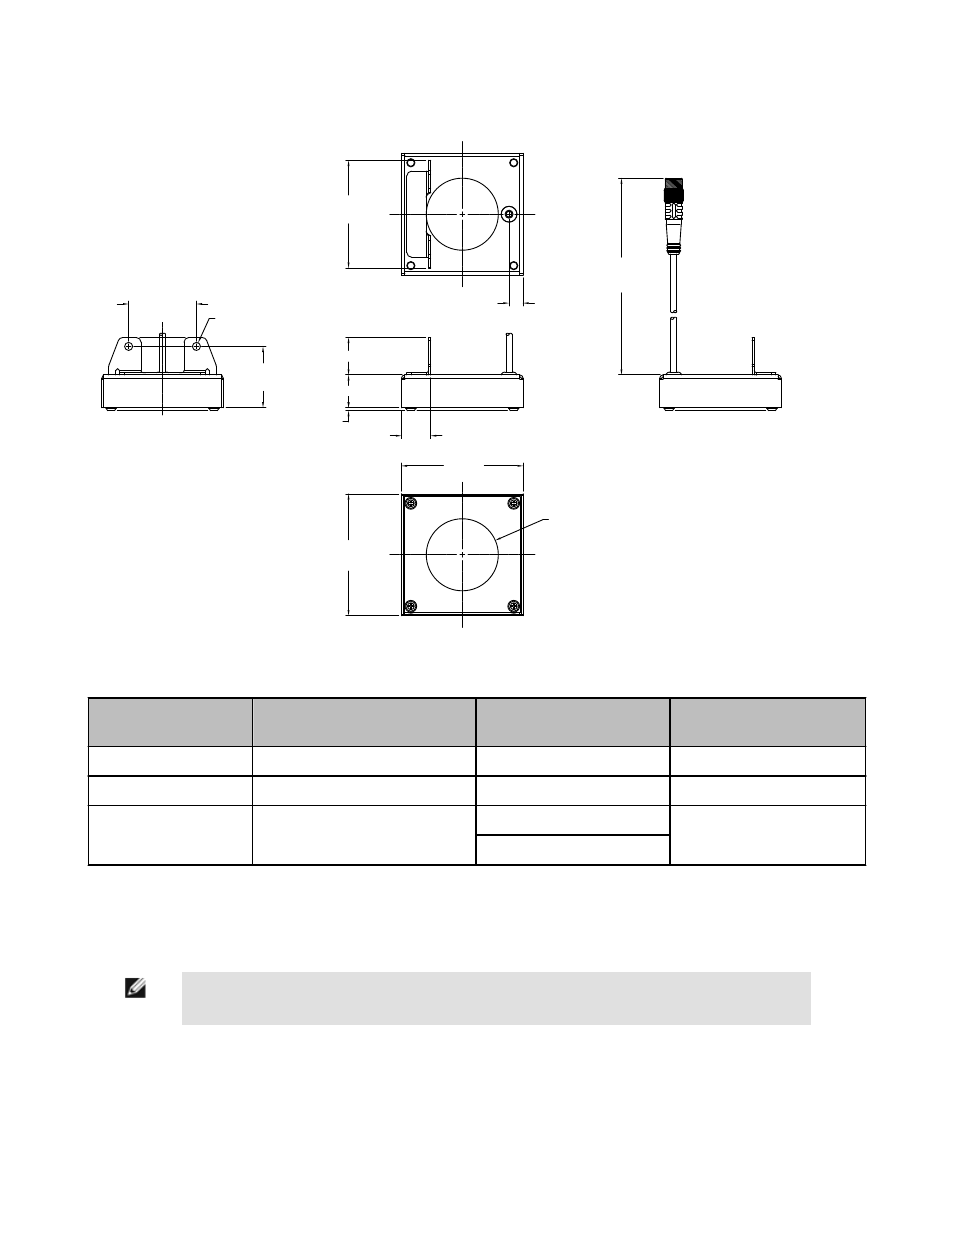
Dimensions
Model LEDIRM62X62W 62 x 62
CL
CL
CL
CL
CL
66.1 mm
[2.60"]
66.1 mm
[2.60"]
39.1 mm dia
[1.54"]
36.8 mm
[1.45"]
2X 4.4 mm dia
[0.17"]
33.3 mm
[1.31"]
15.9 mm [0.63"]
17.8 mm [0.70"]
1.6 mm
[0.06"]
20.3 mm [0.80"]
7.6 mm
[0.30"]
58.4 mm
[2.30"]
Approx 320 mm
[12.6”]
Wiring Table
Light Wire
PresencePLUS Pro Controller Ter-
minal Block
External Power Supply (Stro-
bed)
External Power Supply (Con-
tinuous)
Brown
Pin 1 (+V*)
+V
+V
Blue
Pin 2 (–V*)
–V
–V
White
Pin 4 (strobe)
+5V dc to +24V dc OFF
–V
–V ON
* +V = 24V dc ± 10%; –V = dc common
Installing the Ring Light
The ring light bracket attaches to the top of the PresencePLUS Pro, ProII or Mini Pro lens block, using the hardware kit provided.
NOTE: Before installing this light it is recommended that an ambient light filter be installed behind the lens.
The filter improves image quality by reducing unwanted ambient light.
Sensing Shiny Surfaces
To eliminate direct reflections without using polarizing filters, angle the sensor approximately 15° (or more) from perpendicular to a shiny
surface.
LED..R..W Series Ring Lights
P/N 108626 Rev. F
www.bannerengineering.com - tel: 763-544-3164
3