Functional test, Push button test – Bird Technologies SCC7 Series-Manual User Manual
Page 27
13
Functional Test
1.
Disconnect the AC power cable and turn the power meter off.
Note:
The switch on the rear panel of the meter should be ON.
2.
Turn the power meter off. The ON/OFF switch on the rear panel should be OFF and
the ac power cable should be connected.
3.
Connect the AC power cable.
4.
Turn ON the ON/OFF switch on the rear panel of the meter.
5.
Press the ON/OFF button, while holding down the FWD and SWR push buttons, on
the front panel of the power meter, then immediately release all three.
Note:
The power meter’s model number and revision date should scroll across
the display.
If a dash “–” is displayed instead, then the meter is malfunctioning.
If a dash is displayed after the power meter data, then the power sensor is mal‐
functioning.
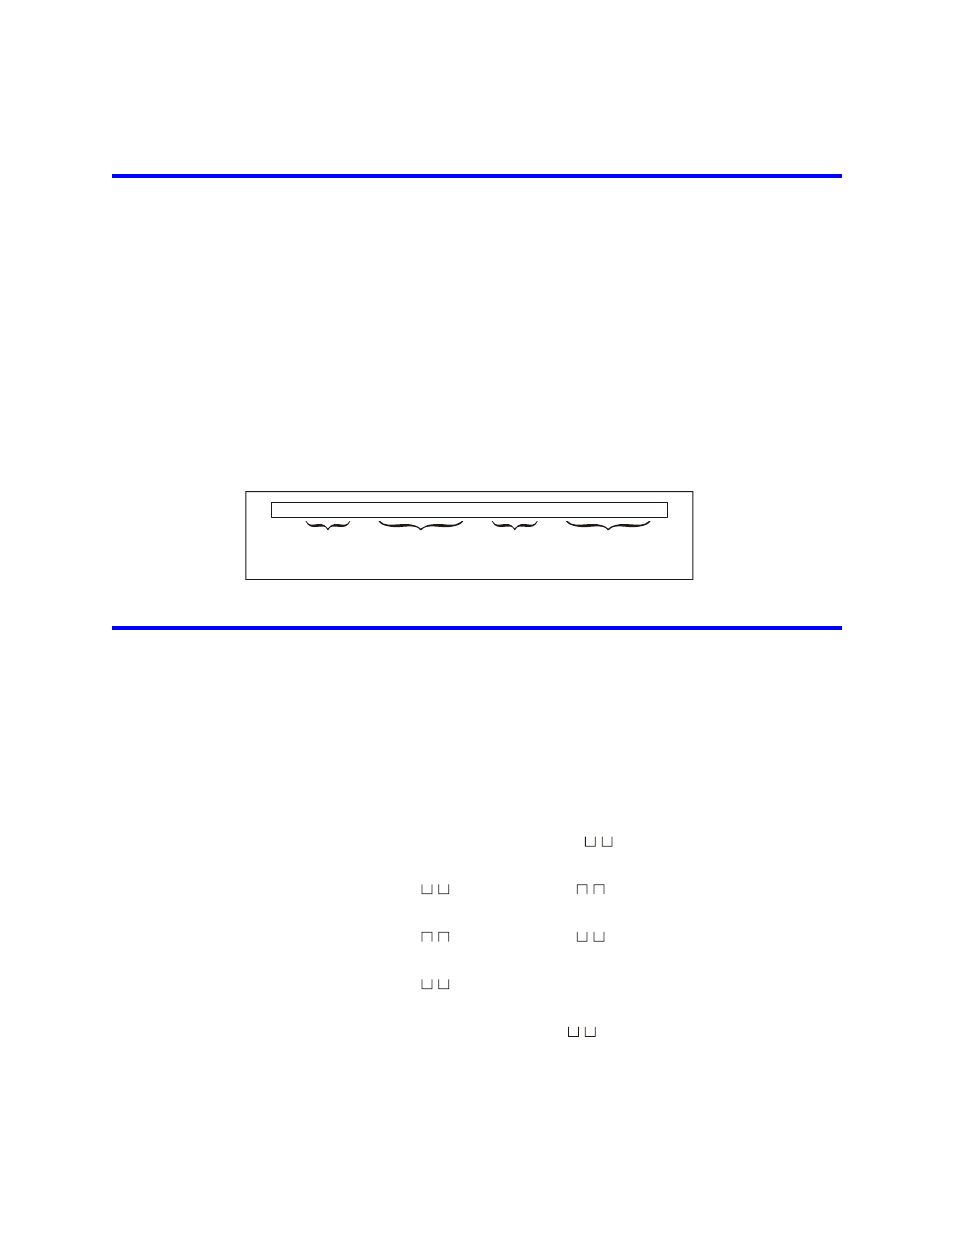
Figure 6 Test Display, No Malfunction
Push Button Test
1.
Disconnect the power sensor.
2.
Turn the power meter ON.
Note:
After the power up display disappears, three dashes “– – –” should scroll
across the display.\
Note:
“AUTO” and “FWD” should be displayed, and a reading of “.000 W”.
3.
Press RFL. “FWD” should change to “RFL” on the display.
Note:
The reading should remain the same.
4.
Press SWR. “RFL” should change to “SWR”.
Note:
“.000 W” should change to “
” (underrange error).
5.
Hold down MIN.
Note:
“
” should change to “
” (overrange error).
6.
Release MIN.
Note:
“
” should change to “
”.
7.
Hold down MAX.
Note:
“
” should change to “.000”.
8.
Release MAX.
Note:
“.000” should change to “
”.
9.
Press dBm.
Note:
“SWR” should change to “dBm”.
Meter’s
Model
Number
Meter’s
Software
Rev. Date
Sensor’s
Model
Number
Sensor’s
Software
Rev. Date
– . . 4 4 2 1 . . – 0 7 . 0 1 . 0 2 – . . 4 0 2 1 . . – 0 7 . 0 1 . 0 2 –