Getting started, Prepare and connect the prompting hardware, Connect the prompting hardware – Autocue SSP07 Quick Start User Manual
Page 4
Getting started
- Prepare and connect the prompting hardware
SSP07-QStartUserManual.docx 2010-10-01
Getting started
This section is designed to get your Starter Series Prompter setup as quickly as possible so that you can start
writing and prompting your scripts.
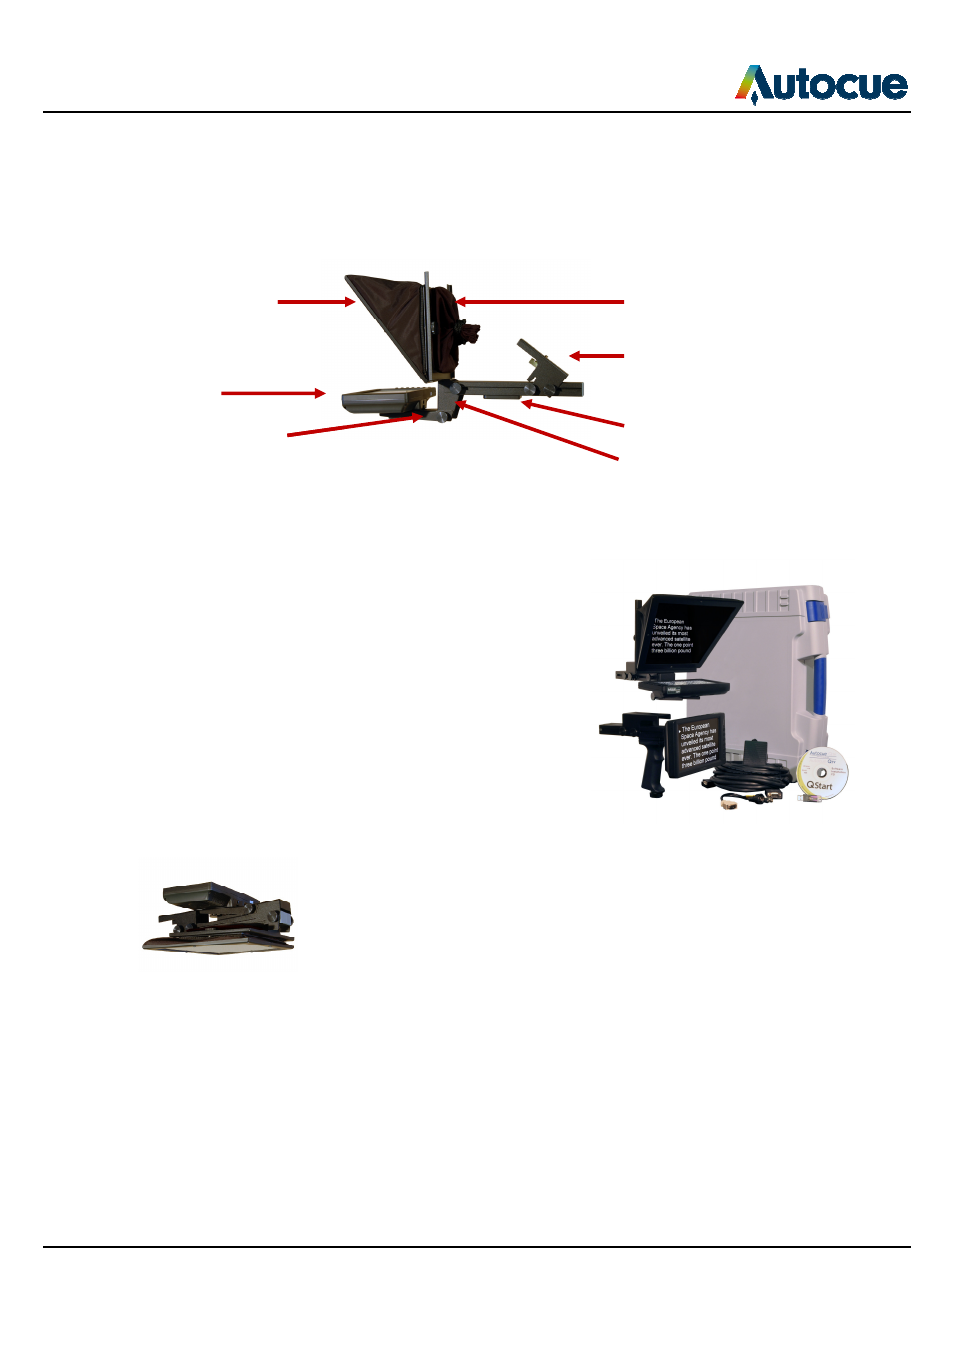
Components of the SSP07
Prepare and connect the prompting hardware
1.
Unpack your SSP07 and check that the following items
have been received:
a.
Starter Series Prompter (SSP
b.
Custom carry case
c.
Software CD
d.
USB hardware licence dongle
e.
10 m VGA cable
f.
Power cord and DC adaptor
2.
Remove unit from its case and car
glass/hood, face down, onto a smooth clean level
surface.
3.
Loosen the thumbscrews holding the monitor assembly and raise the monitor.
4.
Align the metal tongue of the monitor mounting plate with the slot
bracket
and carefully insert the tongue into the slot.
5.
Tighten the thumbscrews to secure the monitor assembly.
Hood and glass
Monitor
Monitor mounting
plate
Prepare and connect the prompting hardware
4
This section is designed to get your Starter Series Prompter setup as quickly as possible so that you can start
writing and prompting your scripts.
connect the prompting hardware
heck that the following items
Starter Series Prompter (SSP07) (one only)
ardware licence dongle
and DC adaptor
Remove unit from its case and carefully place the
onto a smooth clean level
Loosen the thumbscrews holding the monitor assembly and raise the monitor.
ign the metal tongue of the monitor mounting plate with the slot in the drop
and carefully insert the tongue into the slot.
Tighten the thumbscrews to secure the monitor assembly.
Hood mounting
bracket
Camera mounting
bracket
Slider plate
Drop bracket
© 2003-2010 Autocue Group Ltd.
This section is designed to get your Starter Series Prompter setup as quickly as possible so that you can start
Loosen the thumbscrews holding the monitor assembly and raise the monitor.
drop
Hood mounting
Camera mounting
Slider plate
bracket