Valve manager application, Installation, Running the valve manager application – Rockwell Automation T8031 Trusted Valve Manager User Manual
Page 26: Creating a data source, Creating a project, Project name, Opc controller, Figure 24 opc server selection, Trusted, Valve manager t8031
Trusted
TM
Valve Manager T8031
Issue 2 Oct 05
PD-T8031
26
4. Valve Manager Application
The Trusted
TM
Valve Manager package is a Windows based software application that configures,
initiates, collects, processes, and stores valve test information from T8449 – “Trusted
TM
TMR 24Vdc
Valve Monitor” modules. It uses the Trusted
TM
OPC Server to communicate with one or more
Trusted
TM
systems that are configured with T8449 modules, VTEST function blocks, and variables with
special suffixes in their tag names.
4.1. Installation
The Valve Manager must be installed by running the SETUP.EXE program on the installation CD.
Installations on Windows NT/2000/XP machines may require administrative privileges in order to
complete the installation. Windows NT installations require Service Pack 4 or higher.
4.2. Running the Valve Manager application
The Valve Manager application can be started by selecting the short-cut located in the Start menu or
by running it directly from the installation directory. The default path to the executable file is:
C:\TRUSTED\VALVEMGR\ValveMgr.EXE
When creating a short-cut, the working directory (or “Start in” directory) must be set to the directory
where the ValveMgr.EXE application is located (i.e. C:\TRUSTED\VALVEMGR).
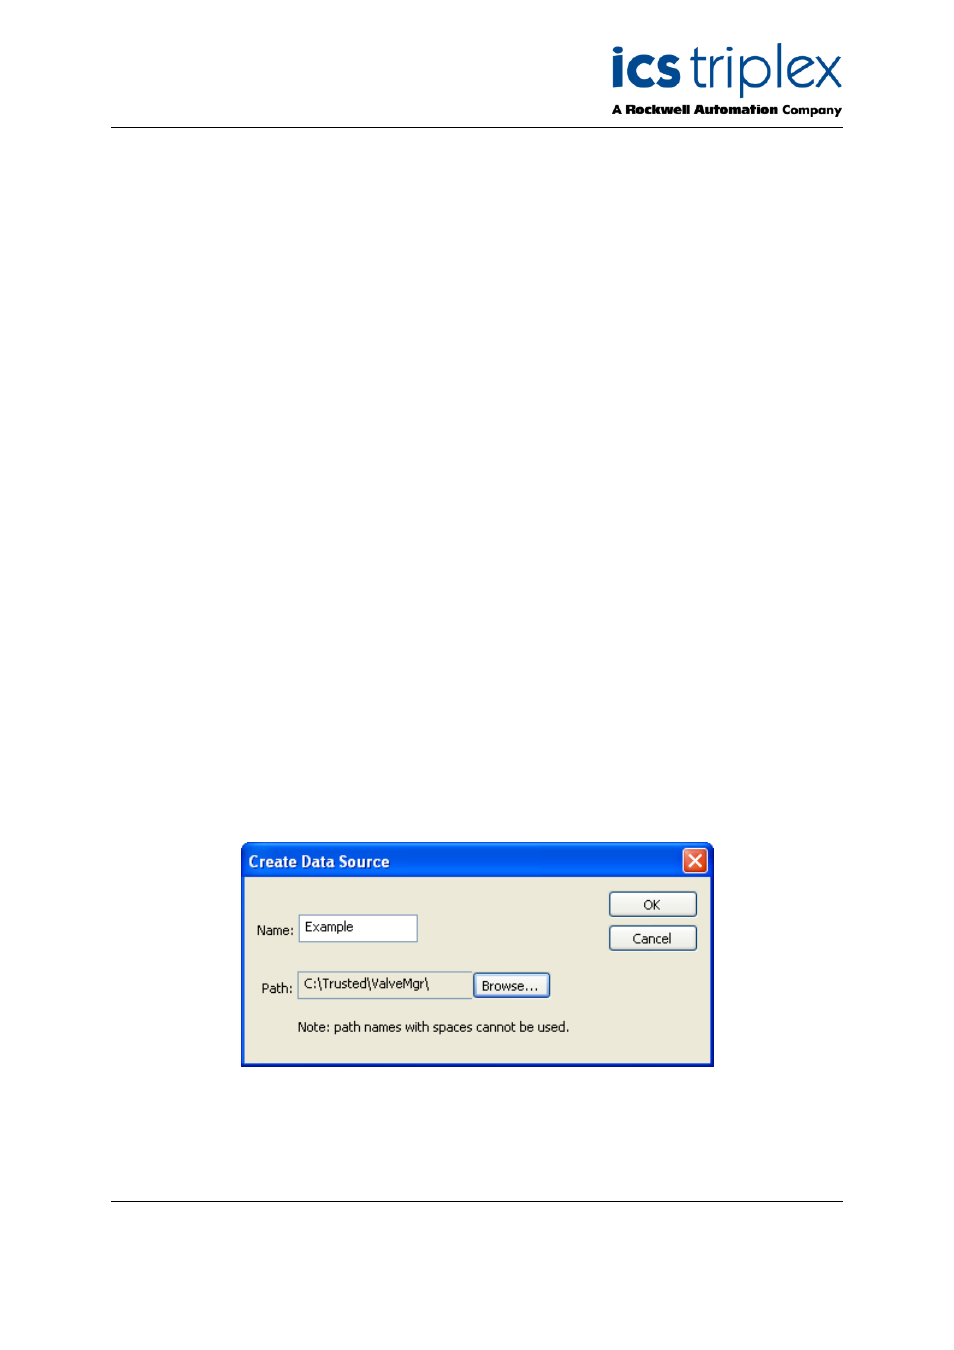
4.3. Creating a Data Source
The Valve Manager stores project configuration, valve profiles, and test results data in an ODBC
compliant database. To have the Valve Manager create and register an ODBC data source, select
“File | Create Default Database” form the main menu. This will bring up the “Create Data Source”
dialog. Enter a name for the data source, and select its location. Please note the restriction that the
path to the location cannot contain spaces.
Figure 21 Create Data Source