Attach motor cables – Rockwell Automation RDD-B4102 Rotary Direct Drive Bearingless Motors User Manual
Page 18
18 RDD-Series Rotary Direct Drive Bearingless Motor Installation Instructions
Publication RDB-IN002B-EN-P — February 2010
Attach Motor Cables
Follow these steps to attach the feedback and power/brake cables after the motor is
mounted.
1. Form a drip loop in the cable before attaching it.
A drip loop creates a low spot in the cable. Gravity causes any liquid to flow
to the low spot and away from the connectors, thereby reducing the
potential for any liquid to enter the connector.
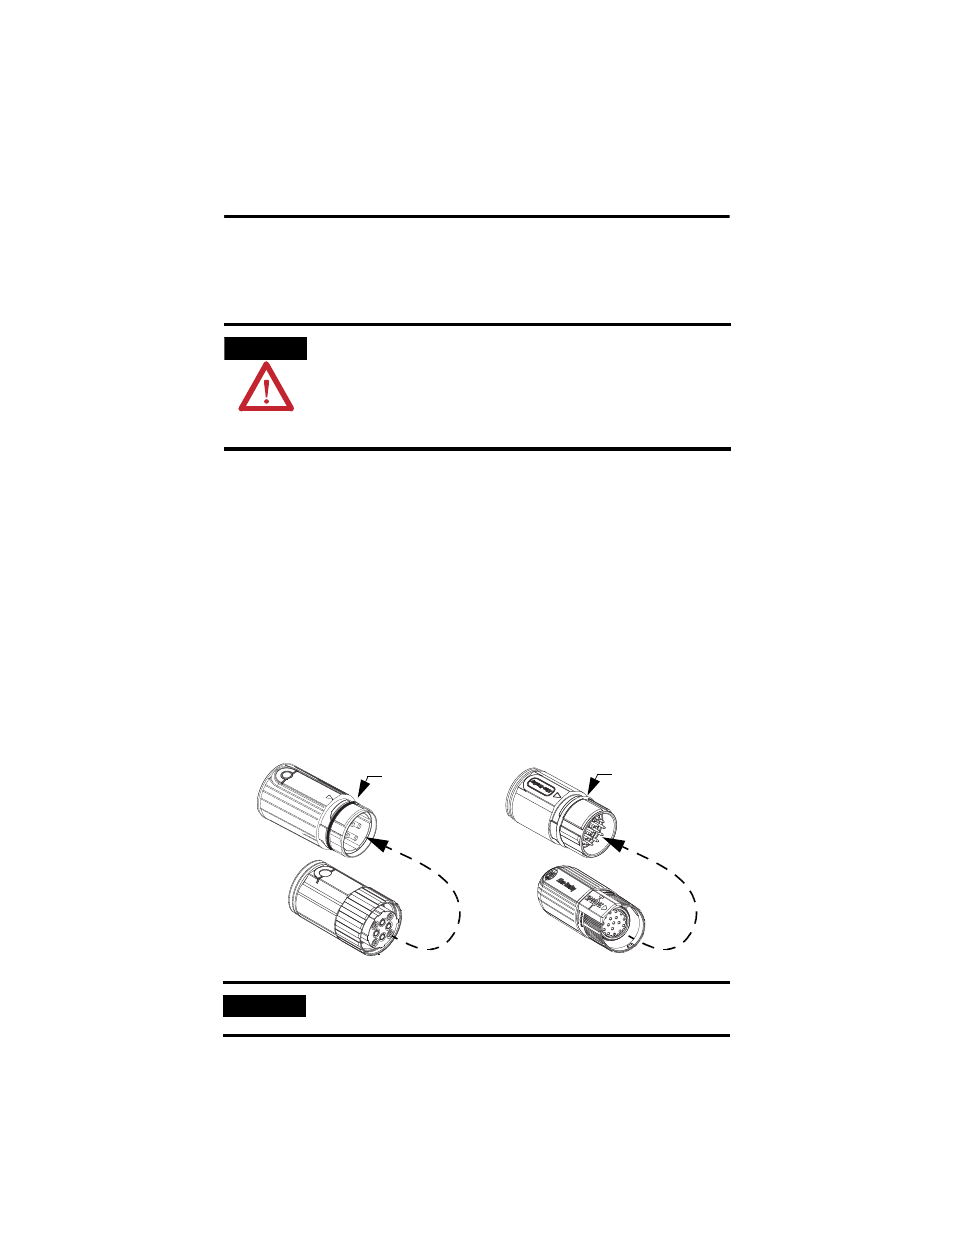
2. Determine if you should remove the O-ring from the motor connectors.
• Threaded plugs (power or feedback) require an O-ring.
• SpeedTec plugs (power or feedback) do not require an O-ring, as it
interferes with the plug seating properly on the motor connector.
The O-ring on the motor connector dampens the effects of vibration at the
cable-to-motor connection for a threaded plug. This creates a more secure
connection for a cable with a threaded plug. O-rings interior to the threaded
and SpeedTec plug provide complete environmental sealing for the cable..
ATTENTION
Make sure that cables are installed and restrained to prevent uneven tension or flexing at
the motor-to-cable connections.
Excessive and uneven lateral force at the motor connectors can result in the connector’s
environmental seal opening and closing as the cable flexes.
Failure to observe safety precautions could result in damage to the motor and its
components.
IMPORTANT
The 2090-XXNPMF-xxSxx power cable and the 2090-XXNFMF-Sxx feedback cable require
an O-ring on the motor connector.
Power Connector on Motor
Feedback Connector on Motor
O-ring removed for
SpeedTec plug.
O-ring
Threaded Power Plug - Install O-ring
SpeedTec Feedback Plug - Remove O-ring
Align the flat
surfaces before
securing connection.