Rockwell Automation 1786-series ControlNet Coax Media Planning and Installation Guide User Manual
Page 57
Publication CNET-IN002B-EN-P - June 2010
57
Install a ControlNet Coax Media System Chapter 3
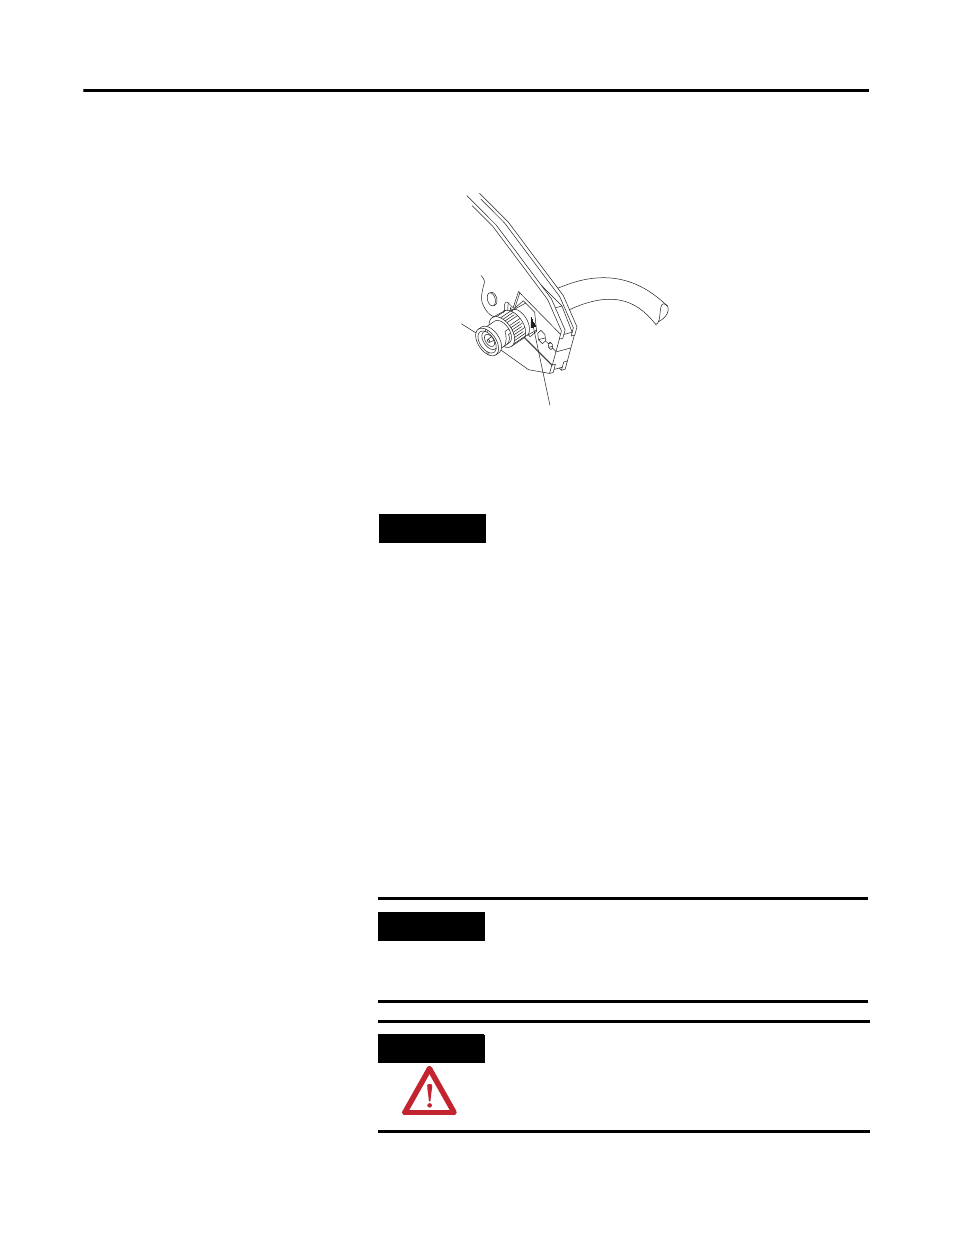
7.
Position the crimp tool on the ferrule as close as possible to the
connector base and ferrule meeting line.
8.
Press the tool tightly around the ferrule until the crimp tool allows
release, noting that the larger hexagonal crimping notch is for crimping
the ferrule that holds the connector to the cable.
9.
If your installation requires IP67-rated cabling and you plan to use the
IP67-rated taps, complete the following steps.
a. Slide the heat-shrink tubing onto the cable.
b. Place the crimp ring on to the cable.
c. Strip the cable using the 1786-CTK stripper tool.
d. Remove an extra 25 mm (1/8 in.) of the jacket from the cable, being
careful not to cut the braid.
e. Trim the center conductor to the required length as directed on the
connector bag.
TIP
Many network problems are due to improperly installed
connectors. You should have tight-fitting connectors on the
ends of all of your cables. Pull the connector to verify that
it is attached. If it is loose or comes off, snip off the
connector and install a new one. The connector should
withstand a minimum 27 kg (60 lb) pull force if
properly installed.
IMPORTANT
Use only the ACUM heat-shrink tubing provided in the
IP67 Tap and Cable Kit. Do not substitute other types of
heat-shrink tubing. Substitutions may cause a loss of the
IP67 rating.
ATTENTION
Be careful when using heat guns. High temperatures can
lead to burns, risk of fire, or other property damage.
Crimp Ferrule in Larger Crimping Notch
45001