Rod adjustment procedure, Adjustment procedure if switch does not turn "on, Adjustment procedure if switch does not turn "off – Rockwell Automation 1494U-D30_D60_D100 Universal Disconnect Switch Installation Instructions (30A, 60A, 100A) User Manual
Page 4
(4)
PN-224754
DIR 10001182729 (Version 01)
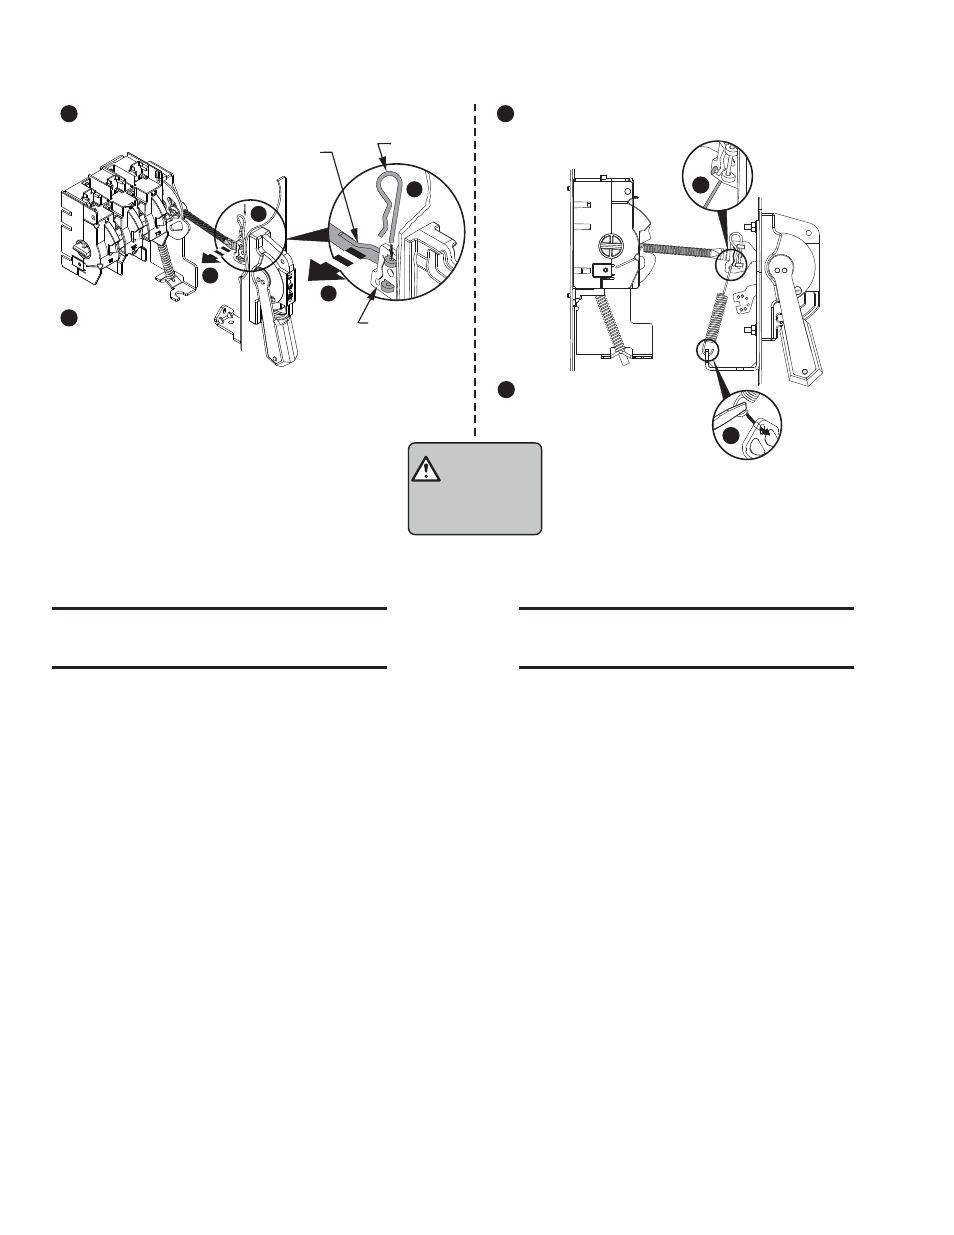
Connecting
Rod
Hitch Pin
Primary Link
5
6
5
6
CHECK FOR PROPER
OPERATION
ATTENTION
5
Engage ears of connecting rod into slots of handle link.
7
Install spring to handle link.
Adjustment Procedure if switch does not
turn "ON".
1. Move handle to “ON” position.
2. If switch does not fully close, return handle to
"OFF" position.
3. Remove link spring and hitch pin to disengage
the connecting rod from the primary link.
4. Turn connecting rod counter-clockwise (1 or
more) full turns.
5. Re-engage connecting rod in primary link of
handle, insert hitch pin and re-test.
6. Repeat steps 1 - 5 as necessary.
7. Re-install link spring.
Adjustment Procedure if switch does not
turn "OFF".
1. Move handle to “OFF” position.
2. If switch does not fully open, return handle to
"ON" position.
3. Remove link spring and hitch pin to disengage
the connecting rod from the primary link.
4. Turn connecting rod clockwise (1 or more) full
turns.
5. Re-engage connecting rod in primary link of
handle, insert hitch pin and re-test.
6. Repeat steps 1 - 5 as necessary.
7. Re-install link spring.
7
8
6
Install hitch pin
through ears of
connecting rod.
8
Install other side of spring
to handle bracket.
Rod Adjustment Procedure