V-verb pro rev2496, Applications – Behringer Rev2496 User Manual
Page 20
20
V-VERB PRO REV2496
X-MODE (Xover filter mode) determines the operating mode of
the crossover filter. When set to WIDE, the entire spectrum is
compressed. When set to LO 6 dB, LO 12 dB and LO 18 dB, only
the output signal of the low pass filter is compressed. When set
to HI 6 dB, HI 12 dB and HI 18 dB, only the output signal of the high
pass filter is processed. The filters have a selectable change
rate, with values of 6, 12 or 18 dB per octave. X-FREQ (Xover
split frequency) in this case determines the cut-off frequency of
the low pass filter and the high pass filter.
With this function you can for example process only the bass
frequencies of a stereo mix, and leave treble unaffected. You
can also configure a 2-band mastering compressor by selecting
this algorithm for both engines and configuring it as a combination
effect in parallel 5-routing. Now, select a LO value in engine 1 for
X-mode; select a HI value in engine 2. The compressor in engine
1 now processes the lower frequency band, while high
frequencies are compressed in engine 2. This way, you can
compress the lows and the highs with different intensity, and
you can set control response times separately for both frequency
bands.
5. APPLICATIONS
The BEHRINGER V-VERB PRO is an extremely flexible reverb
processor. Thanks to its extensive connectivity options, it can
be used in a large number of different applications. In this chapter,
we will describe and present some application possibilities.
5.1 Using the V-VERB PRO in the aux bus
The standard application for a reverb processor. Using the
REV2496 in the aux bus lets you feed signals from one, several
or all channels of your console into the V-VERB PRO. When
miking a drum kit, for example, you can use the aux controls to
adjust the reverberation independently for each microphone.
Thus, you are able to assign a stronger reverb to the snare than
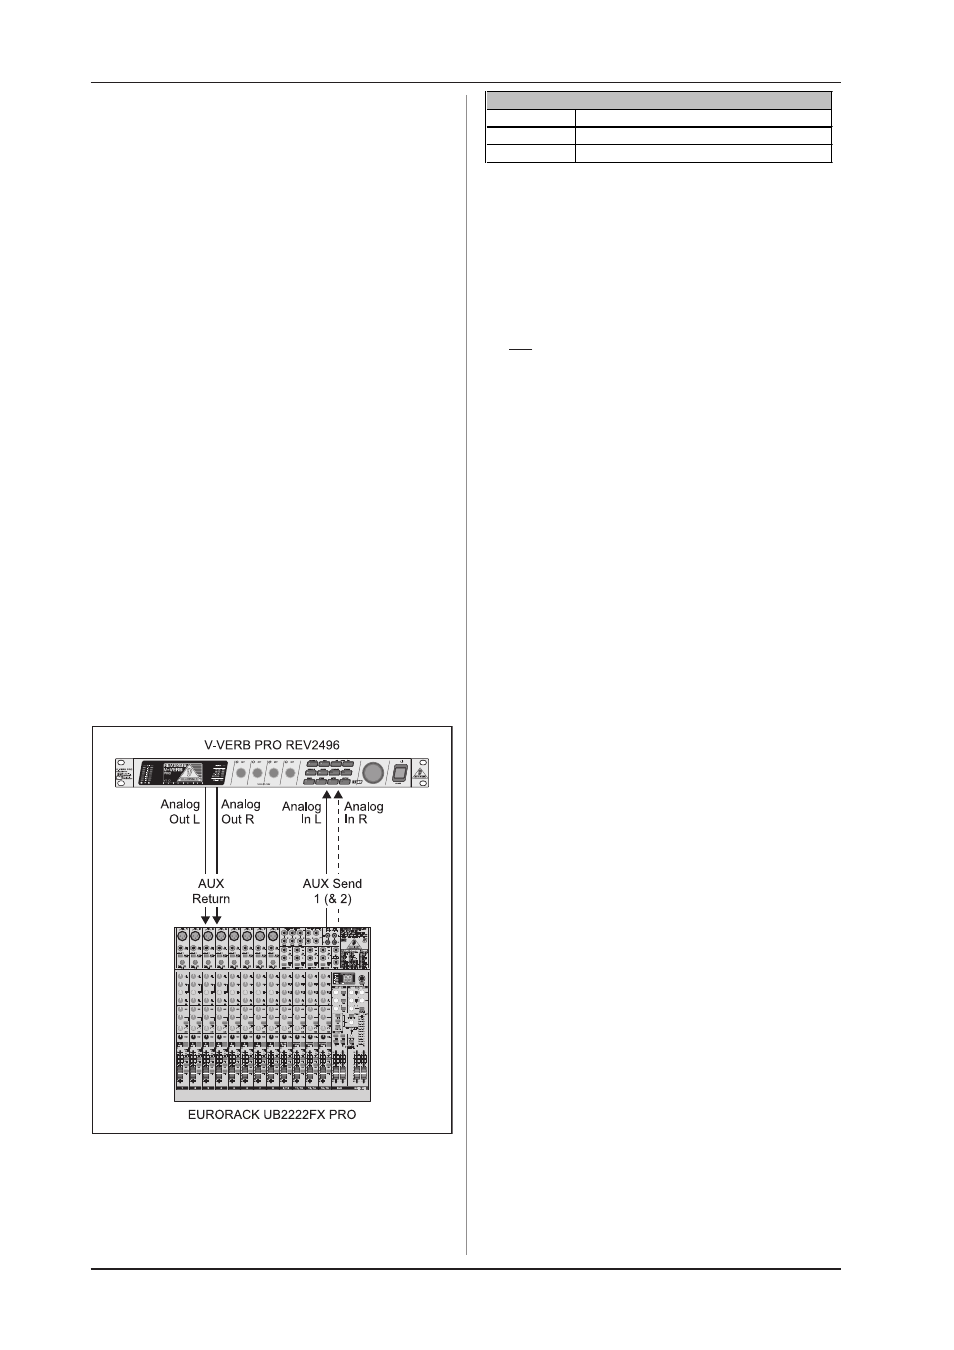
to the toms. Wiring the V-VERB PRO in the aux bus should be
done as follows:
Fig. 5.1: Wiring aux busses of a mixing console
Routing
Parallel 5, 6; Serial 1, 2
Master Input
analog
Wet Dry Mix
external
SETUP
Tab. 5.1: SETUP configuration for wiring
the REV2496 via aux busses
Connect the input of the V-VERB PRO to the aux send output
of your mixer. The REV2496s outputs are connected to an
available aux return input or a stereo input of your mixer. As a
matter of principle, effects processors should always be
connected to post fader aux busses, i.e. independent of the
fader position.
+
If your mixing console has aux busses that feature
one jack for the aux send, you have to always use
the left input of the REV2496. In this case, set Input
Mode on the I/O page to mono (see chapter 3.8.1).
+
To avoid damage to your equipment, turn down the
volume level on your amplifier when making
connections. Turn off all the equipment that you
want to connect to one another until all connections
have been made as described.
An example: say you want to run your REV2496 in a live
situation in connection with a mixing console. An ambiance effect
should lend some more roominess to a drum.
Connect the V-VERB PRO (as described previously) to your
mixer (fig. 5.1). Switch the REV2496 on. In the SETUP menu (I/O
page), activate EXTERNAL operation. Press one of the ENGINE
keys, select the ambience effect (ROM 006) using the PRESET
WHEEL and confirm with OK/TAP. The effect is now activated.
Using aux return, adjust the overall level of the effect. Slowly
turn up the aux send controls in the individual mixer channels
until each of the drum signals becomes the desired amount of
the effect mixed to it. Then, you can do some fine-tuning in the
EDIT mode.
5. APPLICATIONS