V-verb pro rev2496 – Behringer Rev2496 User Manual
Page 12
12
V-VERB PRO REV2496
3.5 COMPARE function
After making adjustments to a preset, the COMPARE function
lets you compare the changes you just made with a previous
preset before you store the changes. To do this, press the
COMPARE key. As long as this keys LED is illuminated,
additional edits are temporarily not possible. If you press
COMPARE again, you go back to your personal edit. Now you
can either store your changes (see the next chapter) or continue
editing.
3.6 STOREStoring programs
As soon as you make an adjustment to a preset, E (short for
Edited) is shown on the LCD. If you wish to keep your changes,
you can store them in one of the USER storage spaces as a
preset. Pressing the STORE key opens the STORE menu.
Fig. 3.7: STORE page
Using EDIT A or the PRESET wheel, you can now select the
storage location where you wish to store the modified program.
Please keep in mind that storage slots 001 - 100 are write-
protected and can therefore not be overwritten. If you press the
EDIT A control, the name of the edited preset is shown.
Use the controls EDIT B, C and D to name the preset (maximum
12 characters long):
By turning the EDIT C and D controls, you can select different
characters horizontally and vertically. Press these controls to
confirm your character selection, after which the cursor in the
name field moves to the next position. By turning the EDIT B
control, you can directly dial the individual name positions. By
pressing the EDIT B control, the character in the current position
is erased, and the characters behind it move forward one
position.
If you dialed a storage slot and named a preset, please press
OK or STORE to store your changes. The following prompt is
then shown on the display:
Fig. 3.8: Confirmation request before storing a preset
Confirm by pressing OK/TAP. Your REV2496 goes back to the
Recall/Preset mode.
You can exit the STORE menu at any time without storing your
preset by pressing ENGINE A, ENGINE B or COMBI.
+
After storing a preset, all previous settings in this
preset location are overwritten and the new
parameters are stored. If you change your mind
and decide to keep the old preset (without losing
the newly made changes), before pressing the
STORE key for the second time, use EDIT A to select
another storage location for your new preset.
3.7 Restoring factory presets
While powering up your REV2496, keep the STORE key pressed
to restore factory presets. A confirmation request is shown in
the display. Confirm by pressing OK/TAP.
+
Restoring factory presets overwrites all presets
you have made!
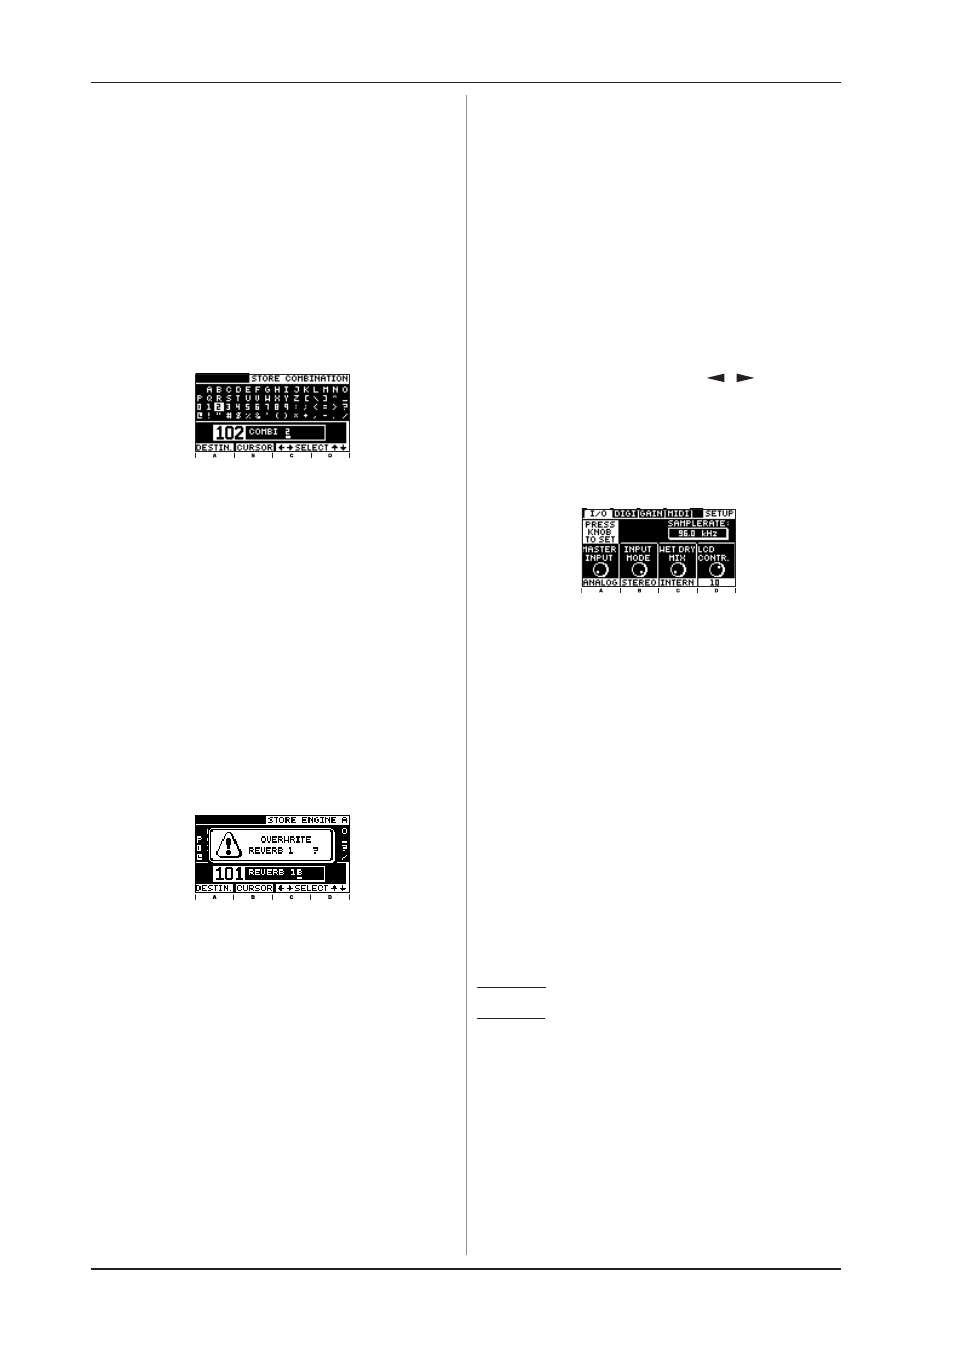
3.8 SETUP menu
While in the SETUP menu, you can make adjustments to your
V-VERB PRO that will have an effect on all presets. These include
the input and output configuration as well as level and MIDI
settings. Individual functions are described in subsequent sub
chapters (3.8.1 - 3.8.4).
Press the SETUP key to go to the SETUP menu. You can scroll
through the sub menus using the PAGE
/
keys. The four
infinitely variable rotary controls are now used for adjusting the
SETUP parameters. With some parameters, you will have to press
the corresponding EDIT control to confirm your selection. To exit
the SETUP menu, simply select another menu (ENGINE A, ENGINE
B or COMBI.).
3.8.1 I/O page
Fig. 3.9: SETUP page 1
Master Input: Use EDIT A to select the master input (ANALOG
or DIGIT.). This selection only has an effect on those routings
that only use one stereo input (parallel 2,3,5,6, serial 1-3). You
can identify these routings because they are labeled with L
and R (instead of A and D) in the routing graphic on the
display on the COMBI. or edit page (also see table 3.3). The LED
level indicator always shows the master input signal.
Input Mode: Use EDIT B to select if the input signal should be
in mono or in stereo. If you only use the left input, please select
mono operation.
Wet/Dry Mix: Use the EDIT C control to alternate the mix mode
between internal and external. The selection of the settings
depends on the REV2496s application. If you for example wish
to operate your V-VERB PRO via the aux paths of a mixing
console, you should activate EXTERNAL. The effect ratio on the
output of the REV2496 is then always 100%, and the mix ratio
between the dry and the effect signal is made in the mixing
console. This way, the parameters Dry or Mix are omitted.
Depending on the selected routing, this parameter has the
following impact:
Parallel 1 - 6: The dry parameter of both engines is not adjustable.
Serial 1 - 4: The control of the Dry and Mix parameters in
Engine A is still active, and Engine B is not adjustable.
If you wish to use your REV2496 together with a guitar amp
that features a serial effects loop, or if you wish to use it as an
insert effect, select INTERNAL. Additional information about this
application can be found in chapters 5.3 and 5.4.
LCD Contrast: Use EDIT D to adjust LCD contrast.
3. OPERATION