Calibrating measurements – Yamato Scientific Vacuum controller Vacuum controller User Manual
Page 22

20
Calibrating Measurements
This function is used to calibrate the deviation which is occurred between the displayed-
measurement of the product and the reading of calibrated vacuum gage you have
(e.g.
manometer
).The calibrated informations relate to the ramp control mode.
It is programmed in the function menu of the fixed value control mode and of the free mode.
The calibration mode is accepted either before or during operations.
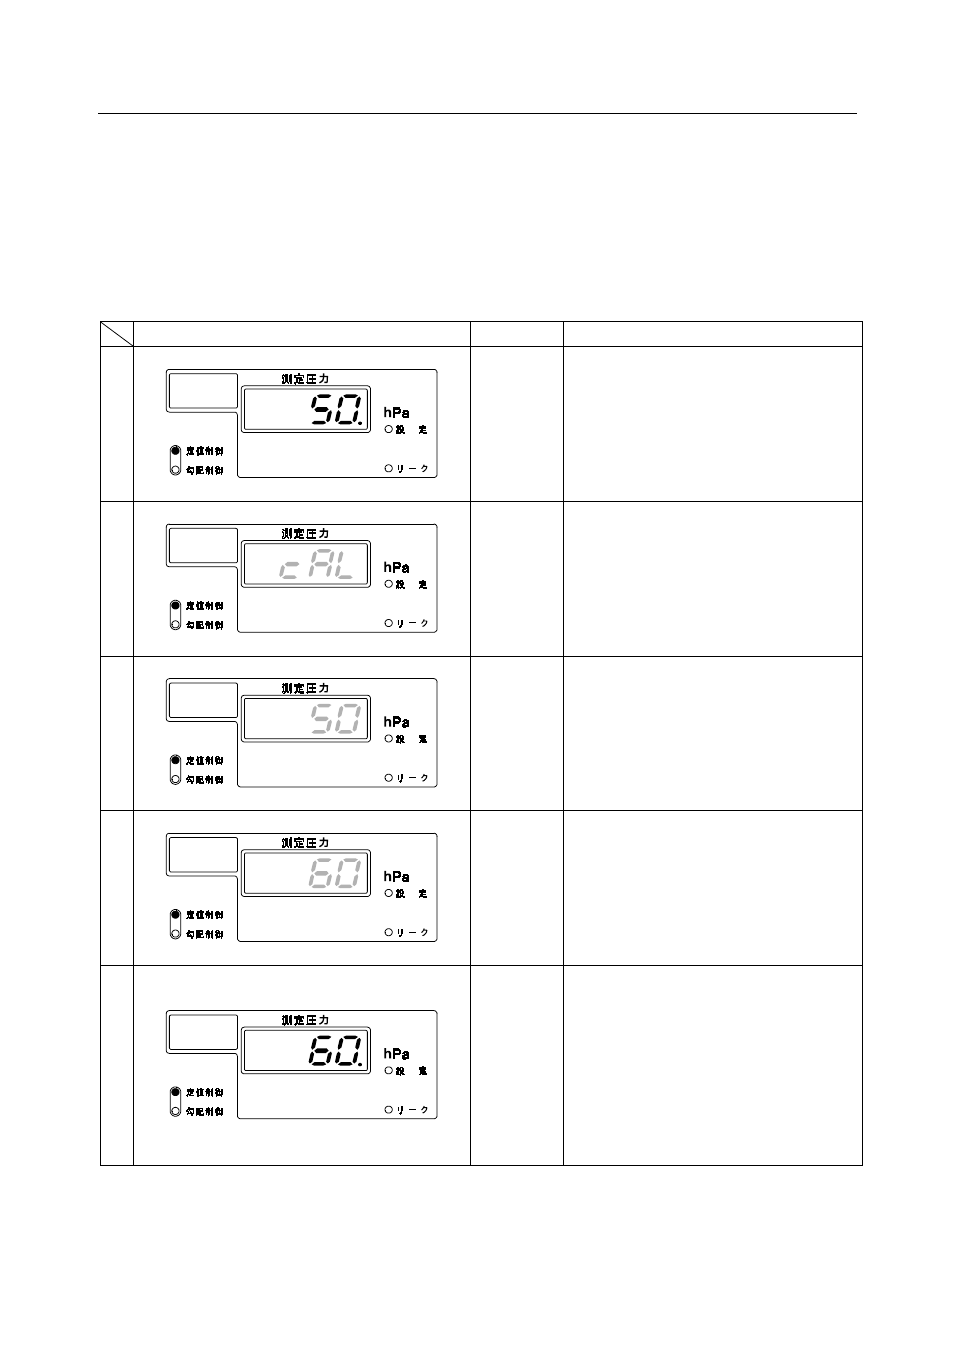
The following shows the procedure for calibrating while the fixed value control operates.
Display After Operation
Key
Explanation
1
•
The fixed value control is running.
•
The present pressure measurement
appears on the indicator. The fixed
value control lamp is on.
2
FUNCTION
MENU
•
Press
「FUNCTION MENU」and
「cAL」appears blinking on the
indicator,showing that the pressure
measurement calibration mode was
shifted.
•
The operation continues and the
operation lamp is still on.
3
ENTER
•
Press ENTER and the present
pressure measurement appears
blinking on the indicator.
•
The operation is still running.
4
▼▲
▼▲
▼▲
▼▲
•
Change to the calibration value you
desired by pressing
「▲」or「▼」.
Changed to 60hPa in the example.
•
The operation is still running.
5
ENTER
•
Press ENTER and the calibration
value is decided. The pressure
measurement appears on the
indicator again.
•
At this stage, the suitable operation is
continued by the controller. Because
deviations occur between the
pressure set point and the pressure
measurement during calibrations.
