Installation recommendations, Mounting siren controller fig. 1, Caution – Wolo 4200 The Commissioner User Manual
Page 2
INSTALLATION RECOMMENDATIONS
• For maximum sound be sure that the speaker connected to THE COMMISIONER siren controller is not less then
200 watts. Recommended Wolo speakers is: Model 4004, or two 100-watt speakers Model 4002 or 4003.
• The speaker or speakers should be mounted facing forward on the vehicle. To obtain maximum sound output,
make sure that the speakers are unobstructed. The siren’s sound can be severely reduced if objects are in front or
blocking the speaker.
• IMPORTANT: Installation of siren controller and wire routing must be out of the deployment path of vehicles air
bags.
• The siren controller must be installed in a location that will ensure safe operation of the controls and microphone.
• The siren’s controller must be mounted in a location that will provide good ventilation. Never install siren controller
close to a vehicle’s heater duct.
• Before drilling any surface for mounting of the siren controller or for routing wires, carefully inspect the desired
location to ensure that there are no components, wires and or any other vehicle parts that could be damaged by
drilling.
• Before connecting the siren controller to the vehicle, carefully review the vehicle’s shop or build manual to ensure
the connection point will not affect the circuit or the vehicle’s operation.
• Speaker impedance: 6 to 8 ohms (not included).
IMPORTANT: Failure to follow all safety precautions and installation procedures outlined in these instructions could
result in property damage to the vehicle, serious injury or death to the driver or others.
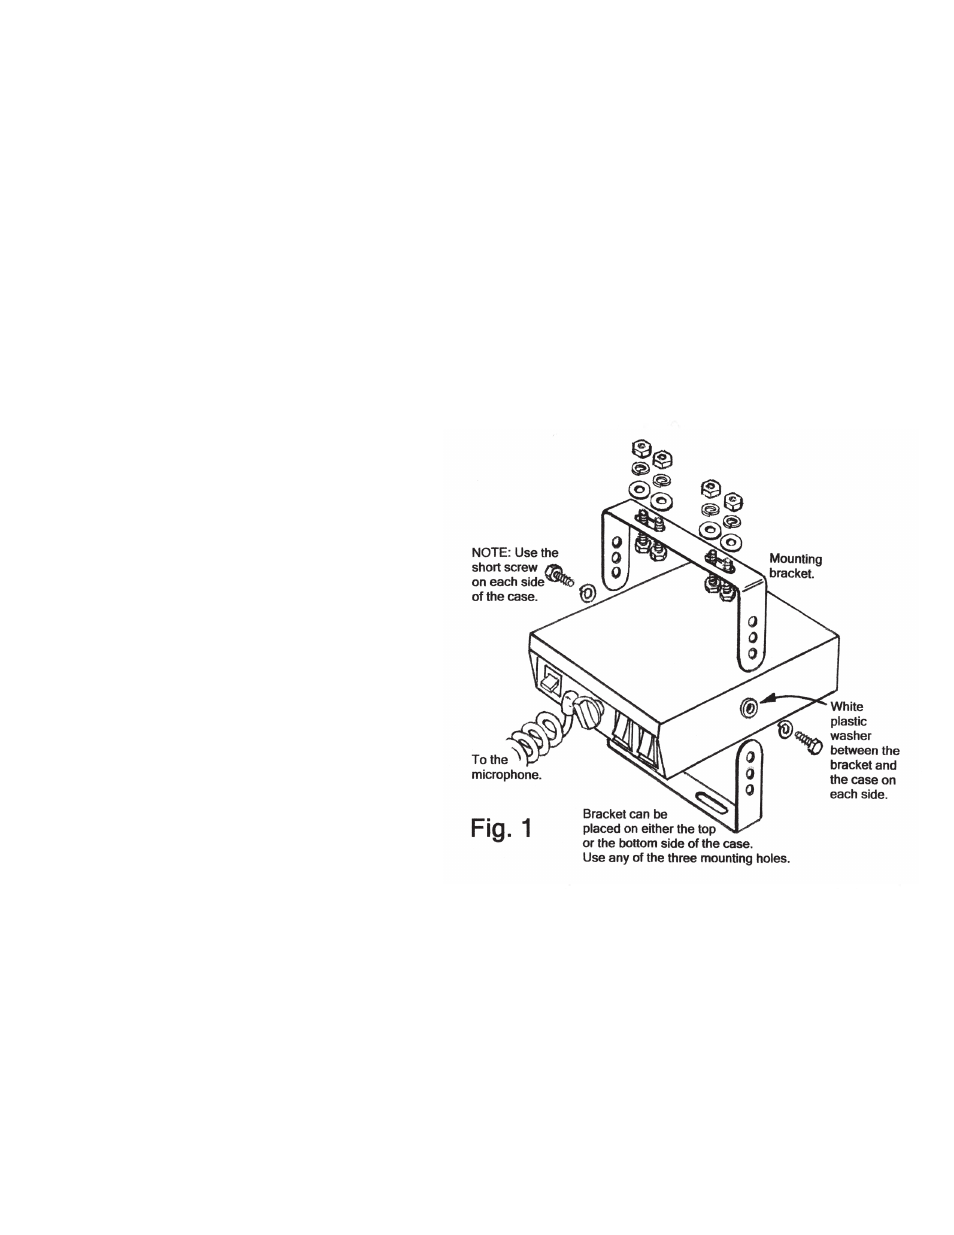
MOUNTING SIREN CONTROLLER Fig. 1
1. IMPORTANT: Do not connect the siren
controller’s wires to any vehicle power point until
mounting of the controller is completed.
2. WARNING: If the vehicle is equipped with air
bags, the installer MUST consult the vehicle’s
shop or build manual to ensure that siren
controller and it’s wires will not affect deployment
of air bags. This siren must be installed only in a
location recommended by the vehicle
manufacturer. If necessary consult manufacturer
for their recommendation.
2.
Failure to adhere to this warning could result in
damage to the air bag and or reduce the
effectiveness of the air bag, which could result in
bodily injury, or death to the driver, passengers
and others.
3. The swing bracket included has been designed to
mount to the siren controller either from the top
for hanging under dash or bottom for top surface
mounting.
CAUTION
• Before drilling any surface for mounting the siren
controller or for routing wires carefully inspect the
desired location to ensure that there are no components, wires and or any other vehicle parts that could be
damaged by drilling.
• The siren controller must be mounted in a location that will provide good ventilation. Never install siren controller
close to a vehicle’s heater duct.
4. Using the swing-mounting bracket as a template, mark the location of mounting holes to be drilled, (2 holes in
each slot of the mounting bracket).
5. Drill holes on the marked locations using a 15/64” drill bit.
6. Secure the swing-mounting bracket to the desired location using the hardware provided, (5.95 mm x 20-screws,
flat-washers, lock-washers and nuts).
7. The siren controller is secured to the mounting bracket using the hardware provided, (5.95 mm x 10-screws, lock-
washer and plastic washer). Tilt and position the siren controller so that it is easily reachable by user. Tighten the
two screws that secure the siren controller to the swing bracket.
Mounting
bracket.
To the
White
plastic
washer
between the
bracket and
the case on
each side.
or the bottom side of the case.
Use any of the three mounting holes.
placed on either the top
Bracket can be
NOTE: Use
the short
screw on
each side
of the case.
microphone.