Using wd print share – Western Digital My Net AC1300 Router User Manual User Manual
Page 62
INSTALLING AND USING ADDITIONAL WD SOFTWARE
58
MY NET AC1300 ROUTER
USER MANUAL
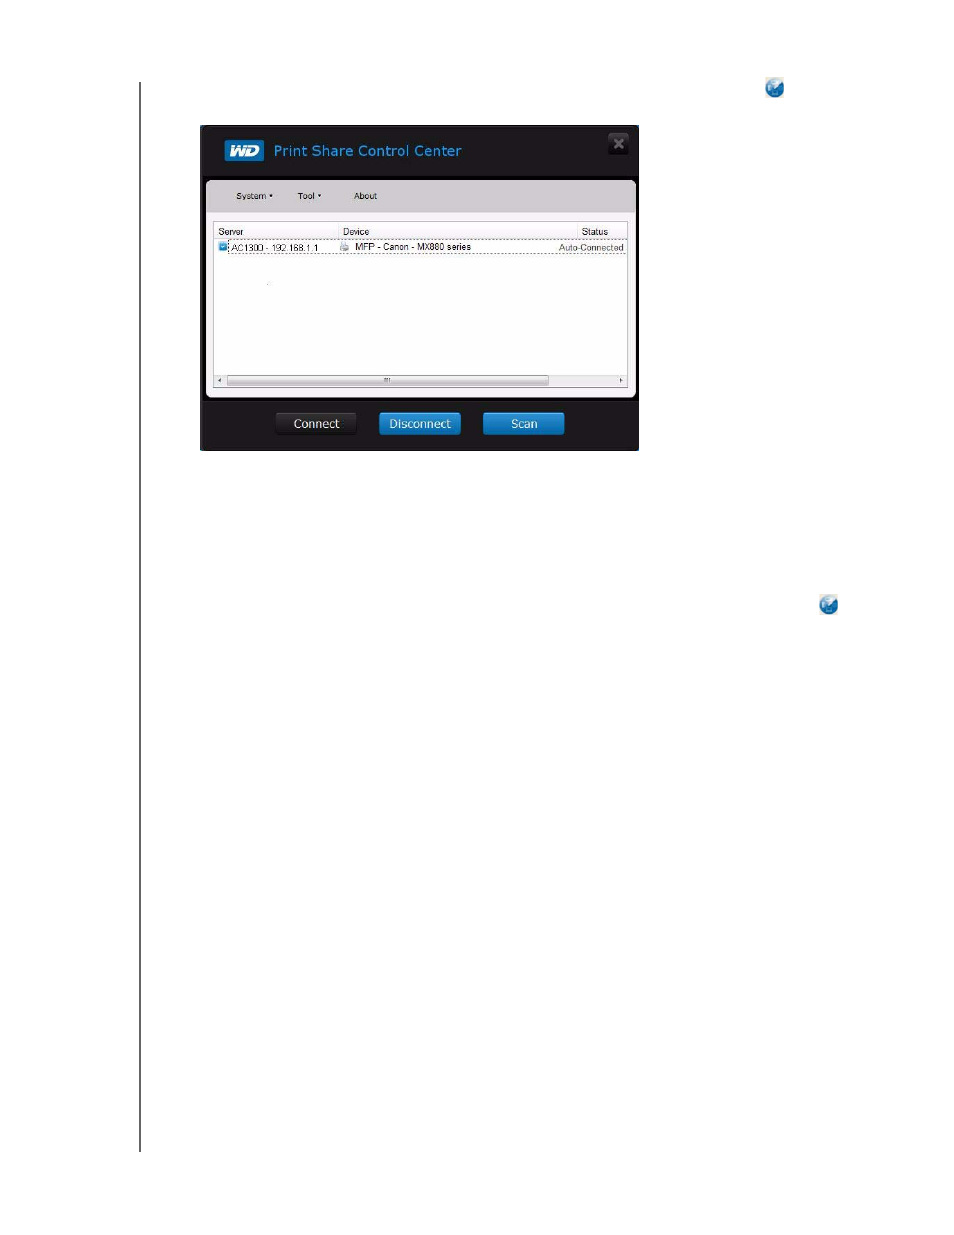
4. When the installation is done, click the WD Print Share icon on the desktop
to
displaythe WD Print Share Control Center.
Using WD Print Share
Opening WD Print Share
To display the WD Print Share Control Center at any time, click the WD Print Share icon
on the desktop.
Using an Auto-Connected Printer
By default, the printer is in Auto-Connected mode, which allows the computer to be
connected to the printer only when you send a print job to the printer. Another user in the
network can use the printer while you are disconnected.
Using the Connect Button
Connected mode is for both printing and scanning. Selecting the printer or scanner and
clicking Connect manually connects the device to your computer for the timeout duration
set in Tool > Set Timeout on the menu.
Using the Connect Button With a Scanner
1. Select the scanner from the list on the WD Print Share Control Center.
2. Click Connect. The status changes to Connected.
3. Launch the software that came with your scanner.
4. After the scanning job is done, disconnect by clicking Disconnect or let the scanner
disconnect automatically in the predefined time period in Tool > Set Timeout on the
menu.
Using the Scan Button
You can also use the Scan button on the WD Print Share Control Center to activate
scanning with the industry standard TWAIN or WIA interface.