Installation, Optional 4-sided faceplate installation – Regency Horizon HZ33CE Small Gas Fireplace User Manual
Page 48
48
Regency HZ33CE Gas Fireplace
INSTALLATION
OPTIONAL 4-SIDED FACEPLATE INSTALLATION
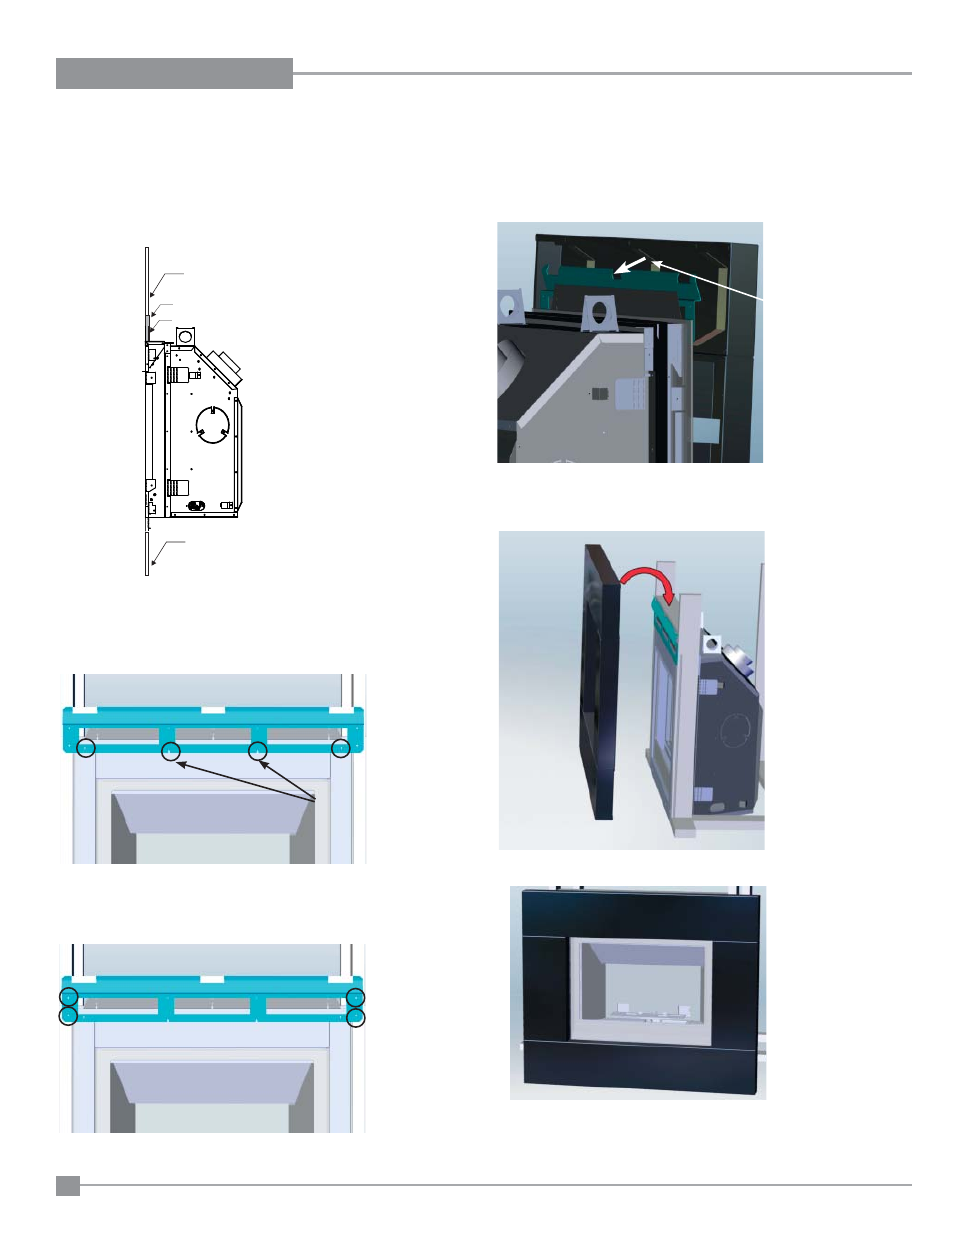
If installing the optional faceplate ensure the combustible
and non combustible material around the unit are installed
fl ush with the unit. (See Diagram 1 below).
The faceplate cannot be installed if materials are not fl ush.
1. Install 2 middle screws on unit face - do not tighten. Slide
bracket over screws then tighten. Install 2 outer screws .
2. Install four (4) wood screws, two (2) on each side of the
bracket into the wall studs as shown below.
Diagram 1- Materials fl ush w/unit.
Diagram 2 -Bracket screw locations on unit.
Diagram 3 -Bracket screw locations.
Diagram 4 -Line up faceplate and bracket.
Middle Rib on Faceplate
Diagram 6 -Final Install
Diagram 5 -Hang faceplate on bracket
3. Line up the middle rib on backside of faceplate with middle indent on bracket.
This will centre the faceplate and allow 1/16" adjustment from side to side.
4. Lift faceplate up and lower gently onto bracket.
Install middle 2 screws on
to unit fi rst
Combustible
Material
Non-combustible Material (3-1/2" x 36")
Nailing Strip -1/2" back from unit face
Combustible
Material