Axle pro equipment instruction guide, Step 3: axle alignment assembly – STEMCO Axle Pro User Manual
Page 10
Axle Pro Equipment Instruction Guide
For your protection, use Standard Shop Safety Procedures during this process
Page 10 of 24
01 577 0092
SEPT 2011
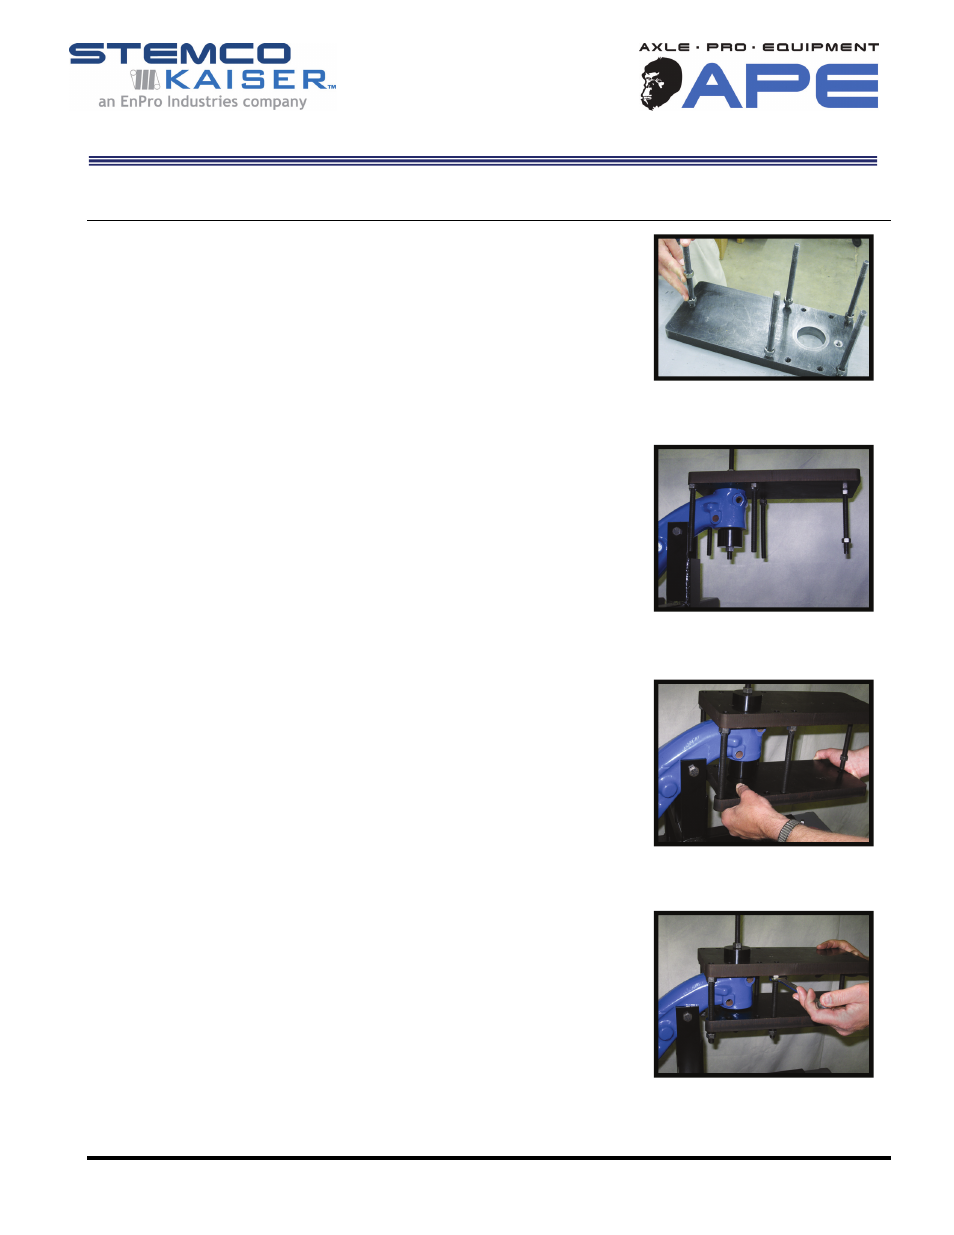
Step 3: Axle Alignment Assembly
a. Install four threaded rods with welded nuts against upper
plate. (upper plate has no cut out) Do Not Tighten.
b. Install adjusting threaded rod with welded nut against upper
plate plus one additional nut. Do Not Tighten (See Photo 3A)
c. Place upper plate over upper centering mandrel with threaded
rods pointing down. (See Photo 3B)
d. Pull bottom plate up carefully aligning threaded rods through
appropriate holes. Pull plate up until it is over lower centering
mandrel and flush against bottom of axle. (See Photo 3C)
e. While holding lower plate in place, place nuts onto five
exposed threaded rods far enough to insure plate will not fall.
Photo 3A
Photo 3B
Photo 3C
Photo 3D