Warning – Orbit Baby G3 Infant Car Seat and Base User Manual
Page 20
Installing the Car Seat Base and Car Seat
Installing the Car Seat Base and Car Seat
39
39
38
38
39
39
38
38
be visible and facing outward when
connectors are correctly routed.
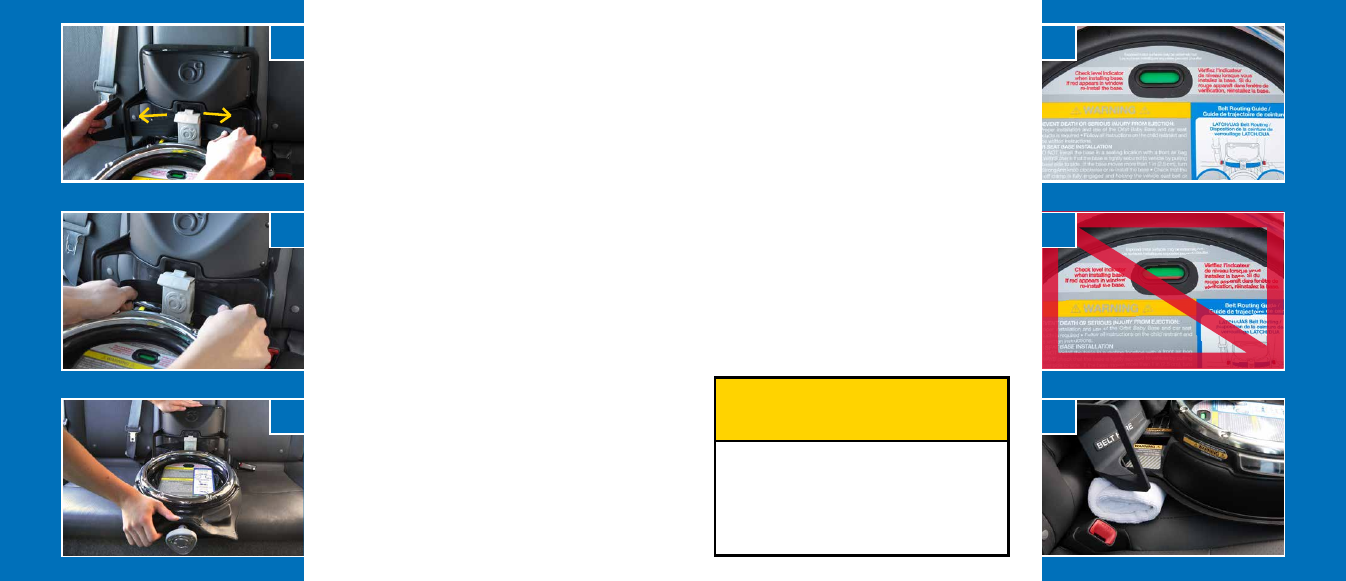
5. LATCH/UAS should slide freely behind
the lock-off clamp for installation.
a. Pull LATCH/UAS belt left and right
to check that it can slide freely
behind the lock-off clamp (Photo
E).”
6. If the vehicle seat back is adjustable,
lock the vehicle seat back into the
upright position.
7. Center the car seat base on the vehicle
seat between the vehicle LATCH/UAS
anchorages (Photo F), making sure the
areas between the vehicle LATCH/UAS
anchorages and the areas under and
behind the car seat base are clear of
obstructions.
8.
CHECK that car seat base is level
by looking at the level indicator. The
window in the level indicator must
be green (Photo G). If red appears in
the window (Photo H), try any of the
following:
a. Remove the car seat base. Position
a rolled towel under the car seat
base (Photo I), making sure the
front of the car seat base contacts
the vehicle seat. The towel should
be compressed as the StrongArm
tightens the car seat base into place.
b. Install the car seat base in a
different vehicle seating position.
c. Seek assistance from one of
the resources in the Need Help
Securing Your Car Seat and Car
Seat Base? section.
⚠WARNING⚠
Death or Serious Injury Can Occur
To prevent ejection, the car
seat base must be properly
reclined. The level indicator
in the car seat base must be
green when installed.
I
H
G
F
E
D
Installing the Car Seat Base: With LATCH/
UAS
cont’d