Coil tine track remover (optional) – Landoll SS/SSB/SSP/SSBP 8, 10, 12 Sure Stand Seeder User Manual
Page 26
2-16
1P480
ASSEMBLY INSTRUCTIONS
Coil Tine Track Remover (Optional)
NOTE
Cannot be used with the Scraper Kit
1.
Assemble the coil tines and the arm weldments to
the 1-1/2” diameter x 29” bar. The arm weldments
may be placed anywhere along the bar, but it is
suggested that they be mounted in the second hole
from the right end, and the third hole from the left
end. (Left end and right end designations are those
related to the operator when sitting in the operating
position). Mount 6 of the coil tines to the bar with 3/8”
x 2- 1/2” capscrews, flat washers, lockwashers and
nuts. Then mount the other two coil tines to the bar
with the 3/8” x 3” capscrews, lockwashers, and nuts
which also attach the arm weldments to the bar.
2.
Clamp the brackets loosely to the seeder frame with
u-bolts, lockwashers, and nuts. Attach the adjusting
angles to frame brackets with lockscrews. Secure the
adjusting angle from swinging with a 1/2” clevis pin
and hair pin cotter. Fasten the bar and tine
assemblies to the adjusting angles with 1/2” x 1-3/4”
capscrews and locknuts. Tighten the locknuts to
allow free side to side swinging. Center the entire
wheel track leveler behind the tractor tires. Tighten
the u-bolts against the seeder frame. See
Figure 2-16.
3.
Attach the chains’ end links to the adjusting angles
with 3/8” x 1-1/4” capscrews, flat washers,
lockwashers and nuts. There is one chain for the left
side and one chain for the right side.
4.
The vertical position can be changed by removing
the clevis pins and lock screws and moving the
adjusting angles up or down.
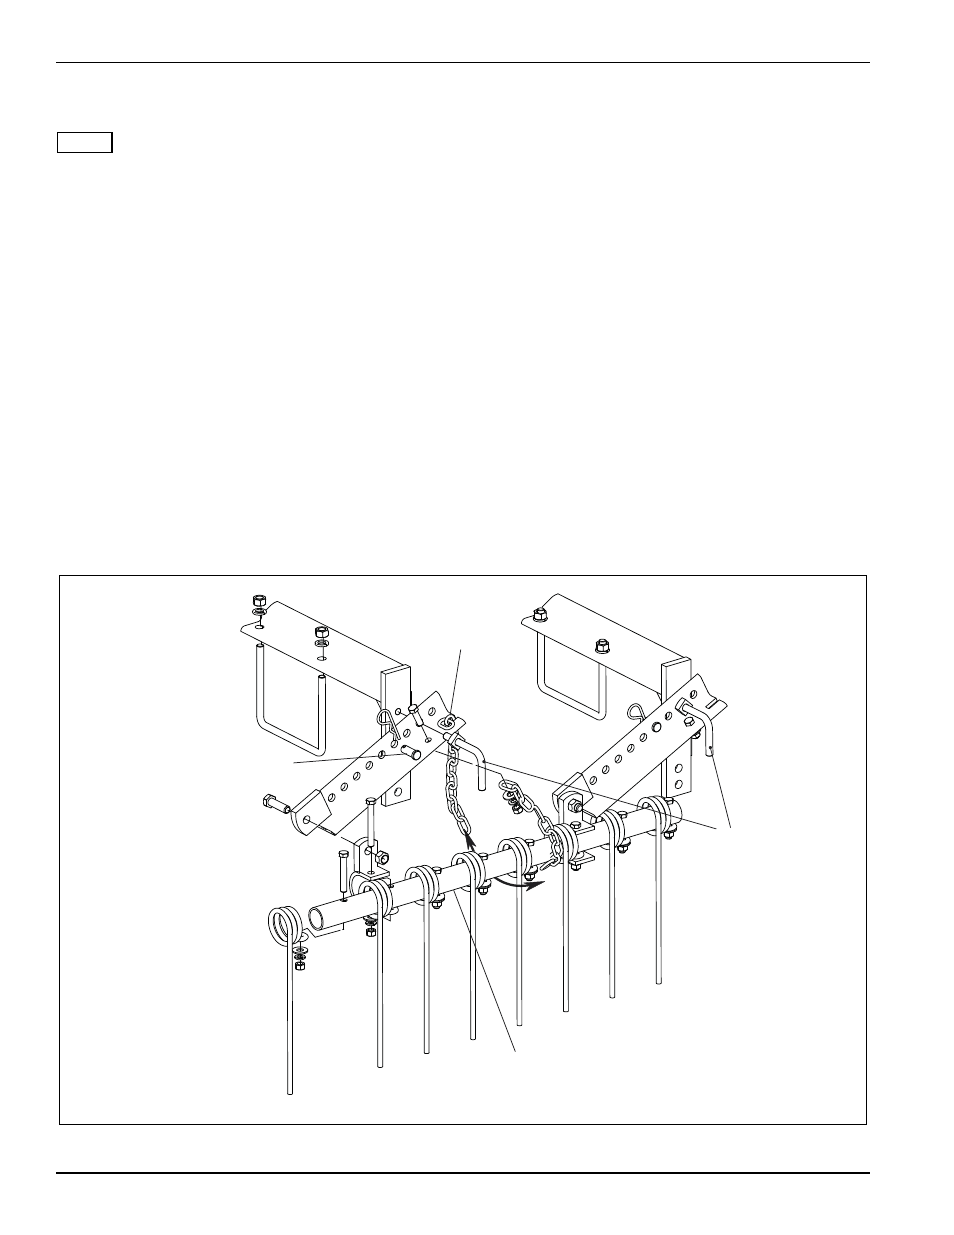
5.
To inactivate the tines, remove the 1/2” clevis pins
and loosen the lock screws. Then swing the bar and
tine assemblies upward and sideways. To hold in
place, wrap the chain under the bar and place the
chain into the slot in the adjusting angle. Re-tighten
the lock screws.
Figure 2-16: Coil Tine Setup
Bar & Tine Assembly
Wrap the chain under
the bar and place
the chain into the slot.
Clevis Pin, 1/2”
Lock Screws