Landoll 5K282 WARNING LIGHT KIT User Manual
Landoll Special machinery
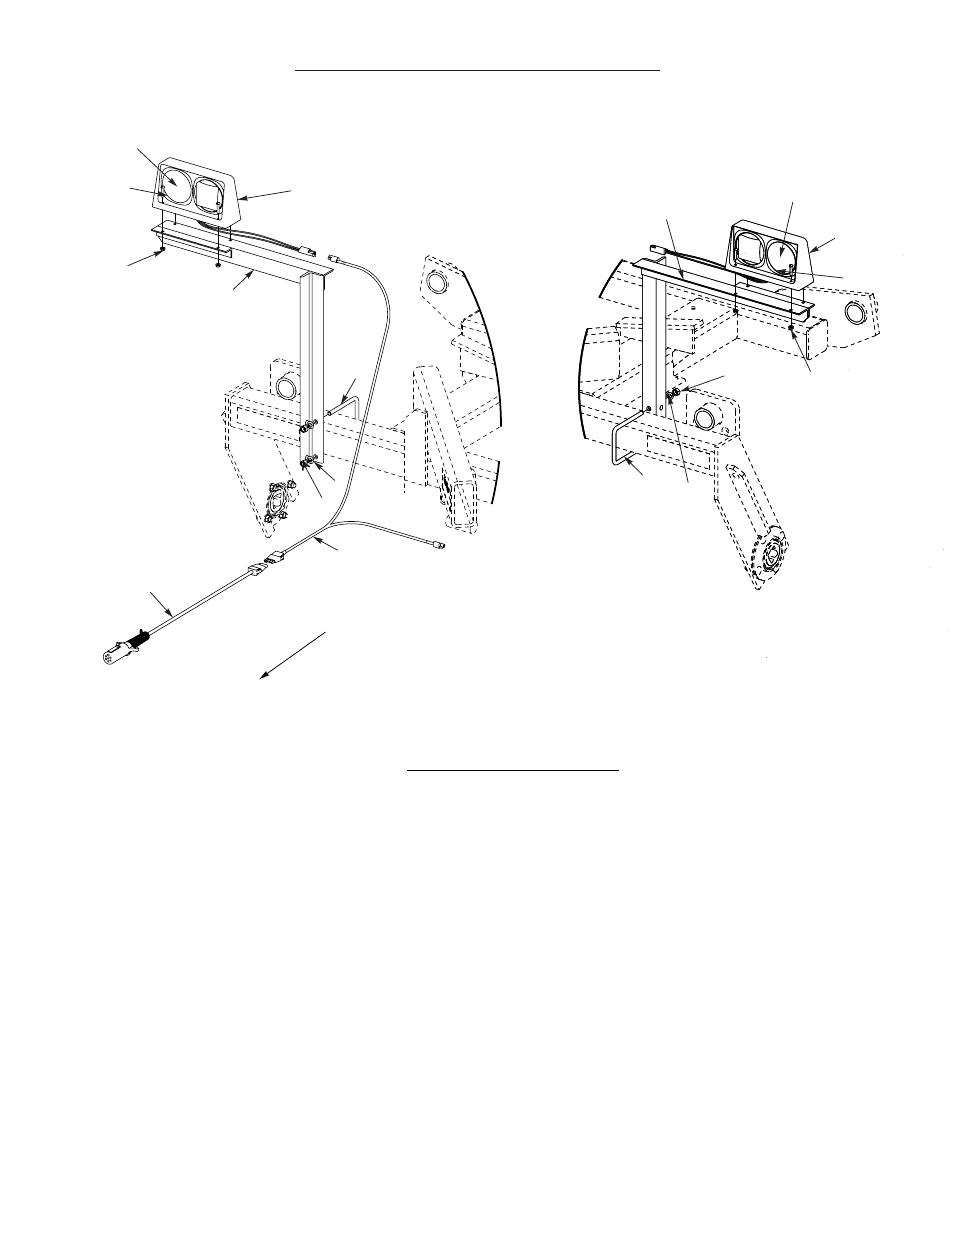
WARNING LAMP ASSEMBLY
Assemble a 4K869 Bracket Weldment to the right side of the machine center frame. Attach to outer
surface of front frame tube with ½” U-bolt, lockwashers, and nuts as illustrated above. Assemble
the other Bracket Weldment in similar fashion on the left side of the machine. (Note: On the left
side of the machine the bracket weldment needs to be assembled to the front frame tube on its
inside surface). Attach lamp assemblies with fasteners shown (Amber facing forward; Red and Amber
facing rearward with Amber in the outermost position).
Connect the “Wishbone” wiring harness ends to the connectors on the lamp assemblies. (Important:
wires are color coded on wishbone harness. Connect end with yellow wire to left side lamp assembly.
Connect end with green wire to right side lamp assembly). Run wishbone harness wires along front
frame member to the center of machine.
Run “Straight Section” wiring harness from front of the drawbar, along the hydraulic lines and over
to the wishbone harness connector at the center of the machine. Then assemble the straight section
harness connector to the wishbone harness connector. All wires must be firmly attached to the machine
frame members or hydraulic lines so they don’t droop or become torn loose by field debris. Use plastic
cable ties and electrical tape to secure all wiring.
8
5
2
4
3
7
1
10
9
1
7
8
6
3
4
2
FRONT
Amber
Amber
INSTRUCTIONS FOR 5K282 WARNING LIGHT KIT
0912
5K284