HiRO H50212 User Manual
Page 11
802.11n WLAN ADSL2+ Router User’s Guide
11
Installation & Setup
Follow each STEP carefully and only go to the next step once you have complete the
previous STEP.
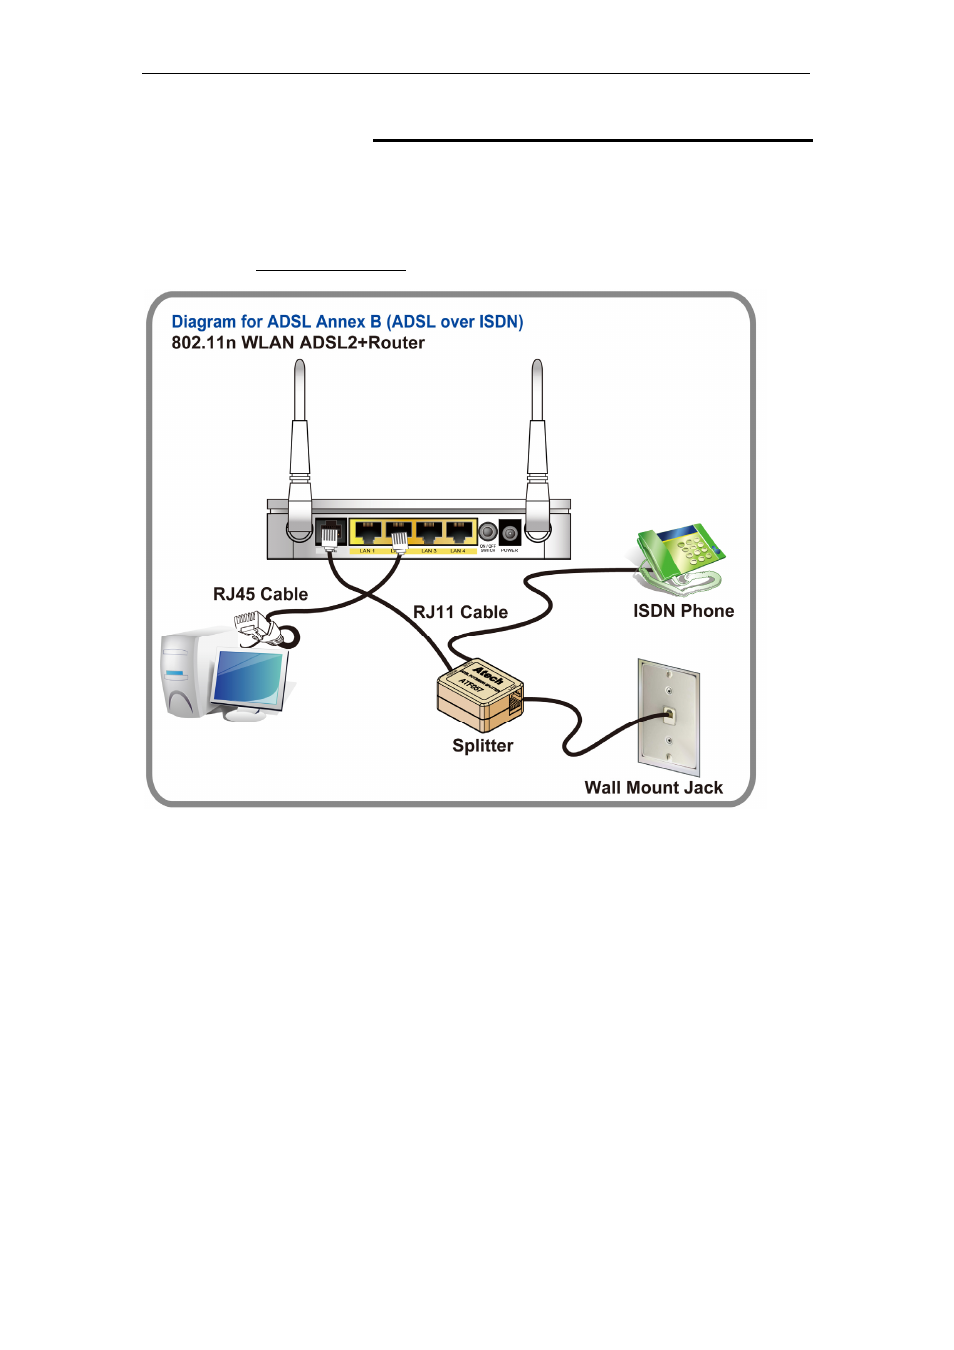
Connection of 802.11n WLAN ADSL2+ Router
If you have an ISDN telephone line connect the modem router as shown below:
1. Connect the supplied RJ45 Ethernet cable from your PC's Ethernet port to any of the 4
802.11n WLAN ADSL2+ Router's LAN Ports.
2. Connect the supplied RJ11 telephone cable from your home's telephone jack to the
“LINE” port of the
supplied splitter. Connect another RJ11 telephone cable to the
“MODEM”
port of the splitter and connect the other end of this cable to the LINE
port of
your 802.11n WLAN ADSL2+ Router.
(If there is no option Splitter, please connect the
supplied RJ11 telephone cable from your home's telephone jack to the “LINE” port of your
802.11n WLAN ADSL2+ Router.)
3. Connect a RJ11 telephone cable to the “PHONE” port of the splitter and connect the other
end to your telephone.
4. Connect the power adapter to the power inlet “POWER” of the 802.11n WLAN ADSL2+
Router and turn the “ON/OFF SWITCH” switch of your 802.11n WLAN ADSL2+ Router on.