Installation – Environmental Express AutoBlock III User Manual
Page 6
INSTALLATION
Front Door Installation
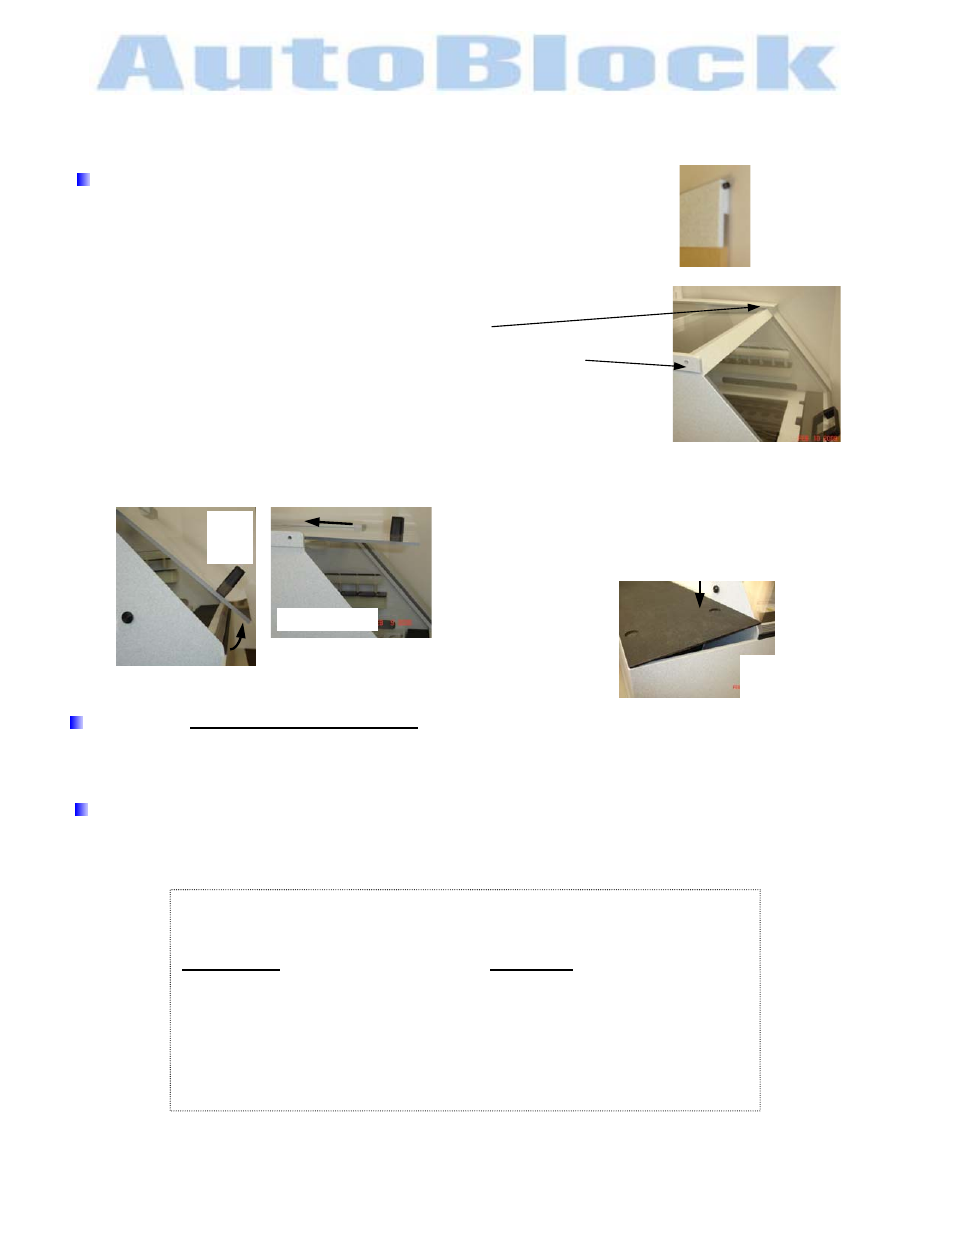
Unpack the front door assembly using caution not to scratch the acrylic.
Both hinge pins have been inserted into the door assembly
as shown.
Remove the hinge pin from the left side using a hex wrench.
Place door in cabinet opening,
sliding the right side hinge pin into the cabinet location.
Align the left side hinge pin location & screw in the second hinge pin.
Hand tighten the hinge pin.
Lift the door & close it. It will be a snug fit. Lift the door up & slide back.
After the installation of the front door, Environmental Express does not warranty
breakage due to operator handling.
Closing the
Pump Compartment Door
Insert edge first along the outside of the cabinet. Tilt the other edge at 10
0
angle along the filter side of
the cabinet. Push down to close.
angle
pump compartment
door as shown
push down
on this edge
lift
door
up
slide door back
Install Reagent Line
The following steps will connect 2.5 liter or standard 38mm top, reagent bottles to AutoBlock. These are
standard 2.5L acid bottles. For the DI water ports, 1 & 6, use a clean acid bottle filled with H
2
O.
Uptake Reagent Components
Components are supplied in a start up kit
SINGLE UNIT
DUAL UNIT
5
Flangeless Nuts
10
Flangeless Nuts
5 + 2 extra Flangeless Ferrules
10 + 2 extra Flangeless Ferrules
25’
Reagent Lines 1/16”ID
50’
Reagent Lines 1/16”ID
Vented Reagent Caps (optional)
Reagent Bottom of the Bottle Filter (optional)
ENVIRONMENTAL EXPRESS
For technical support call 1-800-745-8218 or send email to [email protected]
5528INSTALL rev 3
6
9/15/09