Enerpac HXD-Series User Manual
Page 6
6
WARNING:
To avoid personal injury
keep hands away from support arm and
working area during operation.
IMPORTANT:
The torque wrench always
rotates in the direction opposite the rotation
of the cassette.
WARNING:
Do not exceed
maximum torque of cassettes
and reducer inserts to avoid
danger of cassette failure and
bolt-shearing. Maximum torque of cassettes
and reducer inserts are specified in tables
and
on pages 12-15.
WARNING: Exceeding the maximum torque
for a bolt (nut) size will result in bolt shearing
and potential parts failure. These failures
could result in pieces being projected from
the wrench or bolting site. Failures will also
result in the torque wrench unit moving
rapidly away from the torquing point causing
potential injury to the operator.
IMPORTANT:
When making bolted
connections always consult the
manufacturers instructions or the
engineering recommendations.
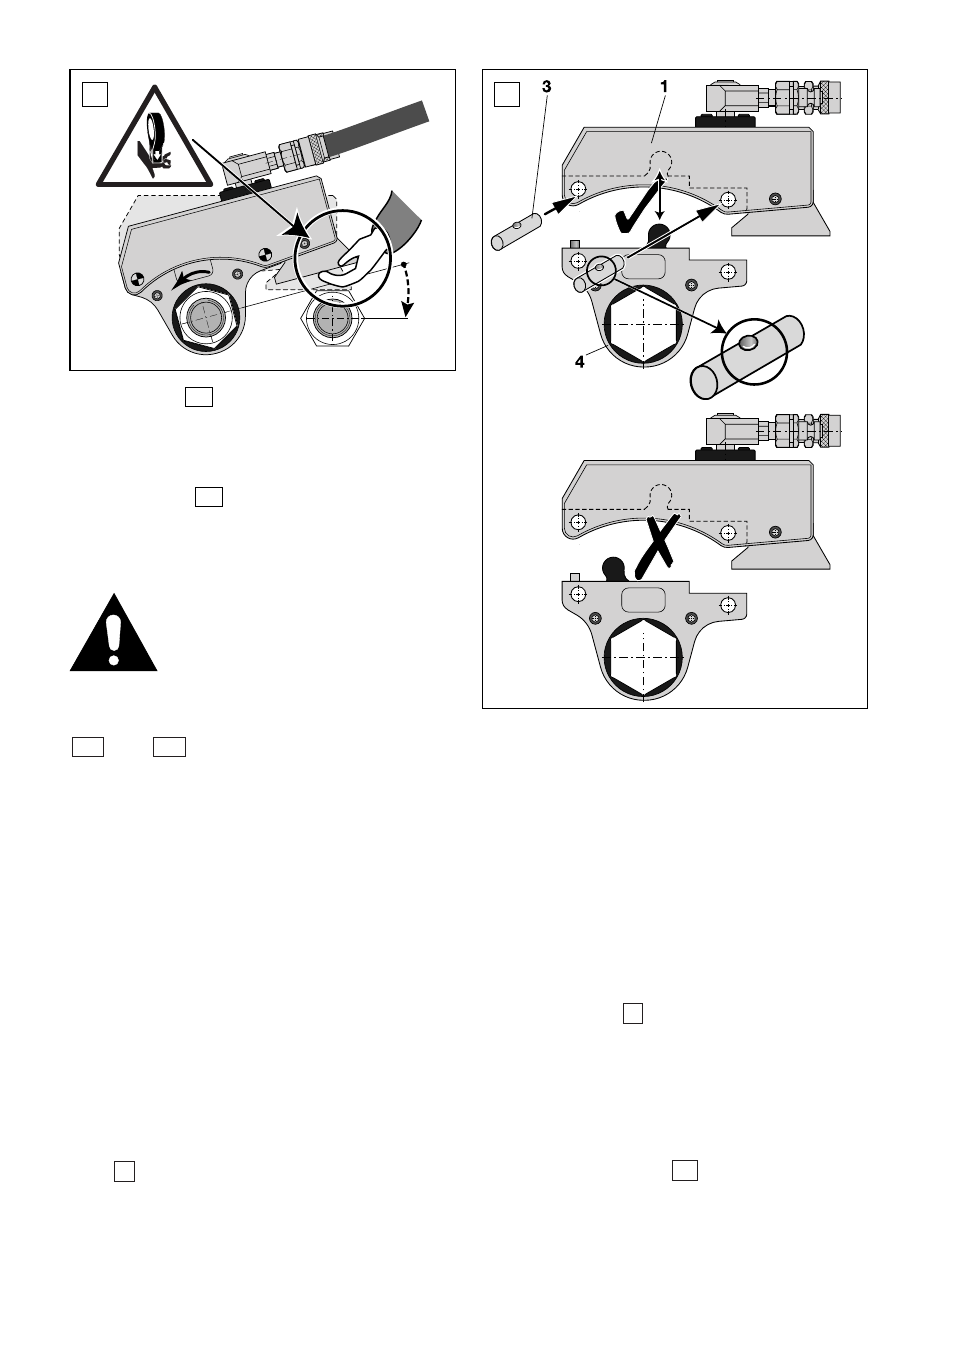
4.0 ASSEMBLING THE WRENCH
See
. All parts must be free of dirt and
lubricated according TO paragraph 6.1.
Follow steps 1-5 below:
1.
Remove the two dowel pins (3) from the
wrench unit (1).
2.
The lever of the cassette (4) must face
the contact surface in the wrench (1).
3.
Insert the cassette (4) into the wrench
unit (1).
4.
Secure the cassette (4) to the wrench
unit (1) using the two dowel pins (3). The
dowel pins must “click” into the correct
position.
5.
When using reducer inserts, see
illustration
on page 5, for correct
position of insert and holding ring into
the cassette.
6.
Connect the Enerpac THC-700 series
3,5:1 safety twin hoses (10) to the swivel
hose connection (2).
WARNING: See
on page 7 for the
correct way to connect the hoses
between wrench and pump.
10
5
9
A2
A1
8
8
8
9
“CLICK”