3 setting dip switches – Dascom DT-230 User Guide User Manual
Page 30
Tally Dascom DT-210/230
19
3 Setting DIP Switches
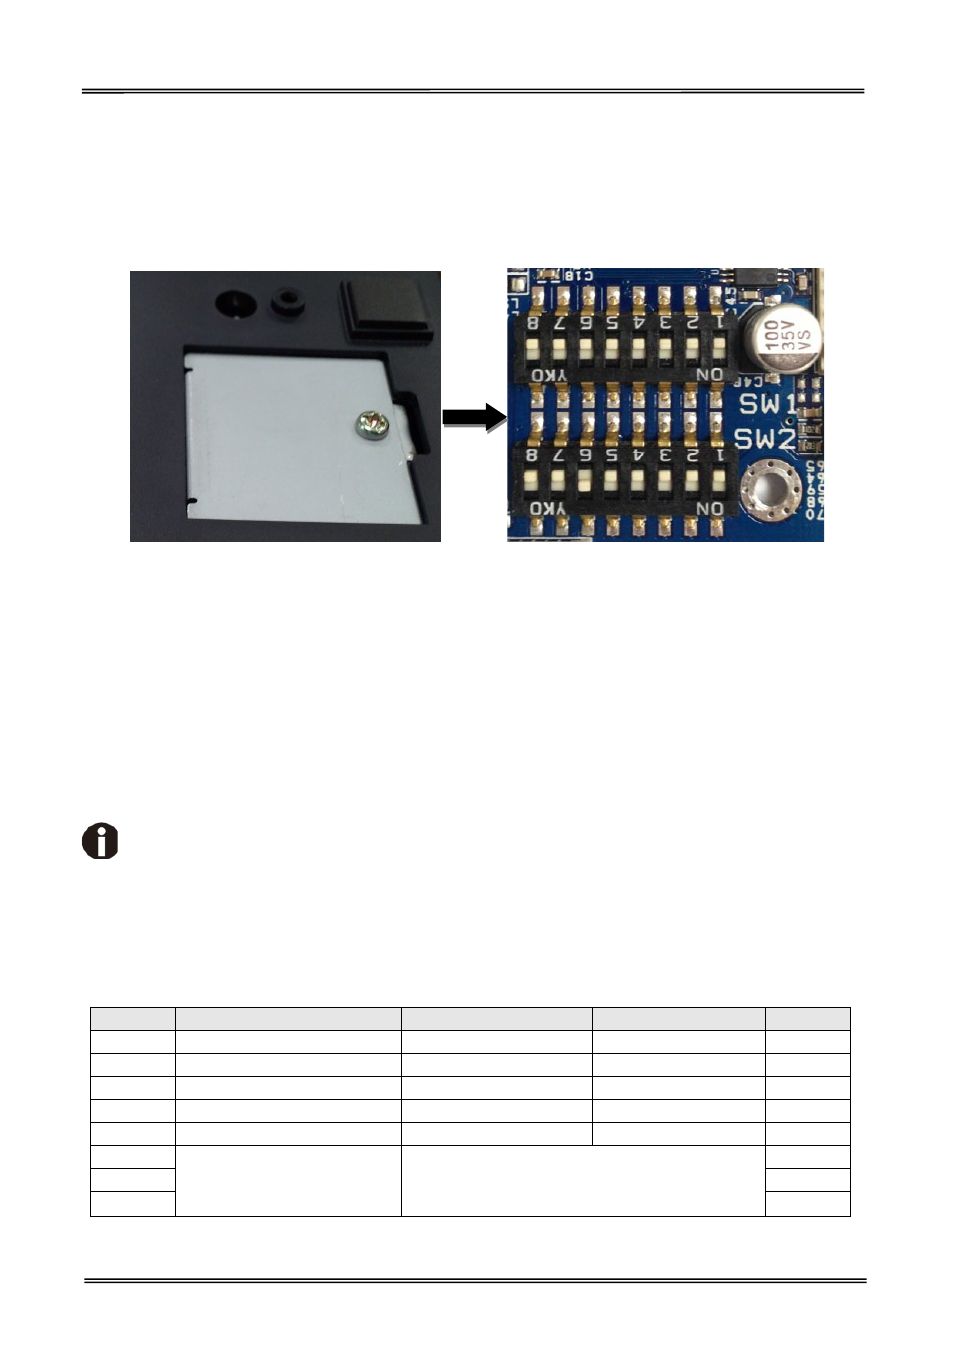
You will see a metal plate on the bottom of the printer. Remove the metal plate with a screwdriver.
You will find two DIP switches on the main control board as shown below.
Metal Plate DIP Switch 1 & Switch 2
There are two DIP switch banks on the main controller board (SW1 and SW2), eight DIP switches for
each bank. These DIP switches can be set on/off, using the tip of a tool, such as a small screwdriver.
The printer parameter such as printer density, baud rate, and auto‐cutter enable/disable etc. can be
set via these two DIP switches as follows.
New DIP switch settings are enabled after the printer is turned on!
Serial Interface (RS‐232C)
• DIP Switches 1
SW
Function
ON
OFF
Default
1‐1
Auto Line Feed at CR
Enable
Disable
OFF
1‐2
Handshaking
XON/XOFF
DTR/DSR
OFF
1‐3
Data Length
7bits
8bits
OFF
1‐4
Parity Check
Yes
No
OFF
1‐5
Parity Selection
EVEN
ODD
OFF
1‐6
OFF
1‐7
ON
1‐8
Baud Rate Selection
(bps)
Refer to the following table 1
OFF