Dakota Ultrasonics PVX User Manual
Page 12
Dakota Ultrasonics
8
2.3 Measure
The PVX is now ready to measure. There are four different measurement view
options, each with a specific purpose. The steps below outline how to toggle
between the different view mode options:
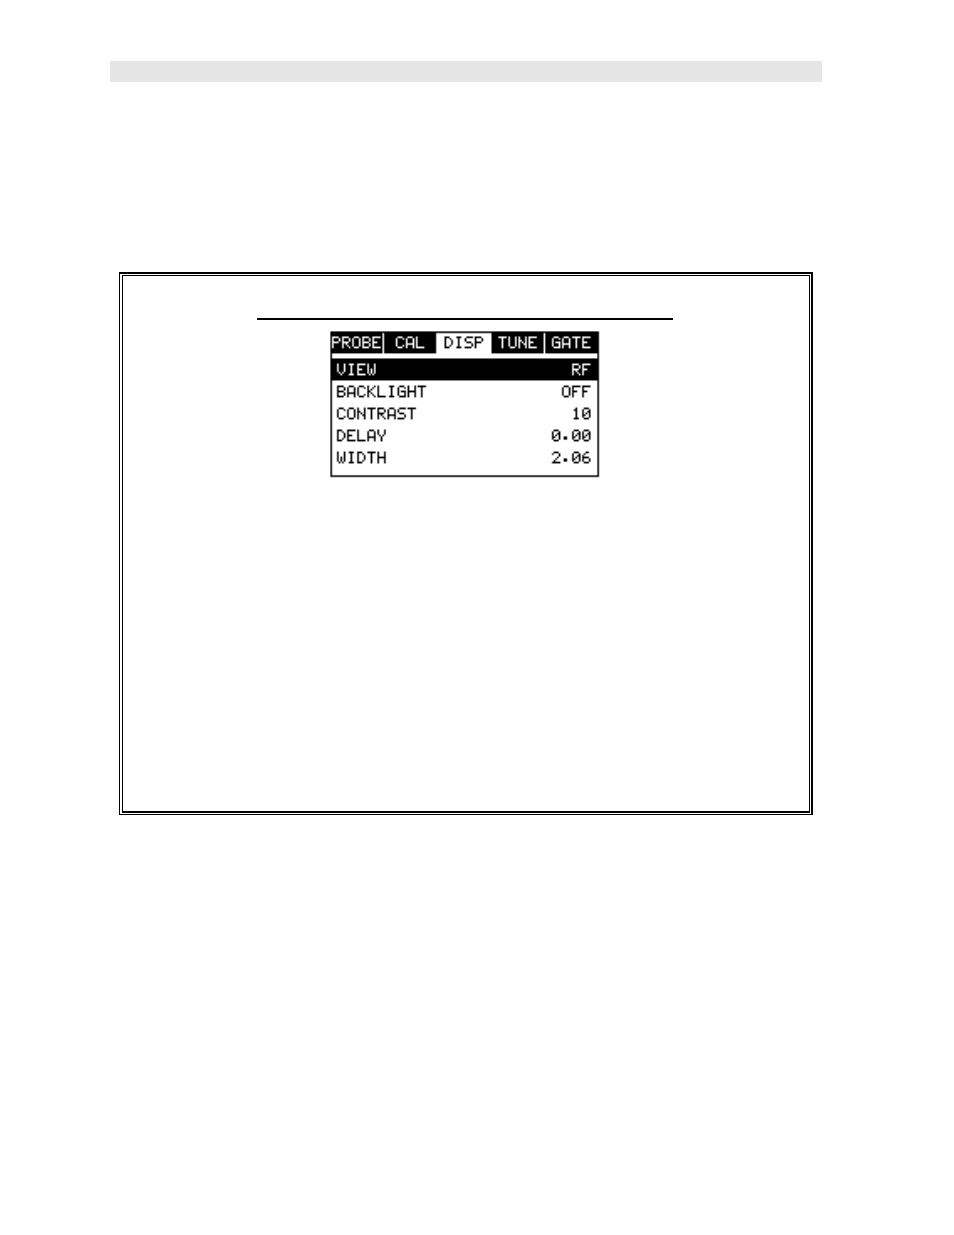
Selecting the Measurement View Option
1) Press the MENU key once to activate the menu items tab. Press the MENU
key multiple times to tab right and the ESC key multiple times to tab left until
the DISP menu is highlighted and displaying the submenu items.
2)
Use the UP and DOWN arrow keys to scroll through the sub menu items
until VIEW is highlighted.
3)
Use the LEFT and RIGHT arrow keys to scroll the view options.
4)
Once the view is displayed, press the MEAS key to return to measurement
mode.
RF: Is useful to see exactly what the signal looks like directly around the detect
point. This view is the preferred view for precision measurements, as it allows the
user to view smaller ranges (zoomed in) around the detection point (displayed as a
vertical dashed line). This can be done manually by adjusting the delay and width
settings. It also provides the user with the ability to view and select either the positive
or negative polarity option.
RECTIFIED (RECT): Displays the entire range being scanned. This screen is useful
to “get the big picture” when viewing wide ranges (zoomed out). The point which is
triggering the digital thickness reading (called the detect) is displayed as a vertical
dashed line.