COATS Kit 85608609, Wheel Lift Accessory User Manual
Page 4
4 •
COATS
10.
Remove two bolts from transmission (see step
8). Reserve bolts for later use.
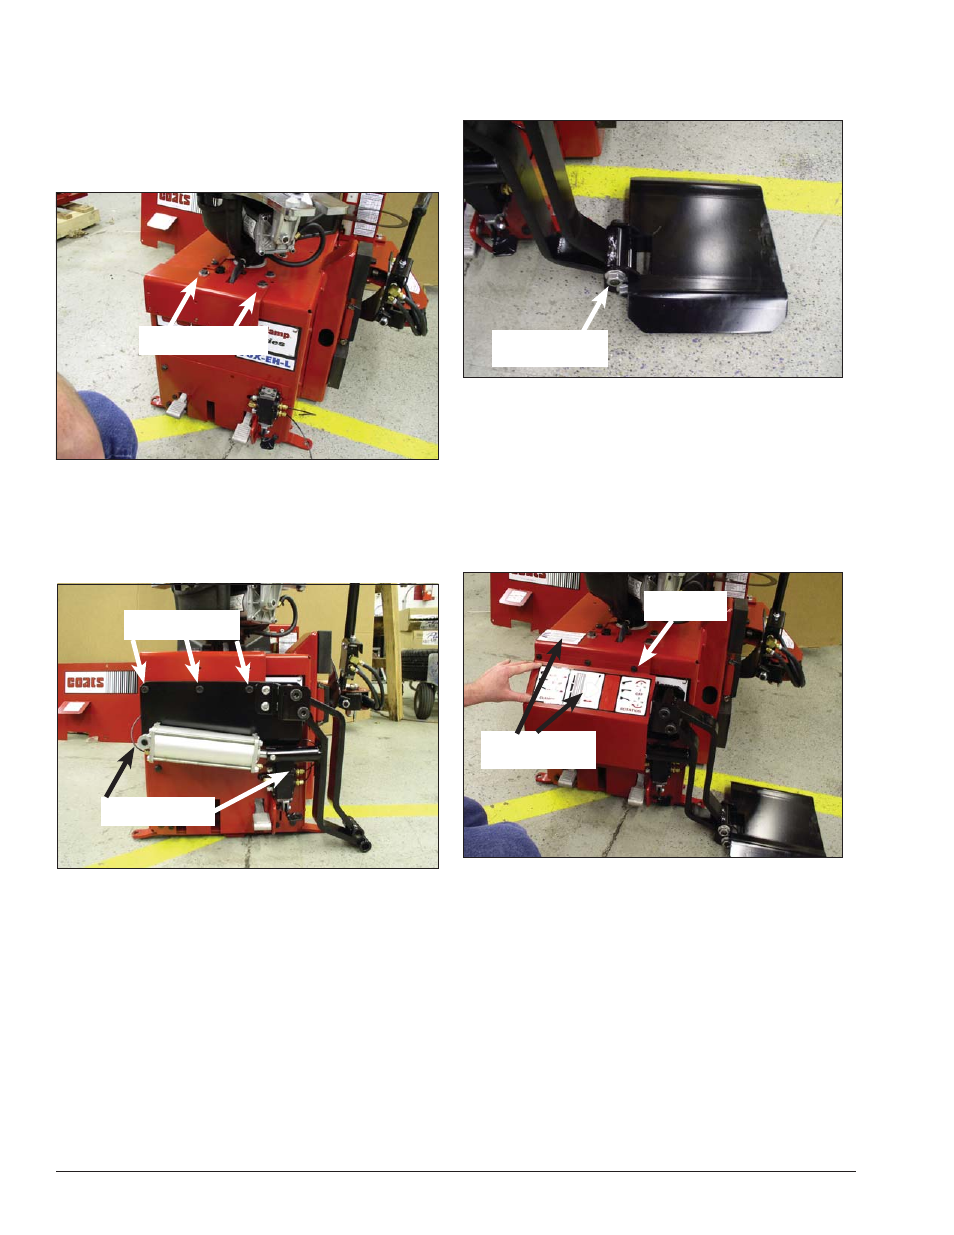
11.
Place lift mounting bracket on chassis and align
on the holes. Now install the lift mounting bracket to
the chassis using the two reserved bolts from step 10.
Important: Torque bolts at 30 foot pounds.
12.
Install the wheel lift assembly to the lift mount-
ing bracket using three thread cutting screws.
13.
Route the two 1/8-inch tubes, from the lift pedal
valve, behind the lift bracket and connect the tubes to
the lift cylinder.
14.
Assemble the lift pad to the lift assembly using
the supplied shoulder bolt. Be sure to grease the shoul-
der bolt and tighten it securely.
15.
Reconnect air supply and machine test checking
for air leaks.
Important: Upon initial air supply connection, it is
normal if the Tire Lift jumps 2 or 3 inches the first time
it lifts, so be careful and expect that to happen.
16.
Attach the new pedal bracket cover using sup-
plied thread cutting screws.
17.
Apply new pedal and clamp instruction decals.
18.
Reassemble side panel.
Fasten Lift Pad
Using Should Bolt
Fasten New
Pedal Guard
Apply Pedal And
Clamp Decals
Install Lift Mounting
Bracket
Fasten Wheel Lift
Assembly
Connect Cylinder
Tubes