COATS Kit 85609017 Pneumatic Sleeve User Manual
COATS Equipment
85608573 01 10/13
1 of 1
© Copyright 2013 Hennessy Industries and COATS
All Rights Reserved
85609017 Pneumatic Sleeve
For use with COATS ProRide Wheel Balancer
with Pneumatic Locking
Hennessy Industries • 1601 J. P. Hennessy Drive, LaVergne, TN USA 37086-3565 (800) 688-6359 • (615) 641-7533 • (615) 641-5104 FAX • www.ammcoats.com
Pneumatic Sleeve
IMPORTANT: Always remove the wheel assembly
from the pneumatic shaft before disconnecting the air
supply from the machine.
Standard Back Cone Mounting Procedure
Using the Pneumatic Sleeve
Most original equipment and steel wheels can be
mounted properly using this method. The wheel is cen-
tered on a cone from the inner side of the hub.
1.
Select the cone that best fits the center hole in the
wheel. Slide the cone onto the shaft with the large end
towards the faceplate.
2.
Lift wheel onto the shaft and center it on the cone.
3.
Attach the pressure cup to the pneumatic sleeve
and install the assembly onto the shaft.
4.
Press down on the positioning pedal to mount the
wheel on the shaft. The wheel must be forced firmly
against the faceplate.
Pin-plate Mounting Procedure Using the
Pneumatic Sleeve
1.
With the wheel off the balancer, check to see if the
pins mate precisely to the lug holes of the wheel.
2.
Select the cone that best fits the center hole in the
wheel. Slide the cone onto the shaft with the large end
towards the faceplate.
3.
Lift wheel onto the shaft and center it on the cone.
4.
Slide the pin-plate assembly onto the shaft so the
pins mate to wheel lug holes.
5.
Install the pneumatic sleeve onto the shaft. Be sure
the pneumatic sleeve is facing in the correct direction.
6.
Press down on the positioning pedal to mount the
wheel on the shaft. The wheel must be forced firmly
against the faceplate.
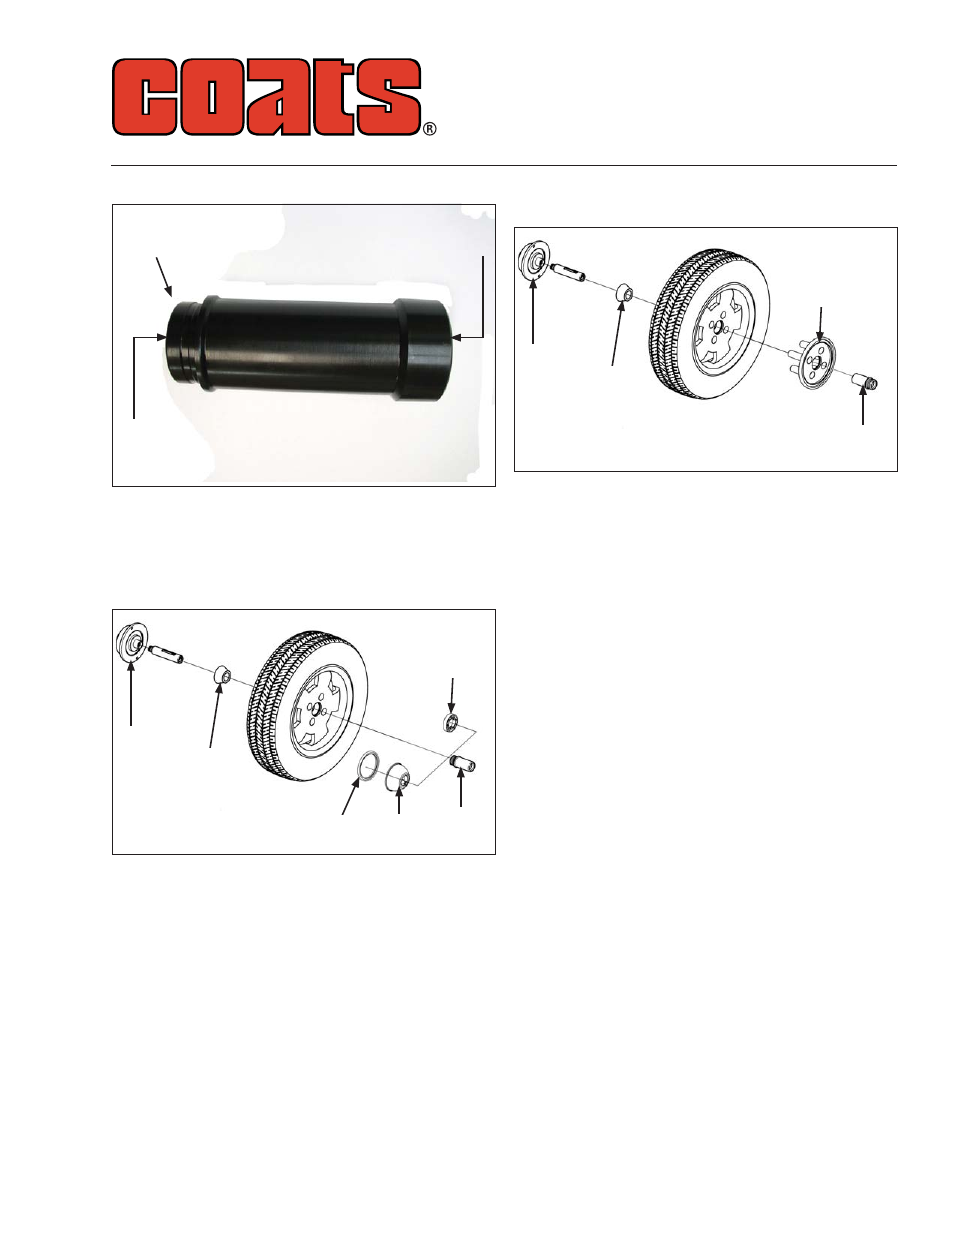
Attach Pressure
Cup Here
Important: When using a pin-plate
adapter, turn this end of the Pneumatic
Sleeve to the balancer for proper
wheel mounting.
Faceplate
Cone
No-Mar
Ring
Pneumatic
Sleeve
Pressure
Cup
Rubber Lip
Important: When using a cone adapter,
turn this end of the Pneumatic Sleeve
to the balancer for proper wheel
mounting.
Faceplate
Cone
Pin-plate
Pneumatic
Sleeve