Web viewer – CCTV Camera Pros iDVR-PRO H Series DVRs User Manual
Page 90
Web Viewer
90
|
Web Viewer
\
\
To save the video
1.
Click <
> to start saving.
2.
The video from the selected channel will be saved to the PC in the AVI format. (Default path: C:\SaveFolder)
Click <
> again to stop saving. Click
saving path.
\
\
1.
Click <
>.
2.
The current screen will be printed with the printer connected to the PC.
\
\
Screen capture
1.
Click <
>.
2.
The current screen of the selected channel will be saved to the path specified in the PC. (Default path: C:\SaveFolder)
Click
\
\
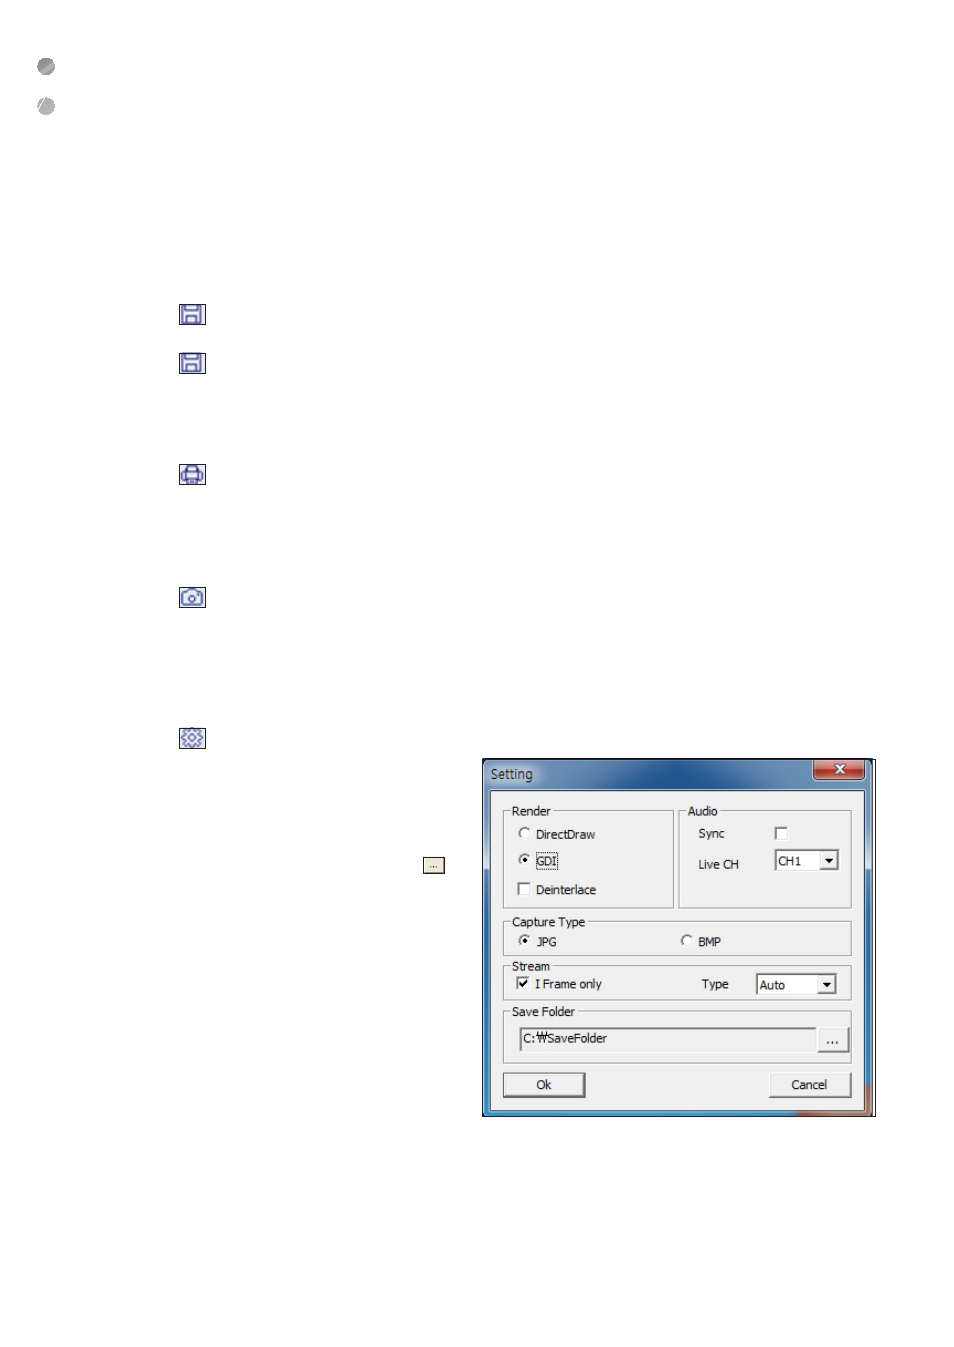
ActiveX Settings
1.
Click <
>.
2.
When the setup screen appears, you can change the
settings of the render type, audio, capture and saving
path as well as the video streaming.
i
Render : DirectDraw is recommended in order to
enable the hardware acceleration.
3.
If you want to change the saving path, click < >
(Save Folder) and specify a new path.
The Windows Vista user cannot change the saving path.
4.
Change the streaming settings according to the PC
specification and network environment.
Auto mode is recommended.
i
Sync : If this option is set, the audio signal will be
synchronized with the video signal.
However, you may encounter a delay due to
buffering for the synchronization.
i
Live CH : Set the audio signal to use in live
monitoring mode.
i
I Frame Only : Only the I frames (key frames) will
be transferred.
i
Type
-
Auto : The DVR will optimize the quality and FPS to the network status and specification of the connected PC
before transferring the data.
-
Main : The video will be transferred in high definition (HD).
-
Second : The video will be transferred in a medium definition (SD).
5.
When done, click