Advance adapters inc. p/n: ranger od – Advance Adapters RANGER OD User Manual
Page 5
17.
Fasten the Ranger securely to the transmission jack.
18.
Bolt the Ranger unit into place using the bolts supplied. On some
models, it may be necessary to modify the floorboard slightly to
clear. The bolts on the left side of the unit will need to be started into
the bellhousing before the unit will fit.
NOTE:
Do not suck unit up
with the bolts.
19.
Run a paper-thin layer of silicone sealer on the rear plate and next
to the retainer to seal off any oil that might transfer between the two
units. Without the silicone sealer, you will have oil leakage between
the two units. The silicone must be wet while bolting the transmis-
sion to the overdrive.
NOTE:
An excess amount of silicone can
cause misalignment of these units. This can cause the unit to pop
out of gear, excessive wear, and ultimately will void the warranty.
20.
Using the transmission jack, bolt the original transmission to the
Ranger using the stock bolts.
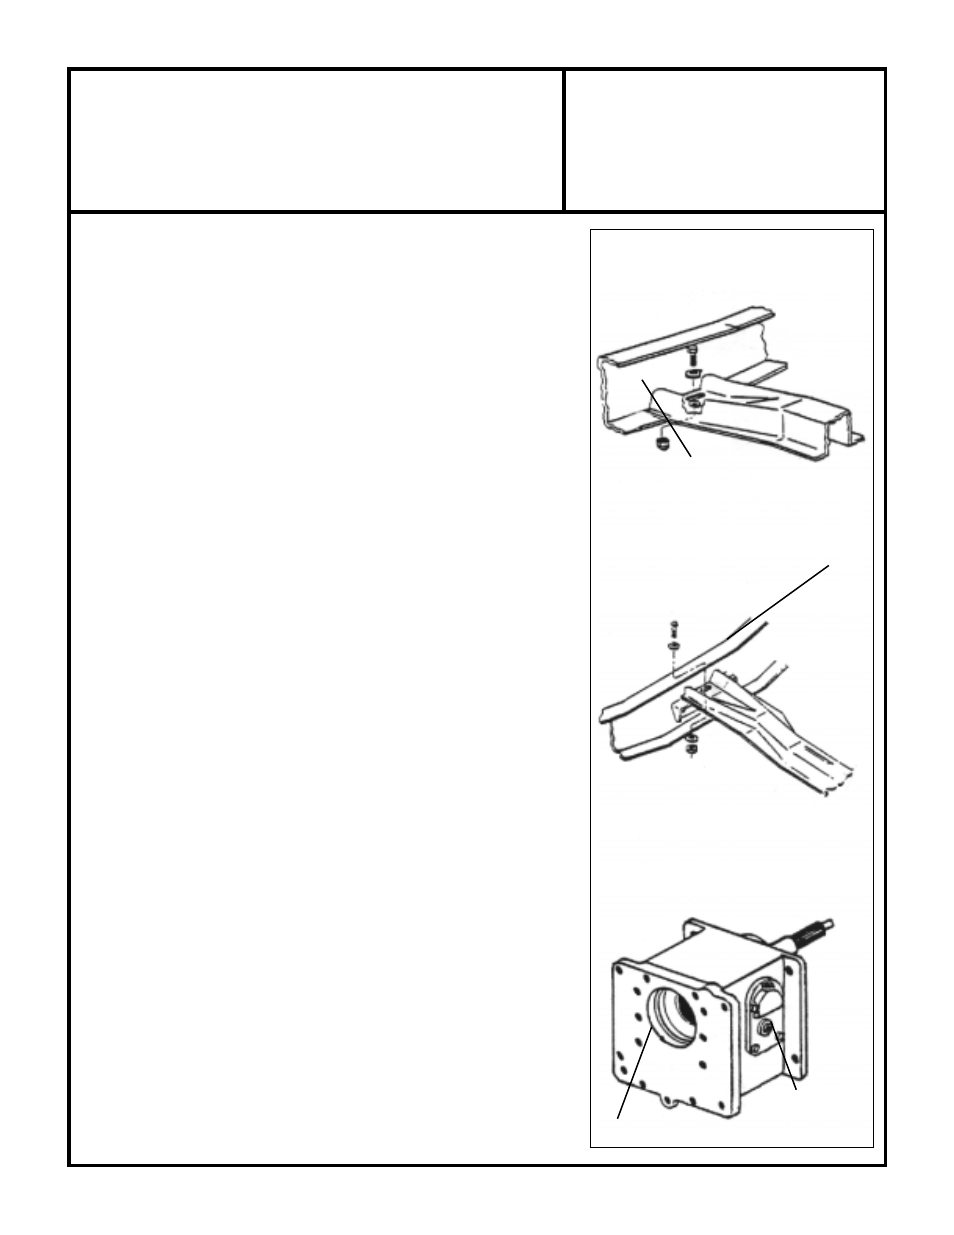
21.
With the transmission jack still in place, check the position of the
rear crossmember (if you vehicle is so equipped). If the original
transmission was supported by this crossmember, it will be neces-
sary to reposition it on the frame 7-1/2" further back. The relocation
is fairly simple on most applications.
22.
Reinstall the rear crossmember and secure it firmly to the frame and
transmission.
CAUTION: Check all connections thoroughly
before lowering the transmission jack. Failure to do so could
result in bodily injury.
23.
If it was necessary to remove the exhaust system, make all
necessary modifications and reinstall. On some models, the
emergency brake cables are supported by rods that hook to the
crossmember. When the crossmember is relocated back 7-1/2",
you should purchase a cable clamp to take up the excess slack.
24.
Now, reconnect the speed-o-meter cable and backup light switch
wires and 4WD indicator light wires where applicable. 4WD models
will possibly need the 4WD shift handle bracket modified. Ford and
some Chevy vehicles will be able to use stock speed-o-cables.
25.
Reinstall the shortened drive shaft and be certain the bolts on the
carrier bearing and the rear "U"-joint are tight. On 4WD vehicles, the
new front driveshaft lengthened 7-1/2" is now reinstalled with special
attention to tightening the bolts on the front differential and the
transfer case flange.
26.
Before the tunnel can be installed, it must be modified with either a
sabre saw or air chisel.
CAUTION: Use safety glasses to avoid
injury while working with any of these power tools listed.
Cut a new shifter hole approximately 7-1/2" from your main 4 speed.
On manual shifter units, this will also be a good time to cut the hole
for the chrome shifter handle. The hole for the handle on your
Ranger should allow for mounting the boot screws to the tunnel or
INSIDE FRAME
PERCH MOUNT
REAR CROSSMEMBER VARIES IN DESIGN.
THEY WILL REQUIRE RELOCATION 7-1/2"
FURTHER BACK.
OIL FILL PLUG
TRANSMISSION OR TRANSFER
CASE CROSSMEMBER
SUPPORTS
"A" DIAMETER
ADVANCE ADAPTERS INC.
P/N: RANGER OD
P.O. Box 247, 4320 Aerotech Center Way
Paso Robles, CA 93447
PAGE 5 OF 11
Telephone: (800) 350-2223
Fax: (805) 238-4201
Page Rev. Date:
12-28-99