Snorkel AB46JE User Manual
Page 30
Chapter 8 – Prestart Inspection
26
AB46JE – 0260072
Note
Only use distilled water when refilling the batteries. Tap
water may contain metallic solids such as iron which can
reduce the life of the batteries.
4. Replace the caps on the batteries. The caps must
be in place and tight during machine operation.
Battery Terminals
To inspect the battery terminals:
1. Check the top of each battery, the terminals, and
cable ends. They should be clean and free of corro-
sion (refer to Figure 8.2).
2. If necessary, clean the top of the battery. Clean the
terminals and cable ends with a wire brush or terminal
cleaning tool.
3. Make sure all cable ends are securely fastened to
the terminals.
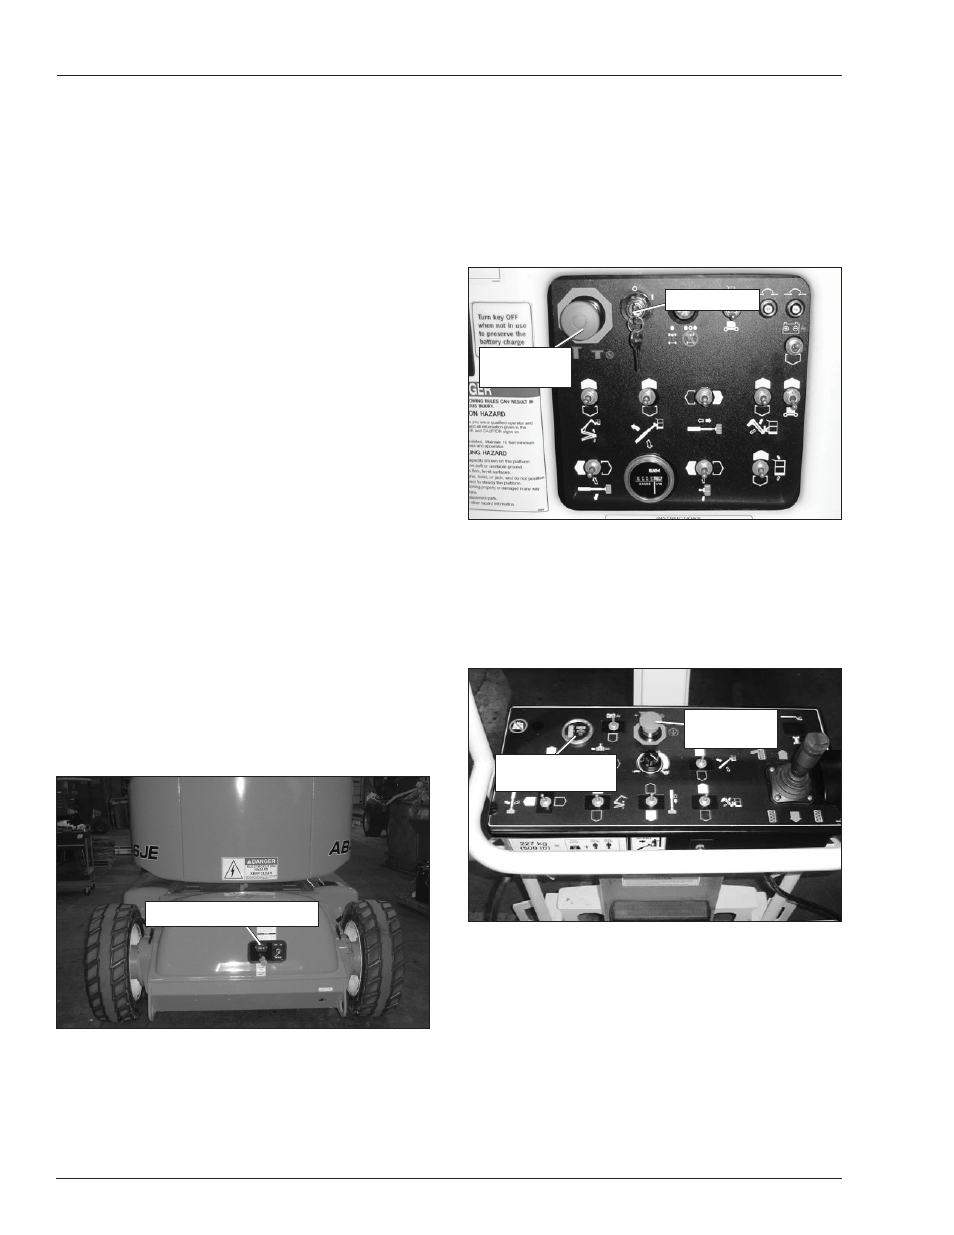
Battery Charger
To inspect the battery charger:
1. At the lower controls, turn the start switch to the off
position.
2. Plug the batter charger into a properly grounded outlet
(115 volt AC, 60 Hz) using a 3 conductor, 12 gauge
(1.5 mm) or larger extension cord. The extension cord
must be as short as possible and in good electrical
condition.
3. After a short delay, visually inspect the battery charge
indicator for proper charging rate (refer to Figure
8.3).
Figure 8.3 – Battery Disconnect Panel
As the batteries become charged, the indicator
light for each level of charge will blink until its
level is reached and then remain lit.
4. Unplug the charger.
•
Battery Charge Indicator
Battery Charge Indicator
Battery Condition Indicator
To inspect the battery condition indicator from the upper
controls:
1. Turn the battery disconnect switch on.
2 At the lower controls pull the emergency stop button
outward (refer to Figure 8.4).
Figure 8.4 – Lower Controls
3. Insert the key into the start switch and turn it to the
on position.
4. At the upper controls pull the emergency stop button
outward (refer to Figure 8.5).
Figure 8.5 – Upper Controls
5. Step down on the platform foot switch and check to
see that the battery condition indicator displays a
power reading at the upper controls (refer to Figure
8.5)
Cables and Wiring Harness
To inspect the cables and wiring harness:
1. Visually inspect all cables and wiring for wear and/or
physical damage such as loose connections, broken
wires, and frayed insulation.
Emergency
Stop Button
Start Switch
Emergency
Stop Button
Start Switch
Battery Condition
Indicator
Emergency
Stop Button
Battery Condition
Indicator
Emergency
Stop Button