Apple AppleShare IP 6.0 User Manual
Page 51
Setting Up AppleShare IP 6.0
51
If you select a disk, every folder on it (except the System Folder on a startup disk) will be
available to users who log on to the Web & File Server. If you select a folder, everything in the
folder (including enclosed folders and their contents) will be shared.
Note: If you will be providing Windows file sharing service, the name of your share point
should have 12 characters or fewer and contain no special characters or spaces.
6
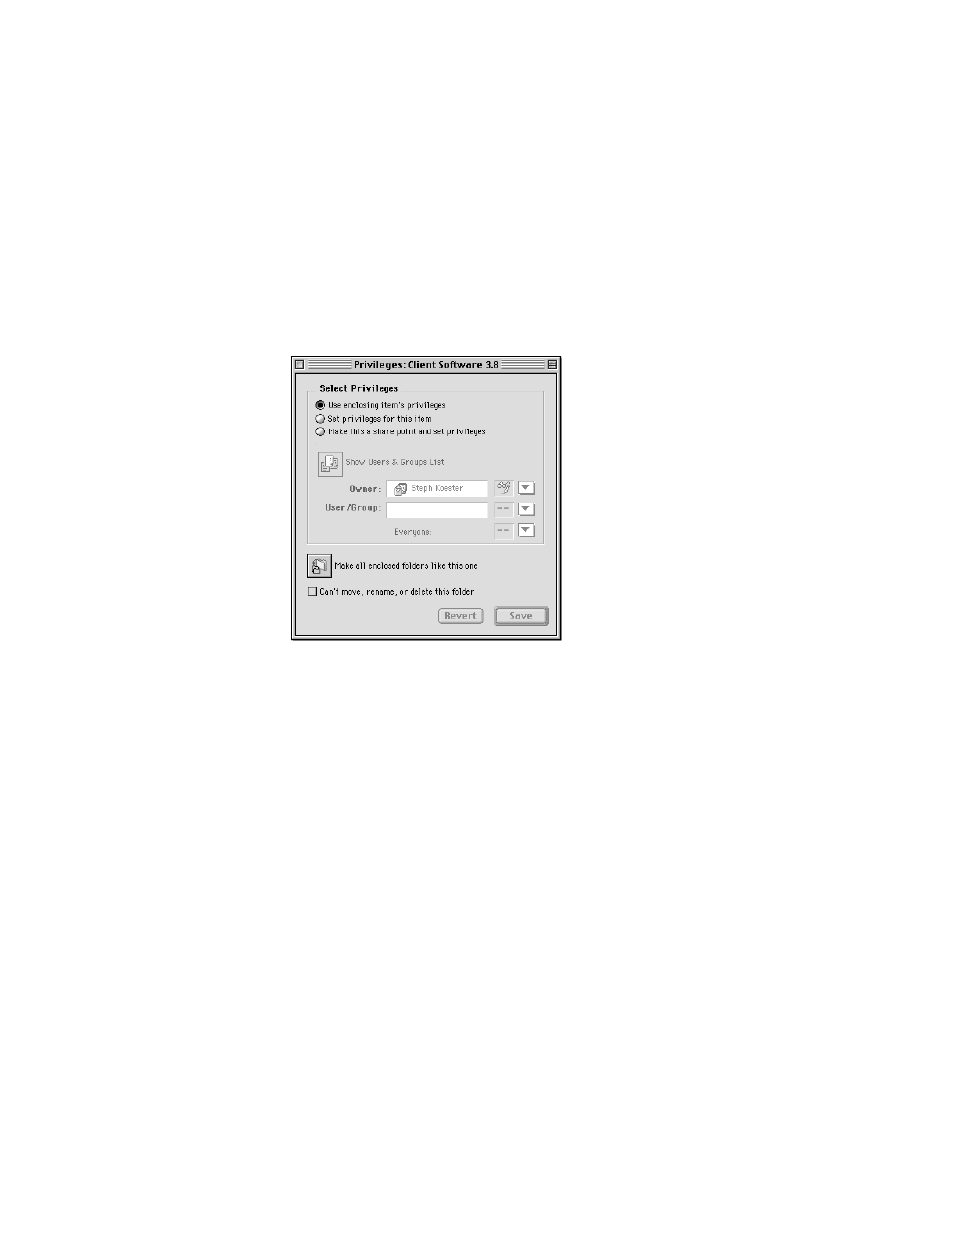
Click the Privileges button (or double-click the item you want to share).
The Privileges window for the selected disk or folder appears.
7
Click the “Make this a share point and set privileges ” button.
All of the folders that a share point contains are also shared. For security reasons, it’s often
better to share folders instead of entire disks.
8
Choose the appropriate access privileges for the Everyone category.
As the administrator of this computer, you are the default owner of all volumes and the
folders they contain. By default the owner has Read and Write access privileges (meaning you
can open or make changes to shared items).
“Everyone” includes everyone listed in the Users & Groups List (including Guest), so select
the access privilege that you want any registered user or guest to have when accessing this
share point. Following are brief descriptions of each privilege:
m Read & Write: Allows a user to see, open, and copy files and make changes to the
contents of the share point (including creating, deleting, moving, and modifying files).
m Read Only: Allows a user to see, open, and copy files.
m Write Only: Allows a user to change the contents of the share point by moving files and
folders in or to it, but not to see files or folders. A folder to which the Write Only privilege
is assigned is also known as a drop box.