Setting up your network identity – Apple AppleShare IP 6.0 User Manual
Page 14
14
Chapter 1
Setting Up Your Network Identity
You need to set your network identity and password in the File Sharing control panel to be
able to log on to the servers and make yourself the default owner of shared disks.
Note:
If you’re upgrading from a previous version of AppleShare or if you used the Mac OS
Setup Assistant after installing Mac OS 8.1, your file sharing settings will be retained. You can
skip ahead to “Setting Up Energy Saver” on page 23.
To set up the File Sharing control panel, follow these steps:
1
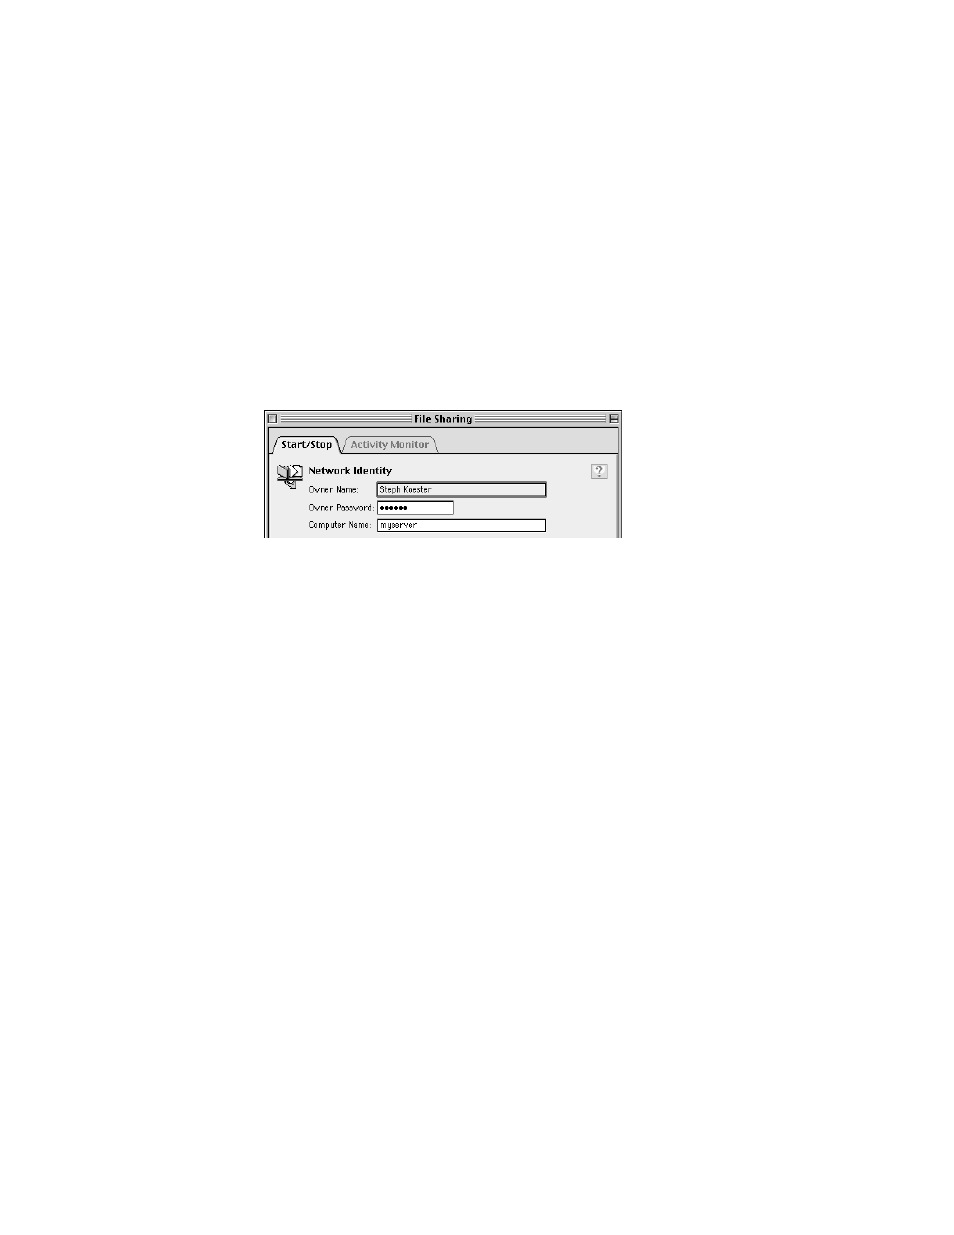
Open the File Sharing control panel.
2
Click the Start/Stop tab to see the Network Identity section.
3
Type your name in the Owner Name text box and press Tab.
Type the name you want to use when you log on to administer an AppleShare IP 6.0 server.
The name that you type will also be the default “owner” name for any items that you share.
The name is not case-sensitive. When you type this name to log on to the server, you can
type it with upper- or lowercase letters.
4
Type your password in the Owner Password text box and press Tab.
Your password can be up to eight characters long. Passwords are case-sensitive, so remember
any letters that you capitalize so that you can log on successfully. The password you enter
here becomes the default password you need to enter to use the AppleShare IP
administration programs.
After you press Tab, each letter of your password is replaced by a bullet (•).
5
Type a name for your server in the Computer Name text box.
The name can be up to 31 characters long and can contain any character except a colon (:),
equal sign (=), or Option-x (
≈
). The Computer Name is the name for your AppleShare IP
server that will appear in the Chooser.
6
Close the File Sharing control panel.
Your changes are saved and take effect immediately.