Photos pane – Apple iMovie HD User Manual
Page 15
Chapter 2
iMovie HD at a Glance
15
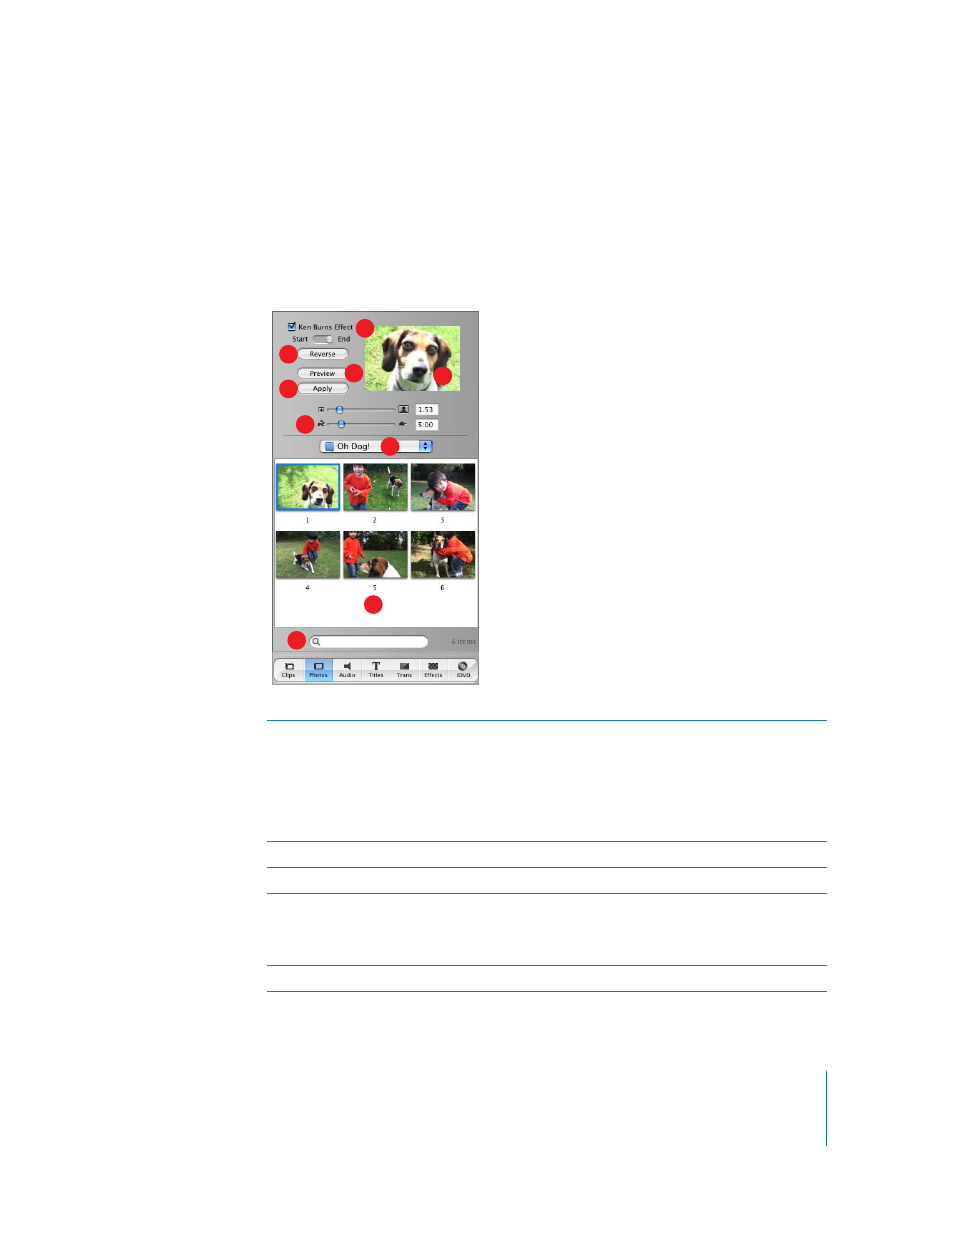
Photos Pane
Click the Photos button to open the Photos pane. Photos, drawings, or images you put
in your iPhoto library automatically appear here. You can drag an image directly from
the pane into the clip or timeline viewer. You can also use the Ken Burns Effect to add
panning and zooming effects to an image, and choose how long the image appears in
your movie.
A
Ken Burns Effect: Use these controls to set up panning and zooming effects for your photos and
images. Turn the effect off or on by selecting or deselecting the Ken Burns Effect checkbox. Click
Start and set how an image should first appear, then click Finish and set how the image should
appear at the end of the effect. Drag the image in the preview monitor to the positions you
want. Use the Zoom slider (below the monitor) to set the zoom. The Ken Burns Effect then
smoothly changes the image size and location on screen as the image is displayed in your
movie.
B
Reverse: Click to reverse the direction of the pan and zoom effect.
C
Preview: Click to see how the effect looks in the preview monitor.
D
Apply: When you have the effect the way you want, click this button to apply the effect to the
photograph. This creates a new clip in the Clips pane that you can drag to the location you want
in your movie. You can also drag an image into your movie and then select it and apply changes
later.
E
Duration: Move the slider to set how many seconds the image remains in view.
F
G
A
B
C
D
E
H
I