Prepare to install kit, Install kit – OR-Fab 84320 ROCKER SIDE ARMOR WRANGLER JK 4-DOOR User Manual
Page 2
2
JEEP JK Rocker Armor Kit
Prepare to Install Kit
1. Remove “Unlimited” or “Wrangler” decals from driver
and passenger side body. They will be obscured by
kit rocker panels.
2. Prepare mounting points.
a. Using an assistants, hold kit Armor in place and
mark the 13 holes for 2 door or 15 holes for 4
door. NOTE: Be sure door lines match up with
Armor, also marks are centered in Armor holes.
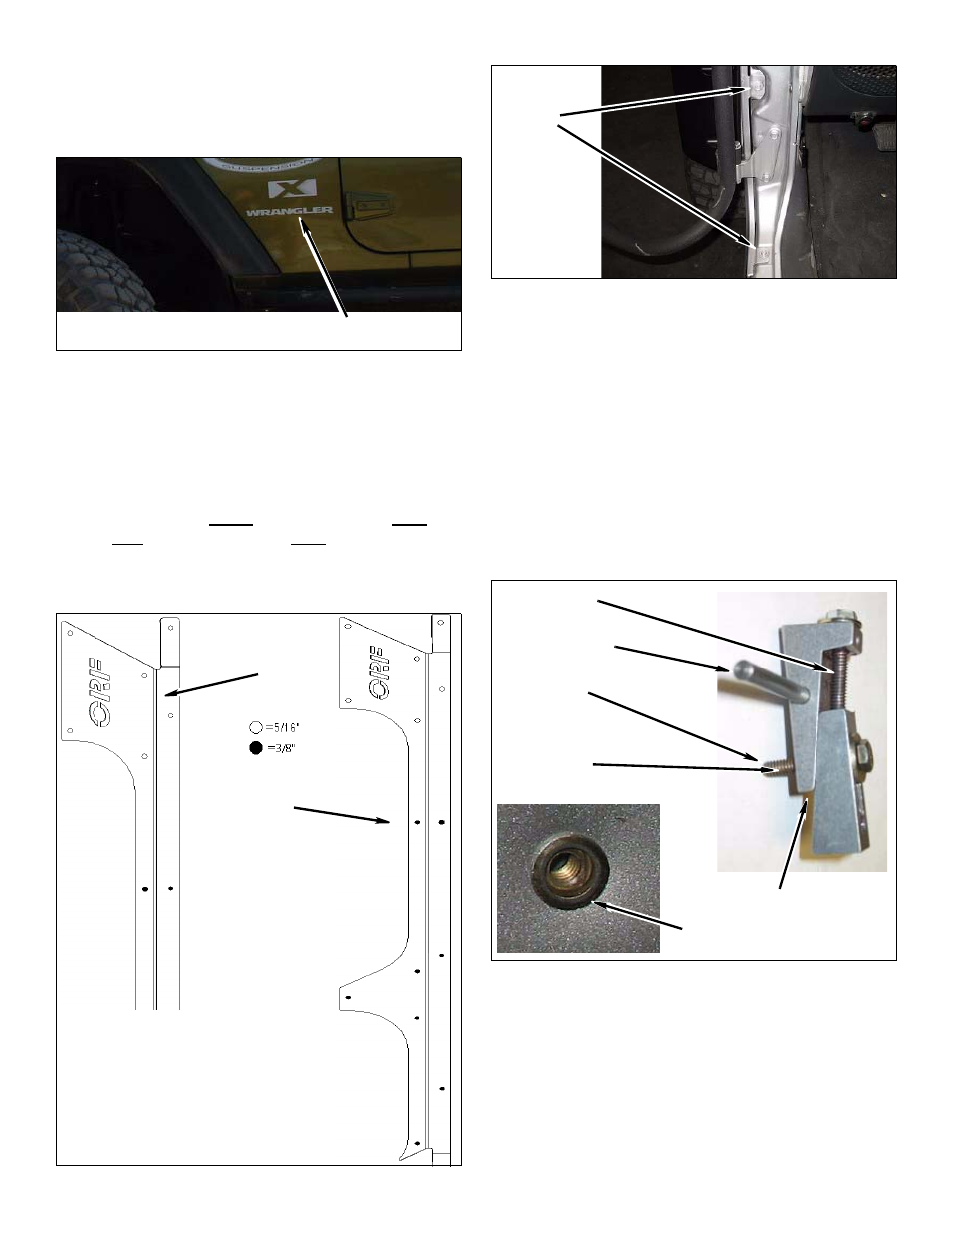
b. Drill all marked holes to 5/16”. Drill using a 3/8”
in only the seven rear holes in the 2-Dr. and
nine rear holes in the 4-Dr. as shown in the
fugure below. DO NOT drill deeper then 1” any-
where. NOTE: Some hole will drill through two
layers for the rivel to slide in flush with the body.
Decals
2 Door
4 Door
c. Loosen four front fender bolts, two each side.
d. Install rivet nuts into the 3/8” holes as follows:
Completely retract the slide and install rivet nut
finger tight on the stud. Place the stabilizing rod
in the provided hole. Insert rivet nut into the
drilled hole and tighten the slide screw to draw
the slide up the ramp. A light coating of grease
on the ramp and a drop of oil on the tightening
screw will ease the operation of the tool. Typi-
cally, you will need to loosen the slide screw and
screw the 1/4”-20 bolt finger tight again repeat at
least twice until the rivet nut it tight and won’t
spin. This will set the rivet nut. NOTE: Be sure
not to over tighten the rivet, doing so will prevent
damage to the rivet’s threads.
Install Kit
1. Front bolts.
a. With the two body panel bolts loose, align kit
armor with the front 5/16” holes and use the kit
1/4”-20 X 3/4” button head bolts, with the kit
fender washer and kit 1/4”-20 flange nuts to
bolt the kit armor to the front fender section. You
Bolts
1/4”-20 Bolt
Rivet Nut Tool
Stabilizing Rod
Slide Screw
Rivet Nut Installed
Rivet Nut
Goes Here