Service (cont.) – Bunn G9-2T DBC User Manual
Page 27
27
0
1
2
3
4
5
6 7 8
9
10
11
12
13
14
15
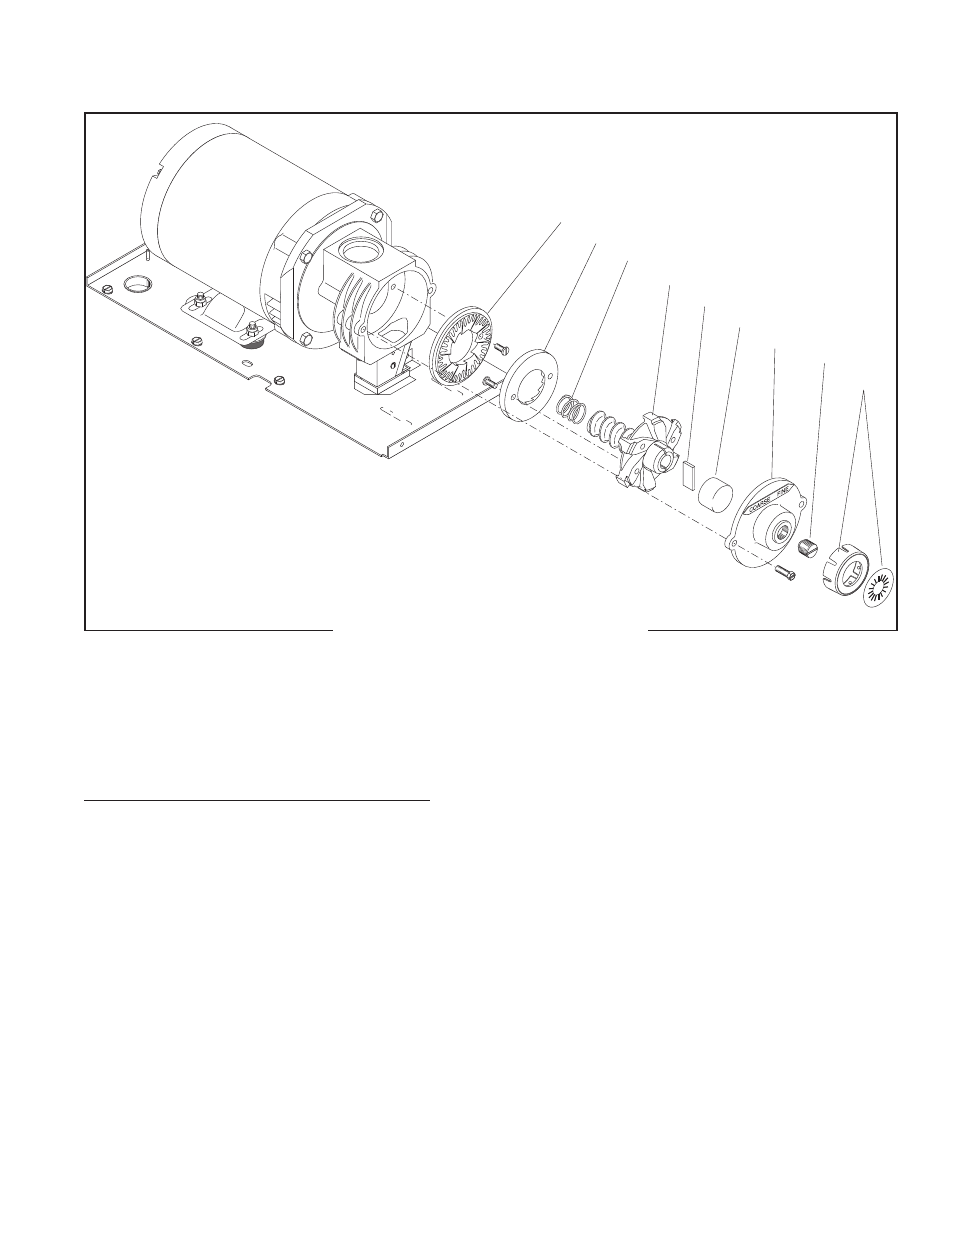
1. Indicator Adjustment Cap & Decal
2. Adjusting Screw
3. Burr Housing Cap
4. Rotor Cup
5. Shear Plate
9
8
7
6
5
4
3
2
1
6. Rotor
7. Spring
8. Burr (Rotating)
9. Burr (Stationary)
P1311
Removal and Replacement - GRIND CHAMBER
1. Refer to the illustration above and remove the two
1/4”-20, hex head screws holding the burr housing
cap(3) to the burr housing; carefully remove the
burr housing cap. Inspect the adjusting screw(2)
to see if the thrust plug is worn.
Replace if excessively worn or damaged.
2. Carefully remove rotor cup(4), shear plate(5), and
burr rotor(6) from the grinder. Inspect the shear
plate and burr(8) for wear.
Replace if excessively worn or damaged.
3. Remove and inspect stationary burr(9) for wear.
Replace if excessively worn or damaged.
NOTE: Burrs must be replaced as a set.
4. Inspect the grind chamber and remove any for-
eign materials. The burrs will not properly seat
in the chamber if any material or coffee particles
remain.
5. Reinstall the stationary burr, spring, burr rotor,
shear plate, rotor cup, and burr housing cap to the
burr housing.
6. Refer to ADJUSTMENTS in the Installation and
Operating Manual to vary the grind dispensed.
SERVICE (Cont.)
MOTOR (Models G9, G9-2, MHG)
FIG. 17 MOTOR AND GRIND CHAMBER
41545 122209