When connecting the external unit featuring, Video source, When connecting the rear display – Pioneer AVIC-X3-II User Manual
Page 18: When using a rear display connected to, Rear video output, Connecting the system
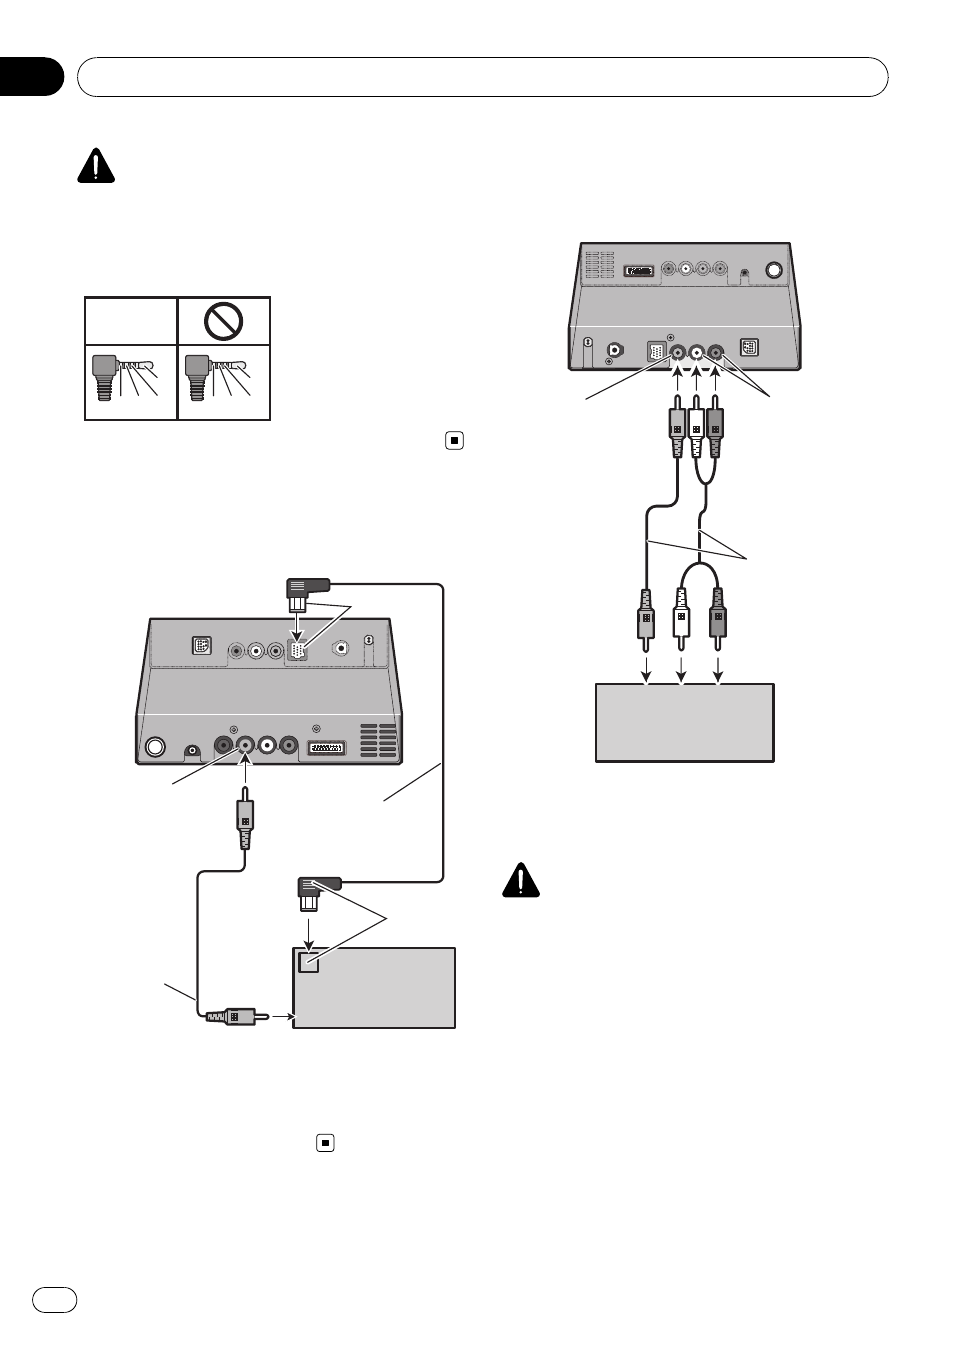
CAUTION
Be sure to use a CD-RM10 (sold separately) for
wiring. If you use other cables, there is a case
where wiring position differs, images and sounds
may be disturbed.
OK
G
V
R
L
G
R
V
L
L : Left audio (White)
R : Right audio (Red)
V : Video (Yellow)
G : Earth
When connecting the external
unit featuring video source
Blue
Pioneer external unit
(sold separately)
The hide-away unit
Yellow
(VIDEO IN)
To video output
Black
IP-BUS cable
(sold separately)
RCA cable
(sold separately)
To IP-BUS
output
! It is necessary to set [AV1 Input] in
[
System] to [EXT] when connecting the ex-
ternal video component. (For details, refer
to the operation manual.)
When connecting the rear
display
The hide-away unit
Rear display with
RCA input jacks
To audio inputs
RCA cables
(sold separately)
To video input
White, Red
(AUDIO OUT)
Yellow
(VIDEO OUT)
When using a rear display
connected to rear video output
WARNING
NEVER install the rear display in a location
that enables the driver to watch the video
source while driving.
This navigation system
’s rear video output is
for connection of a display to enable passen-
gers in the rear seats to watch the video
source.
You can switch the rear screen mode in
“AV
MENU
”. (For details, refer to the operation
manual.)
Connecting the System
Engb
18
Section
03