Adjusting equaliser curves 118, Setting the simulated sound, Stage – Pioneer AVIC-X3-II User Manual
Page 118: Customising the av source setting, Adjusting equaliser curves, Setting the simulated sound stage
2
Touch a or b to adjust front/rear
speaker balance.
Each time you touch a or b moves the front/
rear speaker balance towards the front or the
rear.
Front:15 to Rear:15 is displayed as the front/
rear speaker balance moves from front to rear.
Both
Front:0 and Rear:0 are the proper set-
ting when only two speakers are used.
When the rear output setting is
Rear SP
Sub. W, you cannot adjust front/rear speaker
balance.
= Refer to Setting the rear output and subwoo-
3
Touch c or d to adjust left/right speak-
er balance.
Each time you touch c or d moves the left/
right speaker balance towards the left or the
right.
Left:9 to Right:9 is displayed as the left/right
speaker balance moves from left to right.
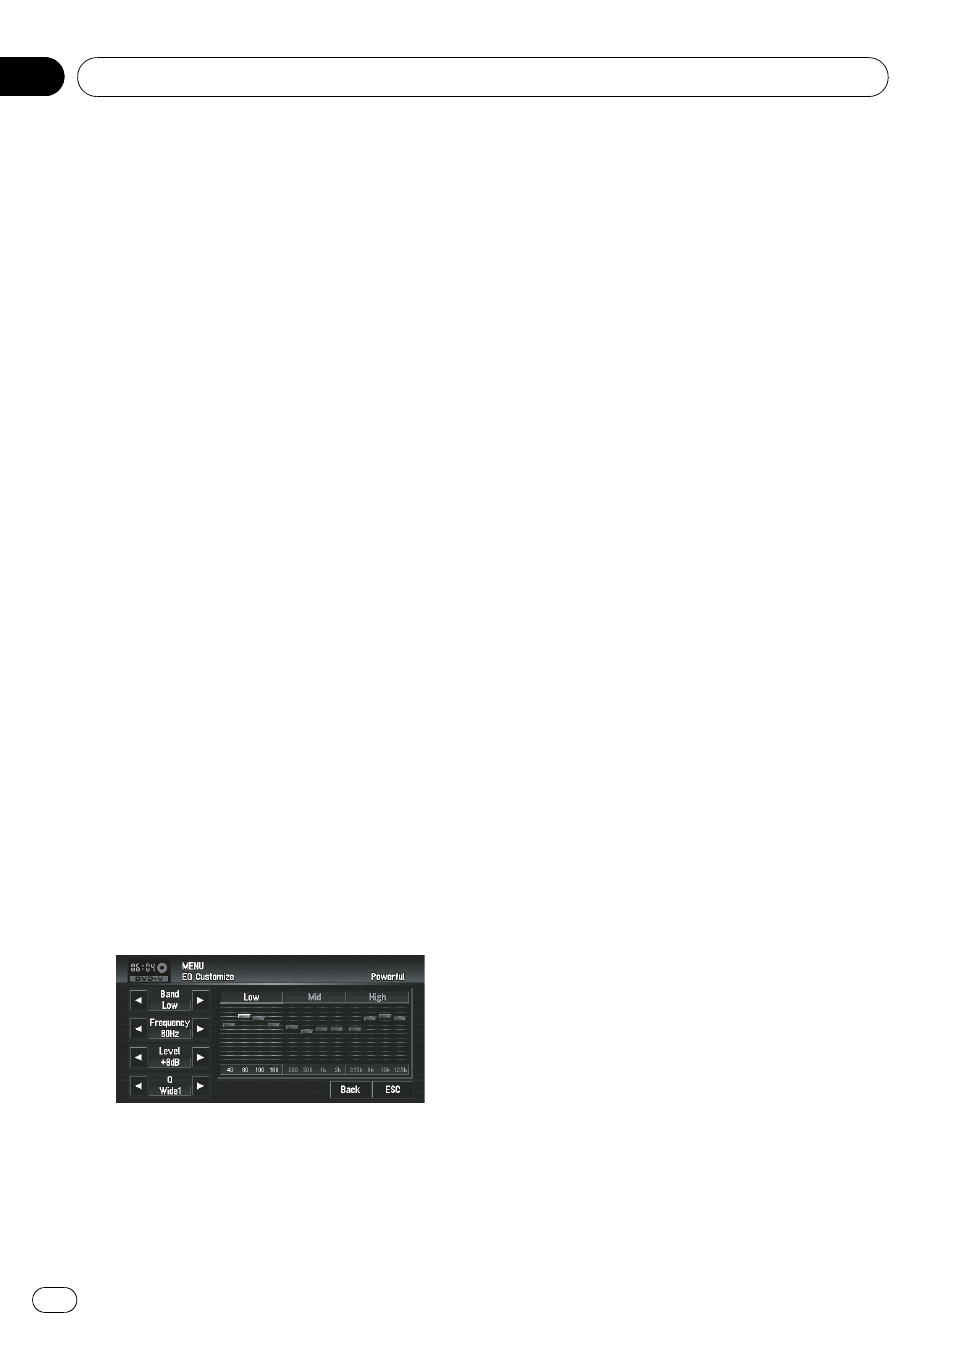
Adjusting equaliser curves
You can adjust the currently selected equaliser
curve setting as desired. Adjusted equaliser
curve settings are memorised in
Custom1.
p If you make Custom2 adjustments,
Custom2 curve is updated.
p You can adjust the centre frequency, level
and the Q factor (curve characteristics) of
each currently selected curve band (
Low/
Mid/High).
! Band:
You can select the equaliser band.
! Frequency:
You can select which frequency to be set as
the centre frequency.
! Level:
You can select the decibel (dB) level of the
selected EQ.
! Q:
You can select the details of the curve char-
acteristics.
1
Touch [EQ Menu] in Sound menu.
2
Touch [Customize].
3
Touch c or d to select the equaliser
band to adjust.
Each time you touch c or d selects equaliser
bands in the following order:
Low
— Mid — High
4
Touch c or d to select the desired fre-
quency.
Touch c or d until the desired frequency ap-
pears in the display.
Low: 40
— 80 — 100 — 160 (Hz)
Mid: 200
— 500 — 1K — 2K (Hz)
High: 3.15K
— 8K — 10K — 12.5K (Hz)
5
Touch c or d to adjust the level of the
equaliser band.
Each time you touch c or d increases or de-
creases the level of the equalisation band.
+12
to
-12 is displayed as the level is increased or
decreased.
6
Touch c or d to select the desired Q
factor.
Touch c or d until the desired Q factor ap-
pears in the display.
Wide2
— Wide1 — Narrow1 — Narrow2
p If you make adjustments, Custom1 curve is
updated.
Setting the simulated sound stage
You can select the desired effect from various
simulated sound stage, such as
Music Studio
or
Dynamic Theater. You can also adjust a lis-
tener positioning effect.
Customising the AV Source Setting
Engb
118
Chapter
09