Other settings 12, Zone audio setup, Sr+ setup for pioneer flat screen tvs – Pioneer SC-LX81 User Manual
Page 93: Flicker reduction setup
Other Settings
12
93
En
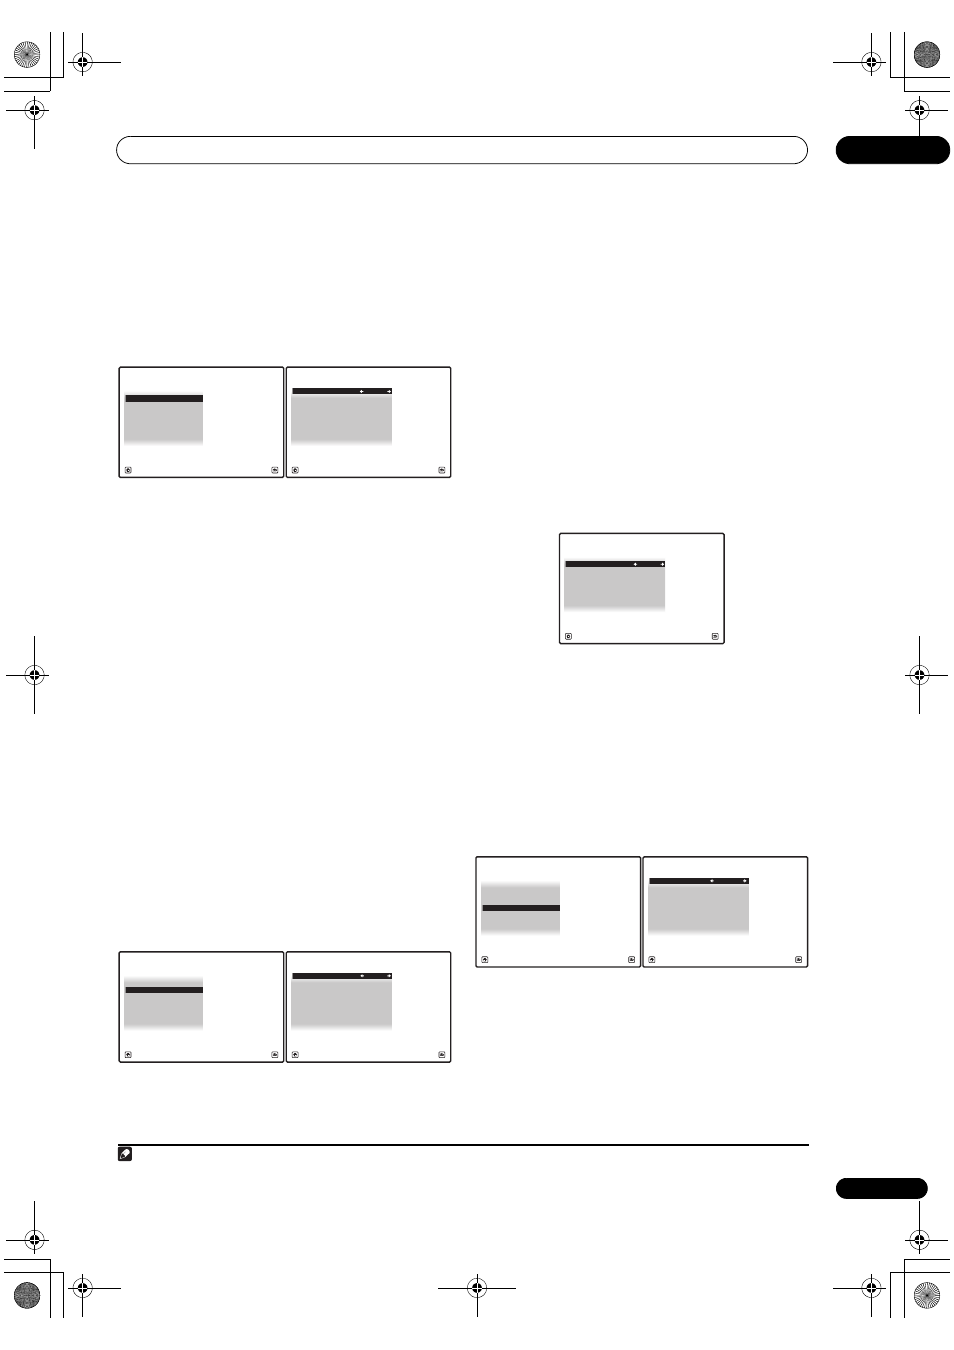
ZONE Audio Setup
If you’ve made MULTI-ZONE connections (see
MULTI-
ZONE listening on page 64), you may need to specify your
volume setting.
1
Select ‘ZONE Audio Setup’ from the Other Setup
menu.
2
Select the volume level setting of ZONE 2 and
ZONE 3.
1
•
Variable – Use this setting if you’ve connected a
power amplifier in the sub room (this receiver is
simply being used as a pre-amp) and you will be
using this receiver’s controls to adjust the volume.
•
Fixed – Use this setting if you’ve connected a fully
integrated amplifier (such as another Pioneer VSX
receiver) in the sub room and want to use that
receiver’s volume controls.
With the
Fixed setting, the source is sent from this
receiver at maximum volume, so make sure the volume is
quite low in the sub zone at first, and then experiment to
find the correct level.
3
When you’re finished, press RETURN.
You will return to the
Other Setup menu.
SR+ Setup for Pioneer flat screen TVs
Make the following settings if you have connected a
Pioneer flat screen TV to this receiver using an SR+
cable. Note that the number of function settings available
will depend on the flat screen TV you’ve connected.
See also
Using this receiver with a Pioneer flat screen TV
on page 68 and
Using the SR+ mode with a Pioneer flat
screen TV on page 69.
1
Select ‘SR+ Setup’ from the Other Setup menu.
2
Select the ‘PDP Volume Control’ setting you want.
•
OFF – The receiver does not control the volume of the
flat screen TV.
•
ON – When the receiver is switched to one of the
inputs that use the flat screen TV (
DVD, for example),
the volume on the flat screen TV is muted so only
sound from the receiver is heard.
3
Assign any input source connected to the flat
screen TV to the corresponding input number.
This matches the receiver’s input source with a
numbered video input on the flat screen TV. For example,
assign
DVD to input-2 if you have connected the your
DVD video output to video input 2 on the flat screen TV.
• The
Monitor Out Connect should be set to the input
that you’ve used to connect this receiver to your flat
screen TV.
4
When you’re finished, press RETURN.
You will return to the
Other Setup menu.
Flicker Reduction Setup
• Default setting:
4
The OSD’s resolution can be increased. If you feel the
OSD is hard to see, try changing this setting. Note that
the resolution in this setting only affects the OSD; it has
no influence on the video output.
1
Select ‘Flicker Reduction Setup’ from the Other
Setup menu.
2
Select the Flicker Reduction setting you want.
3
When you’re finished, press RETURN.
You will return to the
Other Setup menu.
Note
1 If you selected
ZONE 2 in the Surround back speaker setting on page 57, you won’t be able to change the volume level.
4d.Other Setup
A/V RECEIVER
Exit
Return
1. Multi Ch In Setup
2. ZONE Audio Setup
3. SR+ Setup
5. Flicker Reduction Setup
4. HDMI Control Setup
4d2.ZONE Audio Setup
A/V RECEIVER
Exit
Finish
ZONE 2 Volume Level : Variable
ZONE 3 Volume Level : Variable
4d.Other Setup
A/V RECEIVER
Exit
Return
1. Multi Ch In Setup
2. ZONE Audio Setup
3. SR+ Setup
5. Flicker Reduction Setup
4. HDMI Control Setup
4d3.SR+ Setup
A/V RECEIVER
Exit
Finish
PDP Volume Control :
OFF
Monitor Out Connect :
OFF
4d3.SR+ Setup
A/V RECEIVER
Exit
Finish
PDP Volume Control :
OFF
Monitor Out Connect :
OFF
1. Multi Ch In Setup
2. ZONE Audio Setup
3. SR+ Setup
5. Flicker Reduction Setup
4. HDMI Control Setup
4d.Other Setup
A/V RECEIVER
Exit
Return
4d5.Flicker Reduction Setup
A/V RECEIVER
Exit
Finish
Flicker Reduction :
4
SCLX81_71.book Page 93 Monday, June 2, 2008 6:16 PM