Removing and installing memory, Removing fbdimms, Removing – Lenovo Secure Managed Client User Manual
Page 31: Installing, Memory, Fbdimms, Hard, Disk, Drive, Into
5.
For
instructions
on
re-installing
the
drive
carrier
into
the
drive
bay,
see
Removing
and
installing
memory
To
remove
and
install
memory,
do
the
following:
The
silkscreen
on
the
board
for
the
FBDIMMs
displays
DIMM_A1,
DIMM_A2,
DIMM_B1,
DIMM_B2,
DIMM_C1,
DIMM_C2,
DIMM_D1,
and
DIMM_D2,
starting
from
the
inside
of
the
server
board.
DIMM
_A1
is
the
socket
closest
to
the
MCH.
Removing
FBDIMMs
To
remove
FBDIMMs,
do
the
following:
1.
Observe
all
safety
and
ESD
precautions
in
the
Safety
and
Warranty
Guide.
2.
Turn
off
all
peripheral
devices
connected
to
the
storage
system.
Turn
off
the
storage
system.
3.
Disconnect
the
AC
power
cord(s).
4.
Remove
the
enclosure
cover.
For
instructions,
see
5.
Remove
the
processor
air
duct.
For
instructions,
see
6.
Locate
the
DIMM
sockets
(see
7.
Push
the
clips
at
each
end
of
the
DIMM
socket(s)
outward
to
the
open
position.
The
FBDIMM
lifts
from
the
socket.
8.
Holding
the
FBDIMM
by
its
edges,
lift
it
from
the
socket.
Store
the
FBDIMM
in
an
anti-static
package.
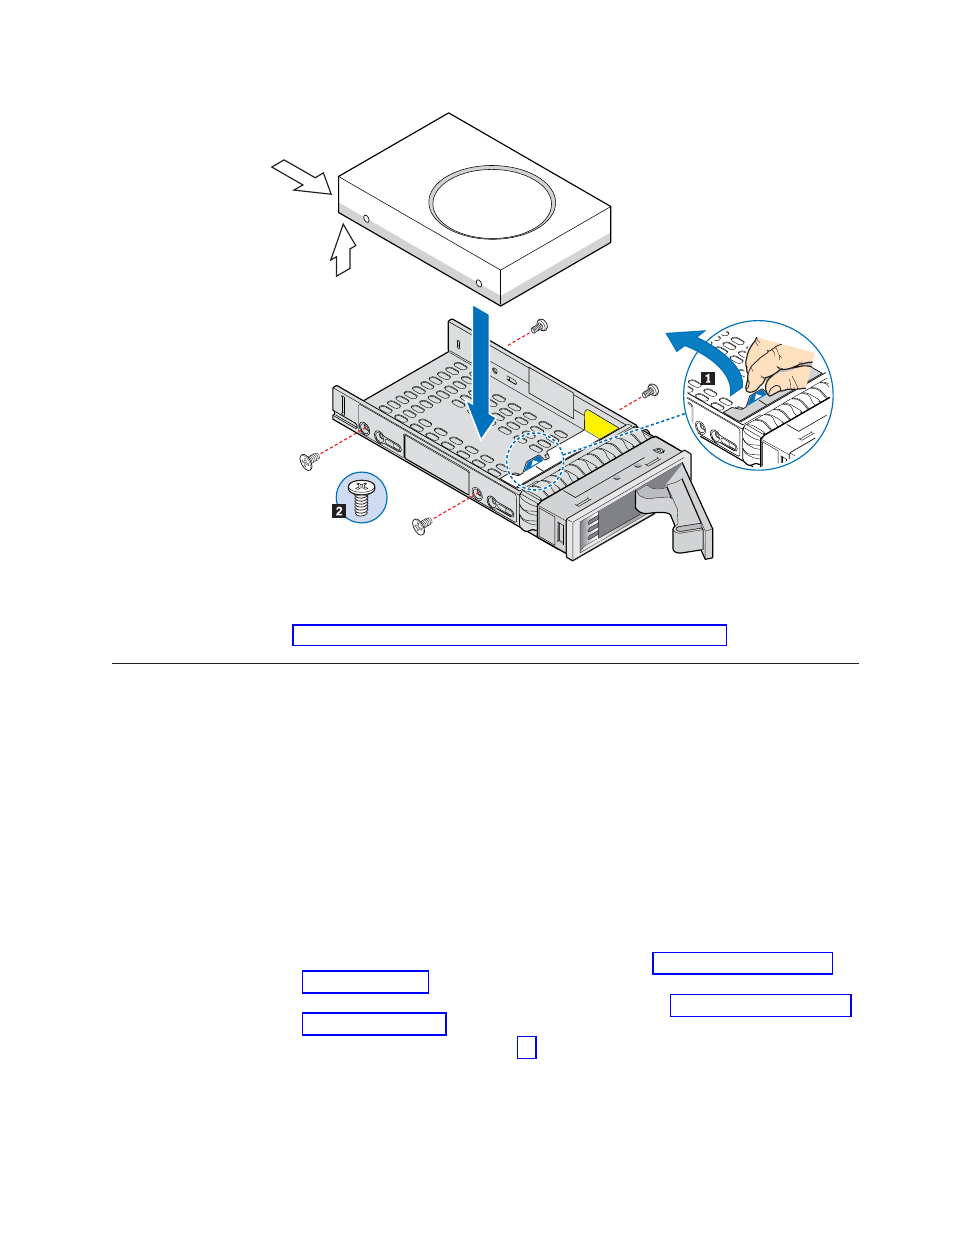
Figure
24.
Installing
hard
disk
drive
into
drive
carrier
Chapter
3.
Hardware
installations
and
upgrades
23