1 connecting the rs-232 interface, 2 connecting the ethernet port, Connecting the rs-232 interface – Kramer Electronics RC-3TBU User Manual
Page 16: Connecting the ethernet port, Figure 6: rs-232 connection
SL-14RC/N - Connecting the SL-14RC/N
13
Connect an IR emitter to IR OUTPUT 2 and attach the emitter to the
power amplifier
4. Connect the RS-232 ports (see
Section 7.1
) as follows:
Connect RS-232 port 1 to the projector
Connect RS-232 port 3 to the plasma display
5. Connect the Ethernet port to a network (see
Section 7.2
).
6. Connect the K-NET port to the input of the first RC-3TB/U (see
Section
).
7. Connect the output of the first RC-3TB/U to the input of the second
RC-3TB/U (see
Section 7.3.2
7.1
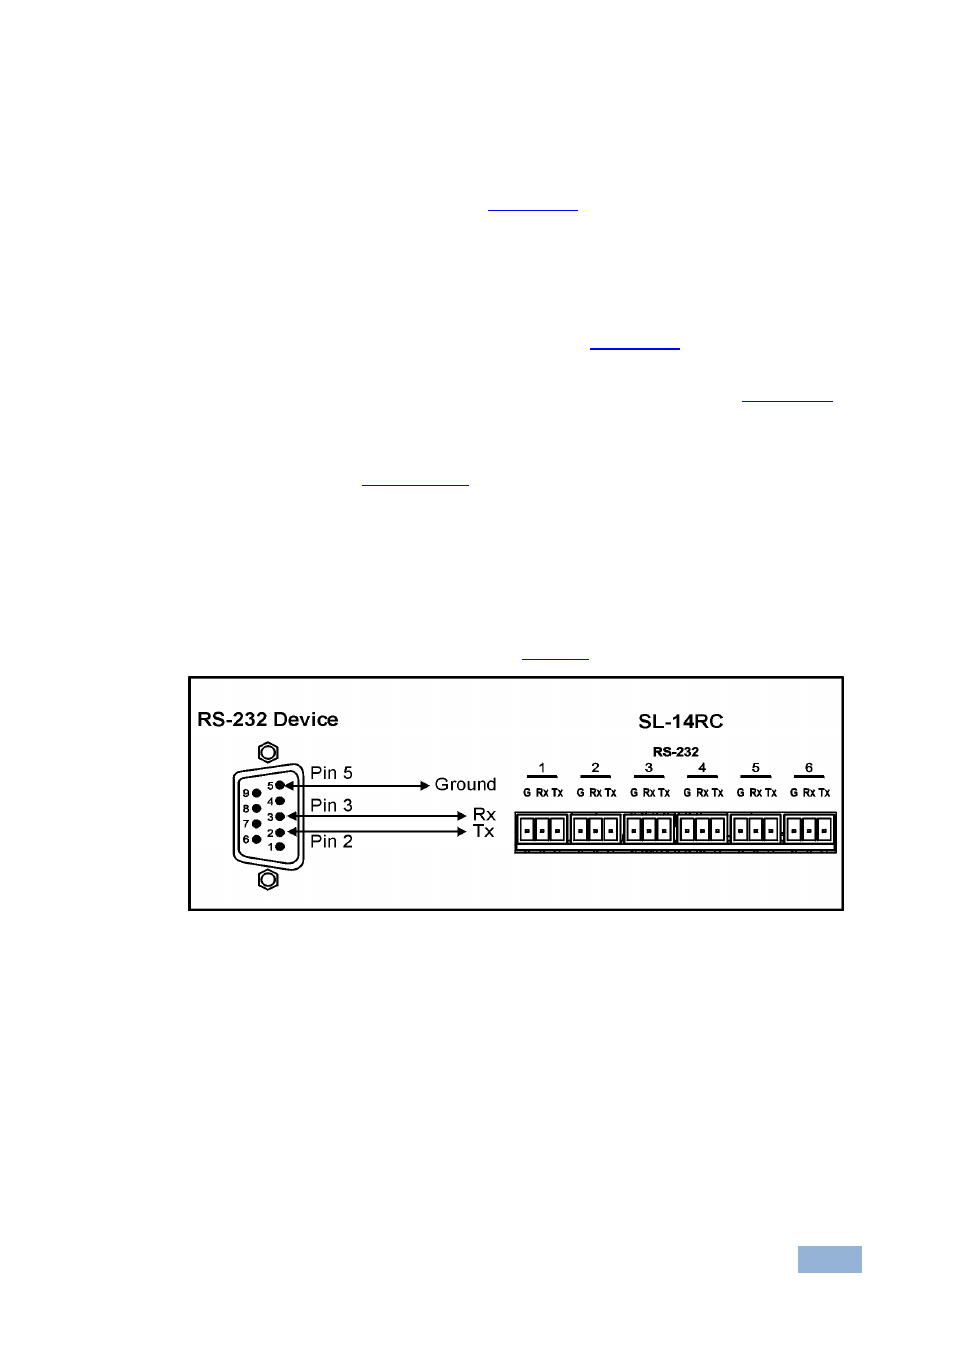
Connecting the RS-232 Interface
To connect an AV device to the SL-14RC/N using the RS-232 port, connect the
RS-232 9-pin D-sub port on your AV device to the RS-232 terminal block on the
rear panel of the SL-14RC/N as shown in
Figure 6: RS-232 Connection
7.2
Connecting the Ethernet Port
The Ethernet connection of the SL-14RC/N lets you perform all control functions of
the SL-14RC/N over the Internet using a PC running the Kramer Site-CTRL
control program.