Muxlab Active Component Video Balun Kit User Manual
Page 11
© MuxLab Inc.
Active Component Video Balun Kit Installation Guide
Page 11
To install the receiver, please follow the steps below:
6. Connect the Active Component Video Balun
receiver to the display equipment with the
appropriate component video & audio jumper cables.
7. (Optional) Connect an infrared receiver to the 2
position terminal block.
8. Connect the UTP cable to the Video IN/UTP
connector of the receiver.
9. Connect the second 12 VDC power supply to the
receiver.
10. Plug the power supply into an AC power outlet. If
power is present, the green power LED will be ON.
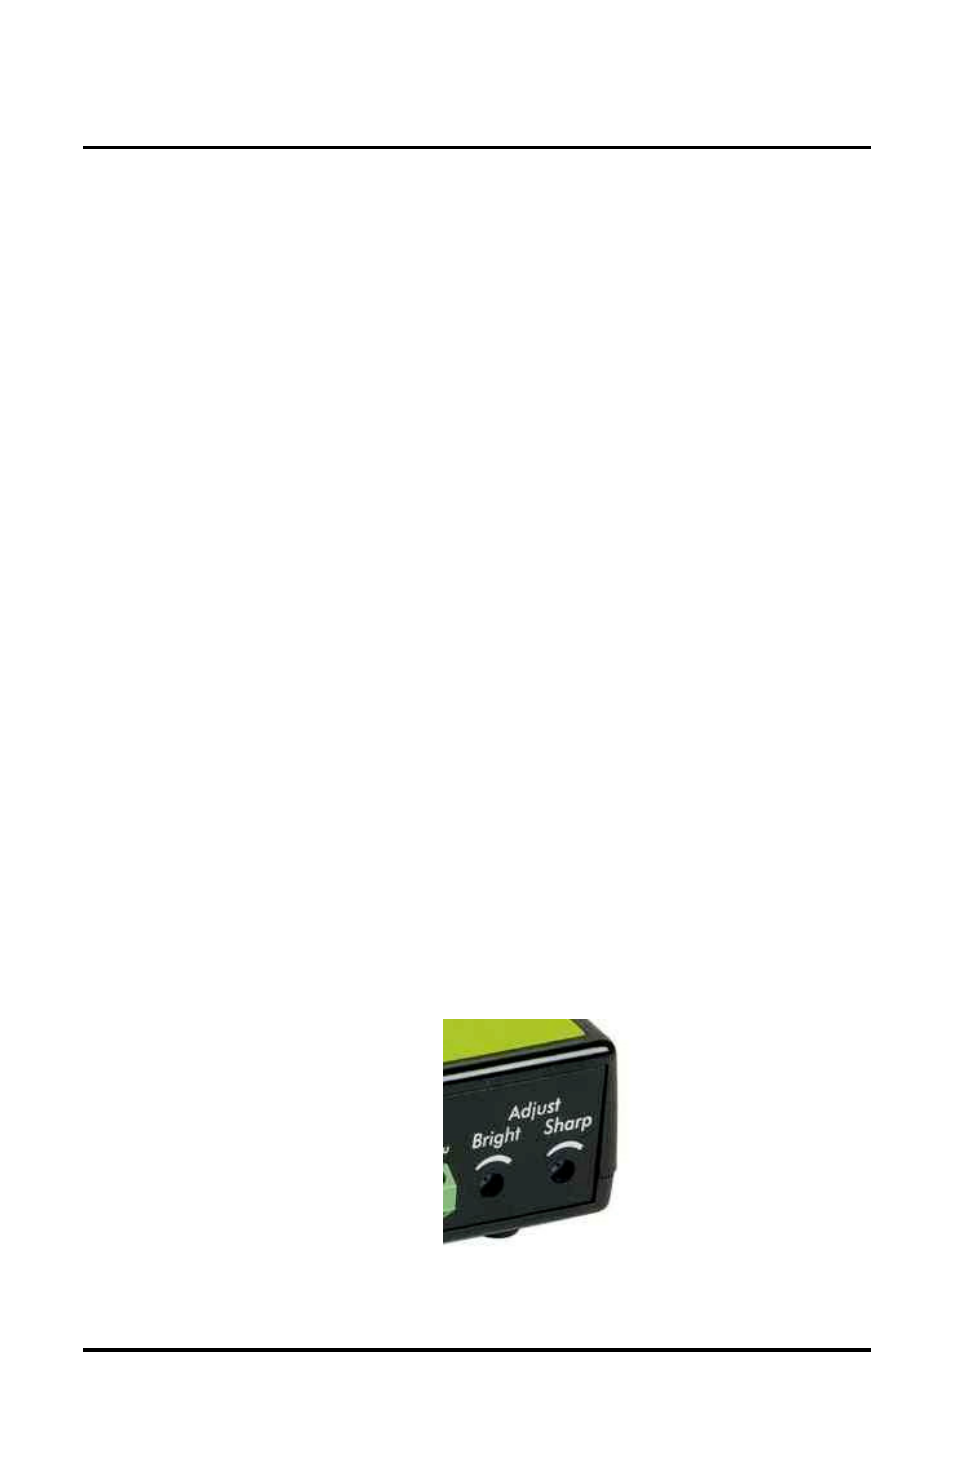
11. To adjust the picture quality, rotate the brightness
rotary switch and/or sharpness potentiometer on the
rear panel of the Active Component Video Balun
receiver. The factory default position for the
brightness (“Bright”) is “None,” and the factory
default position for the sharpness (“Sharp”) is zero
(rotated completely counterclockwise).
Figure 3: Brightness and Sharpness Adjustment
- CCTV Modular Balun (2 pages)
- Stereo Audio-Video Balun (2 pages)
- RGB Balun (2 pages)
- PTZ Balun (2 pages)
- VGA Balun (2 pages)
- Dual Audio-Video Balun (2 pages)
- Dual S-Video Balun (2 pages)
- LongReach™ (16 pages)
- S-Video Balun (2 pages)
- S-Video/Audio ProAV Balun (2 pages)
- S-VideoAudio GLI Balun (2 pages)
- Analog Audio Balun (2 pages)
- Digital Audio Balun (2 pages)
- Component Video Balun (2 pages)
- CCTV Pass-Thru Balun (2 pages)
- CCTV Power-Thru Balun (2 pages)
- CCTV Power-Thru Converter Balun (2 pages)
- MonoPro™ XLR (2 pages)
- Stereo Audio Balun (2 pages)
- Stereo Hi-Fi Balun (2 pages)
- Stereo Hi-Fi Wall Balun, UK (2 pages)
- Stereo Hi-Fi Wall Balun, US (2 pages)
- Stereo PC-Audio Balun (2 pages)
- Quad Video Balun (2 pages)
- Quad Audio Balun (2 pages)
- Quad Audio Wall Balun, UK (2 pages)
- Quad Audio Wall Balun, US (2 pages)
- Active VGA Balun Kit (15 pages)
- S-Video Hi-Fi Balun (2 pages)
- S-Video/Hi-Fi Wall Balun, US (2 pages)
- Stereo Hi-Fi Video Balun (2 pages)
- Stereo Hi-Fi/Video GLI Balun (2 pages)
- VGA Balun II (2 pages)
- VGA Wall Balun II, UK (3 pages)
- VGA Wall Balun II, US (2 pages)
- PS/2 Converter (2 pages)
- Stereo AV/IR Pass-Thru Balun (2 pages)
- Stereo AV/IR Pass-Thru Wall Plate Balun, UK (2 pages)
- Stereo AV/IR Pass-Thru Wall Balun, US (2 pages)
- Component Video/Digital Audio Balun (2 pages)
- Component Video/Analog Audio Balun (2 pages)
- Component Video/Analog Audio ProAV Balun (2 pages)
- Component Video/Analog Audio Wall Balun, UK (2 pages)
- Component Video/Analog Audio Wall Plate Balun, US (2 pages)
- Component Video/IR Pass-Thru Balun (2 pages)