Myron L 760-A Aquaswitch User Manual
Page 8
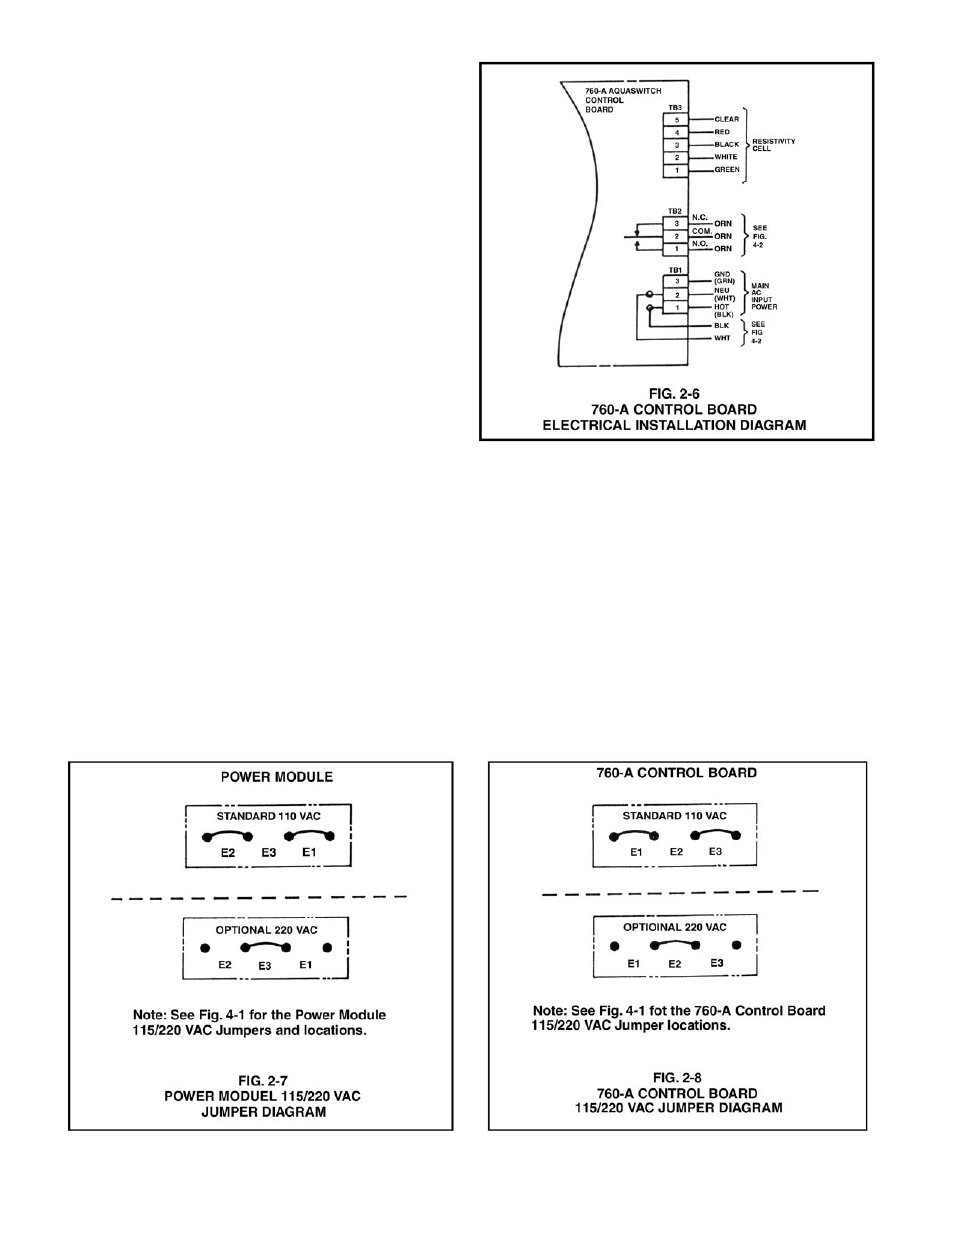
2.3.2 760-A AQUASWITCH MAIN AC POWER
NOTE:
The following procedures are to be used to install the 760-A
Aquaswitch 115 VAC main power source. For the procedures
to install the optional 220 VAC main power source, the user
must first complete the installation procedures in Section 2.3.3.
Failure to do so could result in damage to equipment and/or
property.
STEP 1 Verify that the facility’s 115 VAC power source is turned
OFF or disconnected.
STEP 2 Following STEPS 2 and 3 in Section 2.2.2, remove the
front panel.
STEP 3 Place the facility’s AC power cord and watertight cable
restraint into the enclosure’s appropriate access hole.
STEP 4 Neatly connect cable wires to the 760-A Control board
TB1 terminal block connectors as shown in Fig. 2-6.
2.3.3 220 VAC CONVERSION
AQUASWITCH
STEP 1 Verify that the facility’s 115 VAC power source is turned
OFF or disconnected.
STEP 2 Locate and remove Power Module jumpers E1 and E2.
(See Fig. 4-1)
STEP 3 Using one of the removed jumpers, insert it into jumper
E3’s connection holes as shown in Fig. 2-7.
760-A AQUASWITCH
STEP 1 Verify that the facility’s 115 VAC power source is turned
OFF or disconnected.
STEP 2 Locate and remove 760-A Control board jumpers E1
and E3. (See Fig. 4-1)
STEP 3 Using one of the removed jumpers, insert it into jumper
E2’s connection holes as shown in Fig. 2-8.
STEP 4 Follow STEPS 2 and 3 in Section 2.3.3 to convert the
Power Module 115/220 VAC jumpers.
6