Swiftech H20 80 MICRO User Manual
Page 6
Copyright Swiftech 2005 – All rights reserved – Last revision date: 06-14-06- Information subject to change without notice – URL:
http://www.swiftnets.com
Rouchon Industries, Inc., dba Swiftech – 1703 E. 28
th
Street, Signal Hill, CA 90755 – Tel. 562-595-8009 – Fax 562-595-8769 - E Mail: [email protected]
PAGE 6 of 20
3. Pump
4. Reservoir
1. R
ADIATOR
I
NSTALLATION
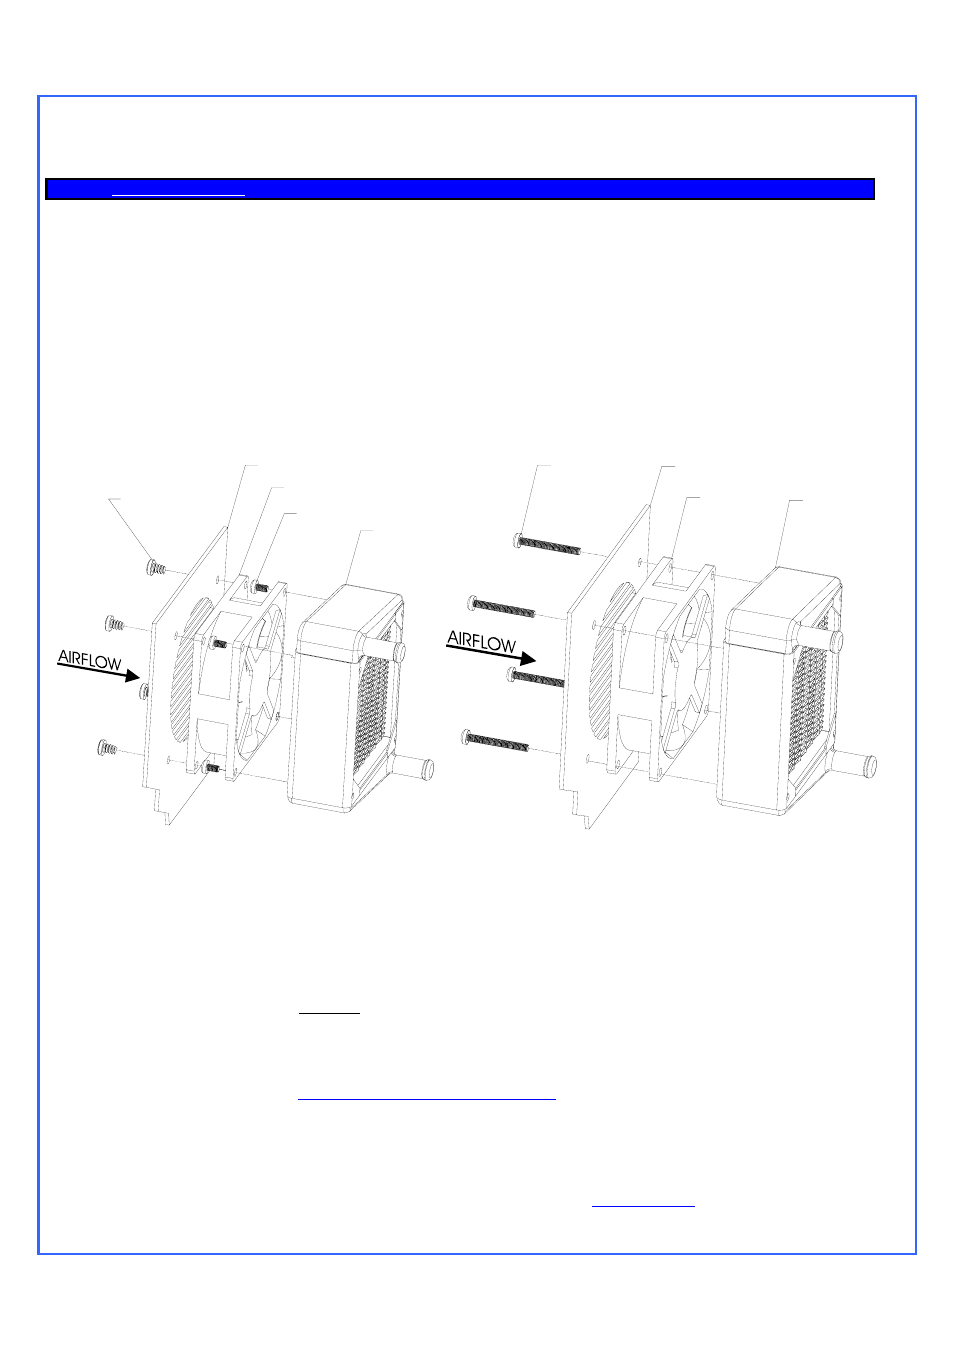
The MCR80-QP Radiator ships pre-assembled with our 80mm fan, as shown in figure 1. All you need to do is re-use the existing fan screws, or fan
retention mechanism.
An alternate installation is also possible as shown in figure 2, by using the provided M3.5mm x 30mm screws, going through the computer panel,
though the fan, and to the radiator.
Installation to the back of the computer:
If CPU cooling is a priority, we suggest that the fan be installed in intake mode in contradiction to the “classic” airflow scheme, which is intake at the
front, and exhaust at the back. As shipped the fan is therefore pre-installed by default in intake mode, so that fresh air will be circulating through the
radiator and optimize the CPU temperature. In effect, if the fan flow direction were reversed the radiator would be cooled with heated air from inside
of the computer, which is usually 3
°C (at best) and up to 10°C hotter than that of the ambient air outside of the computer. Conversely, users with
excellent ventilation in their case may opt to install the fan in exhaust mode with the understanding of the above stated temperature handicap.
MCR80-QP
Radiator
M3.5 X 6mm PHILIPS SCREW
COMPUTER PANEL
EXISTING FAN SCREWS
80mm FAN
Figure 1
MCR80-QP
RADIATOR
80MM FAN
COMPUTER PANEL
M3.5 X 30MM
PHILIPS SCREWS
Figure 2
Installation to the front of the computer
Simply bolt the fan to the chassis as indicated above.
Electrical connections
The fan shipped with the MCR80-QP radiator uses a 3-pin connector. For 12volt operations, this connector can be safely installed on one of the
motherboard headers. Use any free header other than the CPU fan header, since the pump RPM sensor will be connected to the CPU fan header
in order to monitor the pump.
For low noise operations, an additional fan connector adapter is supplied with the kit, and should be connected to the power supply instead of a
motherboard fan header:
12v to 7v adapter: this setting provides a good balance for performance, at whisper quiet operations.
Please consult the product page (
www.swiftnets.com/products/h20-80-micro.asp
) on our web site for specific data with respect to CPU
temperatures when using the 12 to 7V adapters.
Once the radiator is fastened to the case, proceed with the next step, water-block installation. Tubing will be installed later on, once all the other
components are in place.