Remove the existing heat sink, Carefully clean the processor, using alcohol, Nstallation for – Swiftech H20 120 R3 User Manual
Page 39: Ntel, Platforms, Square cut
Copyright Swiftech 2004 – All rights reserved – Last revision date: 11-23-04
Rouchon Industries, Inc., dba Swiftech – 1703 E. 28
th
Street, Signal Hill, CA 90755 – Tel. 562-595-8009 – Fax 562-595-8769 - E Mail:
[email protected] – URL:
http://www.swiftnets.com
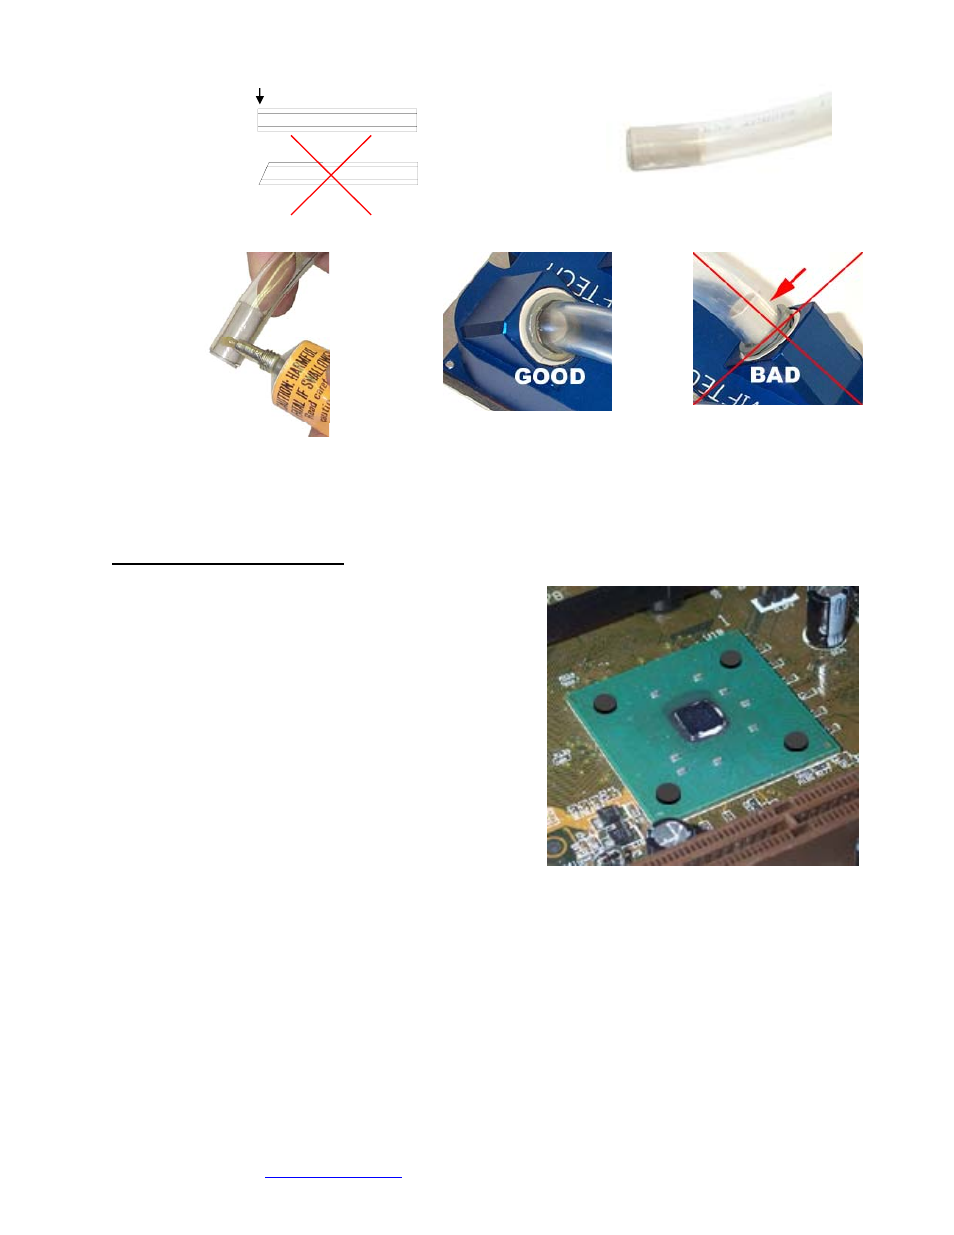
Square cut
Figure 20
Figure 21
Figure 22
Figure 23
Figure 24
c. Spread a little bit of grease or liquid
soap
around the tubing. It helps pushing the
tubes in, particularly with Clearflex
tubing,
which features a very “sticky” surface.
d. Fully insert both tubes into the fittings. The tip of the plastic tube inserts should
be flush with the inlet and outlet openings, as shown in figure 4 above. Inserting the
tubes requires a firm push, accompanied by a twisting motion.
2. Installation for Intel
platforms
a.
Prepare your Motherboard
Remove the existing heat sink
Carefully clean the processor, using alcohol
Install the 4 neoprene pads as shown figure 8. This
step is only necessary if the processor core is
exposed. If the chipset features a heat spreader (a
large lid covering the entire area of the chipset),
then the neoprene pads MUST not be installed.
Lightly coat the CPU with the included Arctic
Céramique thermal compound. Application will vary
depending on the type of processor. We recommend
visiting http://www.arcticsilver.com for detailed
instructions.
Figure 25
- Information subject to change without notice Page 39 of 41