English español – Samsung SC-DC173U-XAA User Manual
Page 106
ENGLISH
ESPAÑOL
106
PictBridge™ (sólo SC-DC173(U)/DC175/DC575)
Ajuste del número de copias
1. Mueva el
[Joystick] hacia arriba o hacia abajo para
seleccionar
2. Mueva el
[Joystick] hacia arriba o hacia abajo para definir el
número de impresiones y presione el botón
[Joystick].
Ajuste de la opción Date/Time Imprint
3. Mueva el
[Joystick] hacia arriba o hacia abajo para
seleccionar
4. Mueva el
[Joystick] hacia arriba o hacia abajo para
seleccionar el tipo de visualización de fecha/hora y presione
el botón
[Joystick].
Tipo de visualización de fecha y hora:
,
Impresión de imágenes
Mueva el
[Joystick] hacia arriba o hacia abajo para seleccionar
archivos de imágenes seleccionados.
Cancelación de la impresión
Para cancelar la impresión de la imagen, presione de nuevo el
botón
[Joystick].
Aparece el mensaje
impresión de la imagen.
Notas
La opción de impresión de fecha y hora no la
admitirán todas las impresoras. Compruébelo con el
fabricante de la impresora. El menú
Date/Time no
puede configurarse si la impresora no admite esta
opción.
PictBridge™ es una marca registrada de CIPA
(Camera & Imaging Products Association), un
estándar de transferencia de imágenes desarrollado
por Canon, Fuji, HP, Olympus, Seiko Epson, y Sony.
Existen en el mercado impresoras que soportan PictBridge.
Utilice el cable USB que se facilita con la Videocámara con DVD.
Utilice el adaptador de CA para la Videocámara con DVD durante la impresión
directa de PictBridge. Apagar la videocámara durante la impresión puede dañar los
datos de la tarjeta de memoria.
Se admite la impresión de fotografías. Las secuencias no se pueden imprimir.
Puede definir varias opciones de impresión dependiendo de la impresora.
Consulte el manual del usuario de la impresora para obtener detalles.
Al definir la opción de estampado de fecha y hora, podrá ver la hora (formato de 24
horas) una vez que se haya grabado la imagen.
PictBridge™ (SC-DC173(U)/DC175/DC575 only)
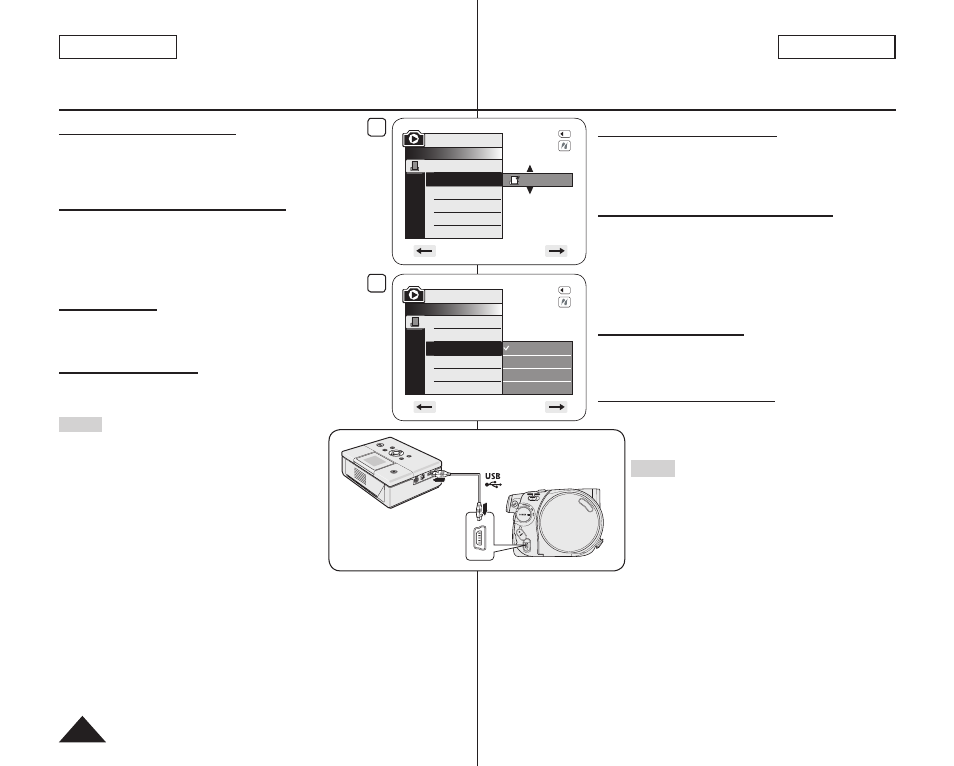
Setting the Number of Prints
1. Move the
[Joystick] up or down to select
then press the
[Joystick].
2. Move the
[Joystick] up or down to set the number of
prints, then press the
[Joystick].
Setting the Date/Time Imprint Option
3. Move the
[Joystick] up or down to select
then press the
[Joystick].
4. Move the
[Joystick] up or down to select the Date/Time
display type, then press the
[Joystick].
Date/Time display type:
Printing Images
Move the
[Joystick] up or down to select
press the
[Joystick], and selected image files will be
printed.
Canceling the Printing
To cancel the image printing, press
[Joystick] button again.
The message
be cancelled.
Notes
The Date/Time Option may not be supported
by all printers. Check with your printer
manufacturer. The
Date/Time menu cannot be
setup if the printer does not support this option.
The PictBridge™ is a registered trademark of
CIPA(Camera & Imaging Products Association),
an image transfer standard developed by Canon,
Fuji, HP, Olympus, Seiko Epson, and Sony.
PictBridge supporting printers are commercially
available.
Use the USB cable provided with the DVD
Camcorder.
Use the AC power adapter for your DVD Camcorder during PictBridge Direct
Printing.
Turning your DVD Camcorder off during printing might damage data on the
Memory Card.
Printing photo images is supported. Moving images cannot be printed.
You can set various printing options depending on the printer. Please refer to
the user’s manual of the printer for details.
When setting the Date/Time imprint option, you can display the time (24-hour
format) when the image has been recorded.
2
M.Player Mode
►Pict Bridge
Copies
Date/Time
001
5/10
4
Off
Date
Time
Date&Time
M.Player Mode
►Pict Bridge
Copies
Date/Time
5/10