Probe configuration and normalization, Step 1 – powering the probe – Campbell Scientific Sentek TriSCAN® Manual v 1.2a User Manual
Page 19
TriSCAN Manual Version 1.2a
Copyright © 1991 – 2004 Sentek Pty Ltd All rights reserved
Page 12
For each probe, assign the top sensor with the lowest address (e.g. address 1) and then address each
sensor below it with a sequentially higher address, such as 2, 3, 4 and so on.
Probe Configuration and Normalization
The probe is now ready to normalize. The following paragraphs outline the procedure for normalizing the
probe using the IP Configuration Utility Software Version 1.4.1 or later. For more details on the IP
Configuration Utility Software, refer to the IP Configuration Utility User Guide.
Step 1 – Powering the probe
Connect a 12 volt power supply to the probe. Refer to the relevant SDI-12 or RS232/ RS485-Modbus
Manual for the correct wiring procedure. Power can either be supplied from the logger power source or
directly to the probe.
Warning:
Incorrect wiring may lead to damage to the probe, or blow the fuse on the probe interface. Any damage
due to incorrect wiring will void the warranty. Therefore it is recommended that the wiring procedure be
checked prior to connecting the power to avoid such damage.
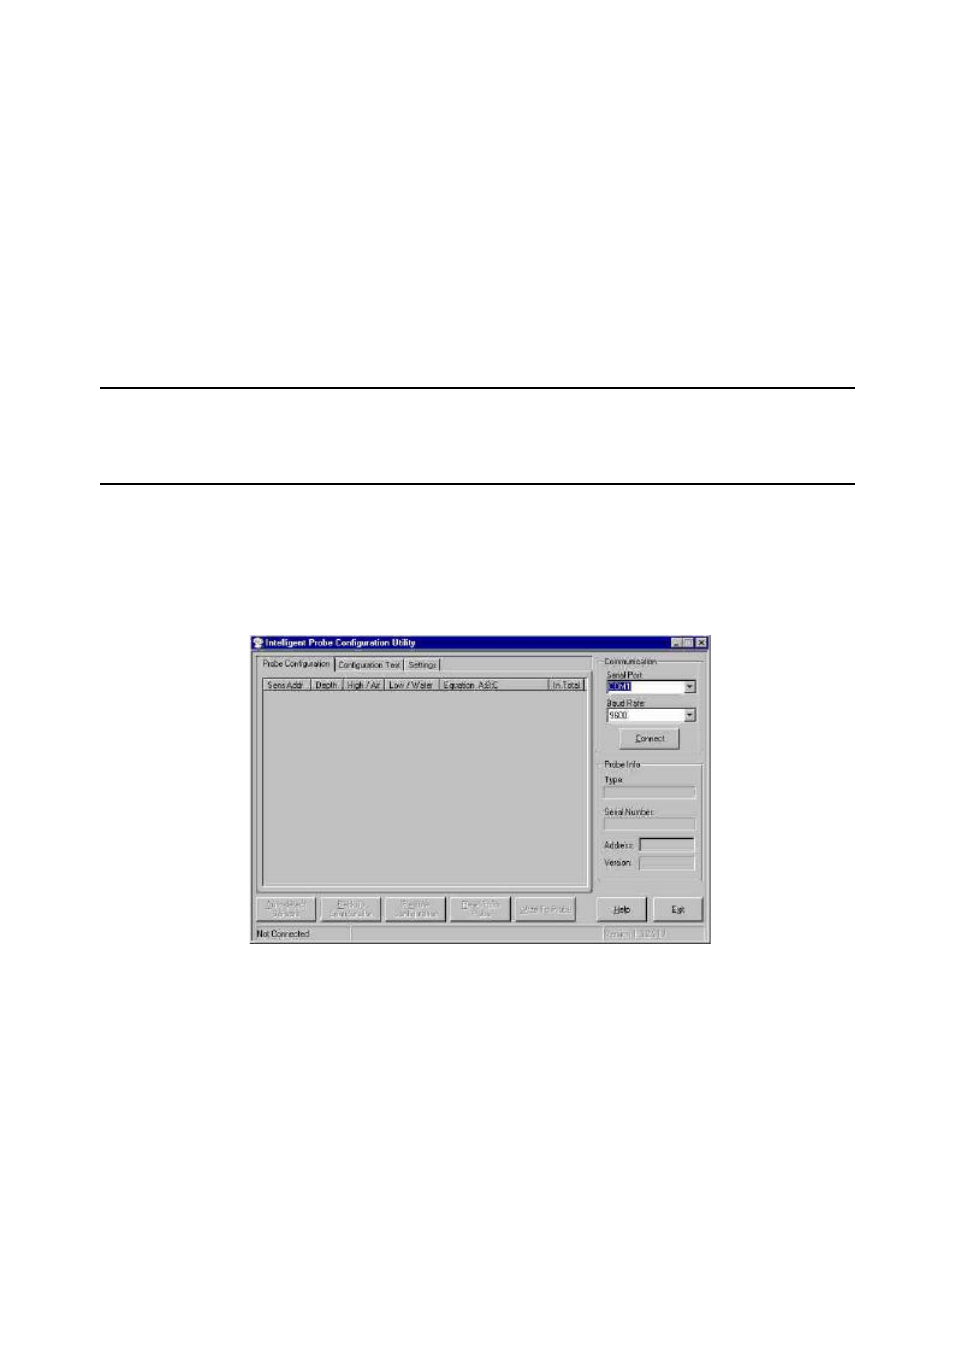
Step 2 – Connecting to IP Configuration Software Utility
1. Connect the IP Configuration Utility Cable to the probe interface and to the serial port on the
computer.
2. Open the IP Configuration Utility Software.
3. Select which serial port the probe is connected to from the Serial Port drop down list. Also select the
baud rate to use from the Baud Rate drop down list. If you are unsure of the baud rate you can
select “Auto” for the baud rate which will use auto detection of the baud rate when connecting.
4. Click the Connect button to connect to the probe. If connection is successful then the status bar will
now display “Connected” and the Connect button will have changed to Disconnect. If “Auto” was
specified as the baud rate then the correct baud rate will now be displayed in the Baud Rate drop
down list. On successful connection, the probe’s information (name, serial number, address and
firmware version number) will be displayed, and the probe will be queried for its configuration
settings.