1 wicks, Wicks – Campbell Scientific CSAT3 3-D Sonic Anemometer User Manual
Page 48
CSAT3 Three Dimensional Sonic Anemometer
Lightly dab the face of the transducers to remove water
droplets. Applying excessive force on the face of the
transducer may separate the matching layer from the
brass housing.
There are no user serviceable components on the CSAT3. The only time the
electronics box must be opened is to change the SDM address.
11.1 Wicks
CSAT3 embedded code version 4 and the wicks work together to improve the
performance of the CSAT3 in rainy conditions. It is up to the station operator
to decide whether the wicks are necessary or not. If they are not, gently
remove the wicks from the transducers, taking care not to damage or peal the
matching layer (rubber tips) from the brass housing of the transducers.
Remove the wicks during the winter. The wicks will accumulate snow or
freezing rain to the point where the transducer face will be obscured. The
CSAT3 Sonic Wick Spares Kit (pn 28902) consists of three top wicks, three
bottom wicks, adhesive, and an installation tool (see FIGURE 11-2). The
installation tool is used by placing a wick over the angled end of the tool,
placing the straight end of the tool gently against the transducer face, and
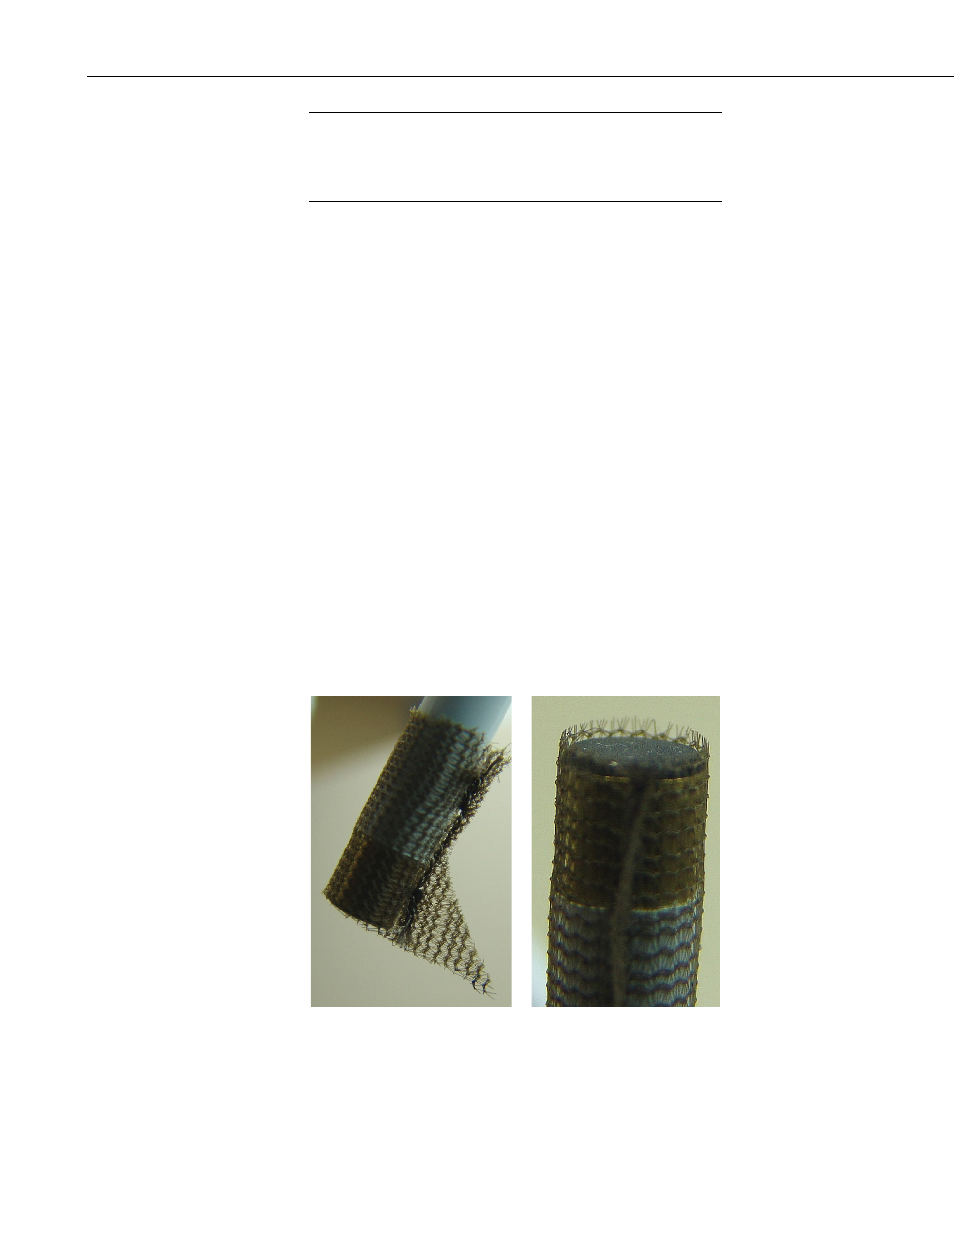
sliding the wick down the tool onto the transducer. When installing the wicks,
ensure that the wicks are located in the proper position. The top wick must be
flush with the transducer face, with the wick tail located at the lowest point of
the transducer (FIGURE 11-1 left). The end of the bottom transducer wick
must extend above the transducer face by between one half and one mesh lines
(FIGURE 11-1 right). Secure the wicks to the transducer with a drop of
adhesive which is provided in the CSAT3 Sonic Wick Spares Kit (pn 28902).
Take care that the adhesive is not deposited on the transducer face.
FIGURE 11-1. Proper location of the top (pn 17388) and bottom (pn
17389) wicks
CAUTION
38