Low-voltage pendant no. 5701, Assembly instructions for – Holtkoetter 5701 User Manual
Page 2
e-mail: [email protected]
www.holtkoetter.com
ASSEMBLY INSTRUCTIONS FOR
Major lamp parts manufactured in Germany by Holtkötter Leuchten GmbH.
Bulbs manufactured in Germany by Osram GmbH. Final assembly by Holtkötter in South Saint Paul, MN.
Holtkötter
®
and Holtkötter Leuchten
®
are registered trademarks of Holtkötter. All Rights Reserved.
© Holtkötter
Low-voltage Pendant
No. 5701
Please make sure that the following parts for your fixture are enclosed:
1. Fixture with backplate and hanging hardware.
2. Bulb: 50 Watt Halostar IRC by Osram, GY6.35 base
3. Allen Wrench
4. Wire Crimps (2 each)
5. Glass
6. Plastic Nut Driver
7. If a dimmer is required, it is recommended that a Lutron ELV (Electronic Low Voltage)
dimmer be used.
It is recommended that this fixture be installed and hung by a licensed
electrician.
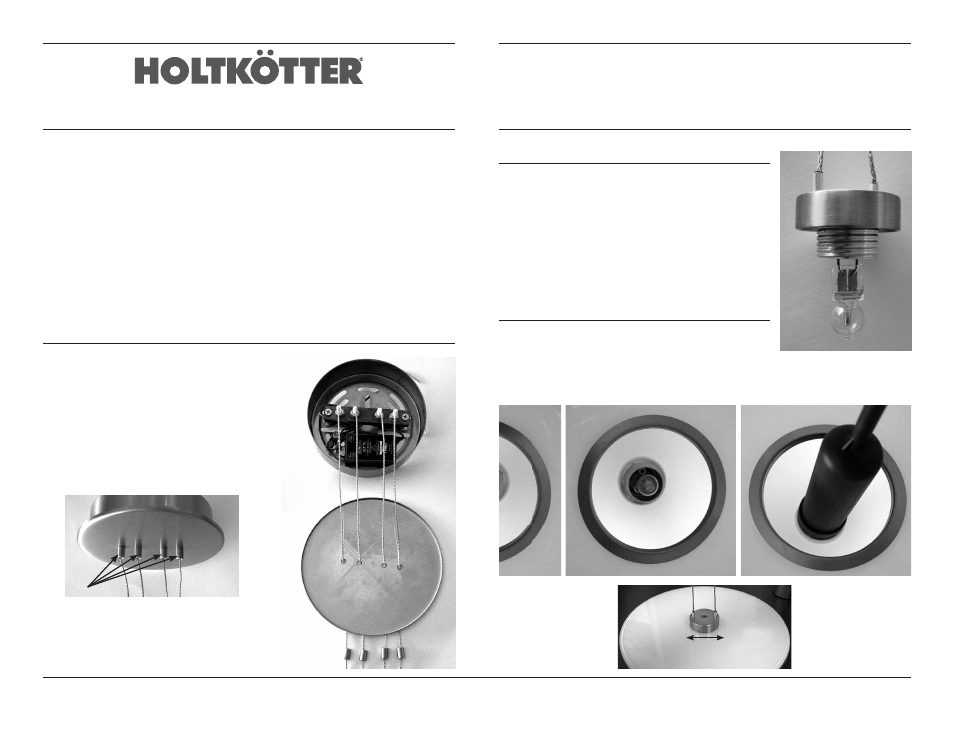
HANGING INSTRUCTIONS
1. Be sure to disconnect the power to the outlet box.
2. Unscrew the four (4) stem screws (A) below the
backplate, allowing access to the crossbar strap
and mounting plate.
3. Connect the wires and ground wire according to
generally accepted electrical standards.
4. Screw the crossbar strap/mounting plate to the
outlet box.
5. Secure the backplate to the fixture by screwing the
four (4) stem screws back into place.
(A)
BULB INSTALLATION / REPLACEMENT
CAUTION: DISCONNECT POWER BEFORE SERVICING.
Install the bulb into the socket. Be sure to use the plastic wrap
provided with the new bulb to ensure long bulb life. Push the
bulb firmly into the socket.
The recommended replacement bulbs for this fixture are 50
Watt Halostar IRC bulbs by Osram.
Use of other brands of unknown quality may cause a risk of
overheating.
Holtkötter Item No. 9250*050-HSTAR
GLASS INSTALLATION
Slide the glass over the socket. Using the plastic nut driver
provided, insert the nut driver on the inside of the glass and
tighten the nut until the glass is snug against the fixture.
Please note: if the glass doesn’t hang straight, the socket may be adjusted slightly
within the hole of the glass. Once readjusted, be sure to tighten until secure.