Basic operations – Kenwood KDC-U7056BT User Manual
Page 5
10
|
KDC-U7056DAB/ KDC-U7056BT/ KDC-U7056BTL
English
|
11
Basic operations
3-5. General operations
Power
Press [SRC] to turn the power ON.
Press and hold [SRC] to turn the power OFF.
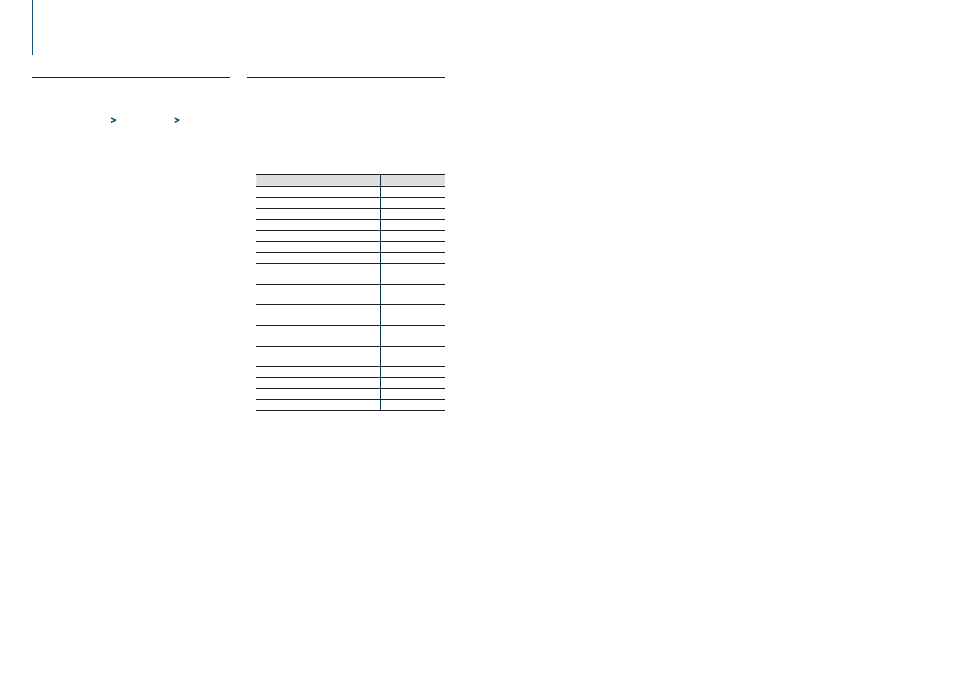
Source selection
Press [SRC].
The source will switch each time upon pressing the
button.
Source
Display
Standby
“STANDBY”
Digital radio
[2]
“DIGITAL RADIO”
Tuner
“TUNER”
USB device connected to front USB terminal
“USB(FRONT)”
USB device connected to rear USB terminal
“USB(REAR)”
iPod connected to front USB terminal
[1]
“iPod(FRONT)”
iPod connected to rear USB terminal
[1]
“iPod(REAR)”
Pandora® of iPod connected to front USB
terminal
[1][2][3]
“Pandora(FRONT)”
Pandora® of iPod connected to rear USB
terminal
[1][2][3]
“Pandora(REAR)”
Pandora® of device connected via Bluetooth
[1]
[2][3]
“Pandora”
aha™ of iPod connected to front USB
terminal
[1]
“aha(FRONT)”
aha™ of iPod connected to rear USB
terminal
[1]
“aha(REAR)”
aha™ of device connected via Bluetooth
[1]
“aha”
Bluetooth audio
“BT AUDIO”
CD
[1]
“CD”
Auxiliary Input
“AUX”
[1]
This source can be selected only when it can be played.
[2]
Function of KDC-U7056DAB
[3]
Function of KDC-U7056BT.
Setting the source switching
• Source switching can be set so that pressing [SRC] switches
among sources. For more details, refer to
<12-5. Initial
settings> (page 60)
.
• Source switching can be set so that “Pandora”, “aha”, and
“AUX” sources can not be selected when not in use. For
more details, refer to
<12-5. Initial settings> (page 60)
.
Volume
Turn [Control] knob.
USB terminal
A USB device or iPod can be connected.
The CA-U1EX (Max. 500mA) or KCA-iP102
(optional accessories) is recommended to
connect a USB device or iPod.
Auxiliary input
A portable audio device can be connected with
a stereo mini-plug (3.5 mm ø).
3-4. Adjusting the clock
1
Press [Control] knob.
Enters the Function setting mode.
2
Select “Settings”
>
“Clock&Date”
>
“Clock
Adjust” using [Control] knob.
For how to use [Control] knob, refer to
<3-3. How
to select the item> (page 9)
.
3
Set the hour using [Control] knob.
4
Set the minute using [Control] knob.
Exiting from the Function setting mode
Press and hold [
1/6].